How to set up Bitcoin Client and Wallet
This article describes the installation of a Bitcoin-Client and the setup of a wallet. It will not go into technical details but cover the necessary knowledge to use Bitcoin. We recommend reading the Bitcoin Basics article which covers how Bitcoin works and what you should be aware of.
For simple and quick usage of Bitcoin we recommend using Electrum as client software. This client has a number of advantages over the standard Bitcoin client. You can find more detailed information about this in the Bitcoin Basics article.
Download & Installation
Download the Electrum client from this page.
After the installation and first start of the software you will be asked to create your first wallet.

In the first window, leave the settings as they are (“Create a new wallet” and “Standard wallet”) and click on next.
You now receive your “wallet seed”. The seed consists of 13 random works and should be written down offline carefully. With these 13 words you will always be able to restore your wallet – without any other data or information. But this also means that other persons can do the same. For this reason never store the wallet seed in your computer and do not print it (printer memory retains data).

For this reason write the seed down by hand and store it in a safe location. For the normal usage of your wallet (sending and receiving Bitcoins) you do not need the wallet seed. It is only used in case you have lost your wallet (or passphrase for the wallet).
After clicking on next you will need to confirm your wallet seed. Once done, you get to choose your passphrase in the next window. You will need this passphrase everytime you want to send Bitcoins to someone else. Consequently the passphrase should be strong, we recommend at least 30 characters. You can find tips for creating secure passwords and passphrases which are still easy to remember here: Are your passwords secure?
In the last window of the wallet setup leave the settings on “Auto connect” and click “Next”. The main overview window of your new wallet will be displayed.

Before going into the key feature of the Bitcoin software – sending and receiving Bitcoins – you can adjust some settings in the client. Under “Tools” > “Preferences” > “Appearance” you can change the bitcoin units from mBTC to BTC. The default mBTC will display all balance in units of 1/1000 Bitcoin.
Also you may want to go to “Tools” > “Plugins” and activate “Exchange Rates”. This will always display the current exchange rate to US-Dollar.
Receiving Bitcoins
To receive Bitcoins you need to give the sender a Bitcoin address where he can send to. As explained in the Bitcoin Basics article, addresses should only be used once.
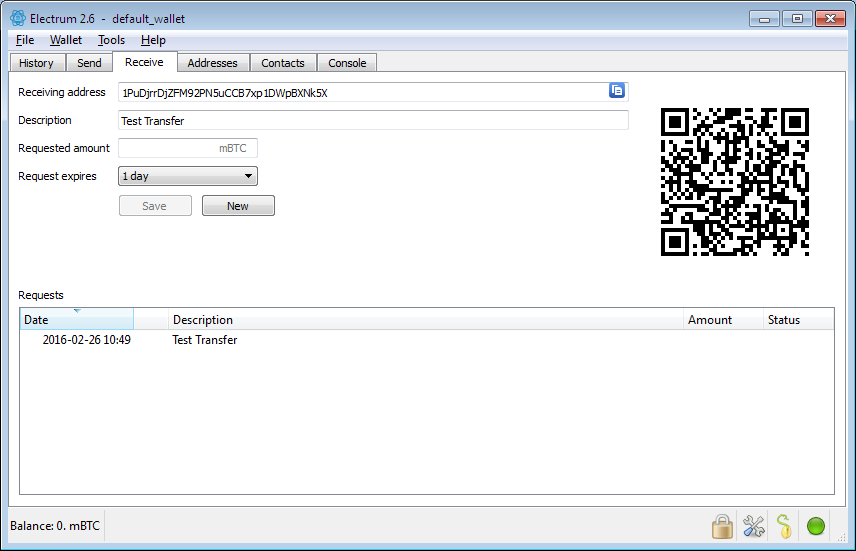
Click on the receive tab where you can reqest addresses for a payment. It is possible (but optional) to enter an amount and a description. You can print this information (as QR-code) or send it electronically to the person you are requesting Bitcoins from. For direct (private) transfers the amount is usually omitted and the sender enters the amount of Bitcoins to be sent.
If a friend wants to send you Bitcoins, all you need to do is to click on “Save” under the receive tab without entering any other information. This assigns an address to the expected payment which you then can give to your friend.

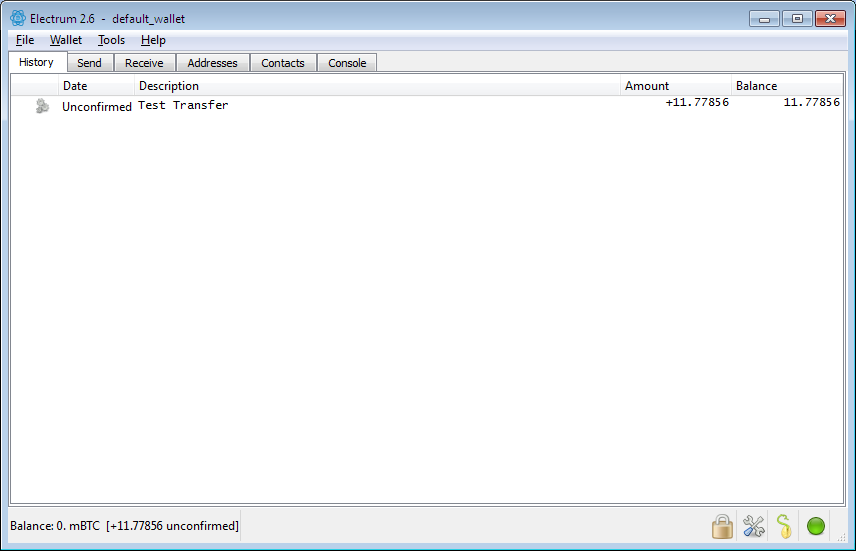
As soon as your friend sent out the Bitcoins from his wallet you will see the incoming transaction under the History tab. At first it will be displayed as unconfirmed. In the status bar at the bottom you balance is still 0 but the incoming transaction should be shown in parentheses.

After a transaction was sent out it has to be verified by the Bitcoin network before the receiver can use the funds. The technical details would exceed the scope of this article, it is sufficient to know that the validity of the Bitcoin transaction can be verified by using the blockchain.
After a transaction was confirmed by six peers it is fully valid and finished. Many vendors that accept Bitcoins will already accept transactions after three confirmations. Either way, the process of validation should not take longer than an hour. When receiving Bitcoins directly in your wallet, you can spend them after just one confirmation.
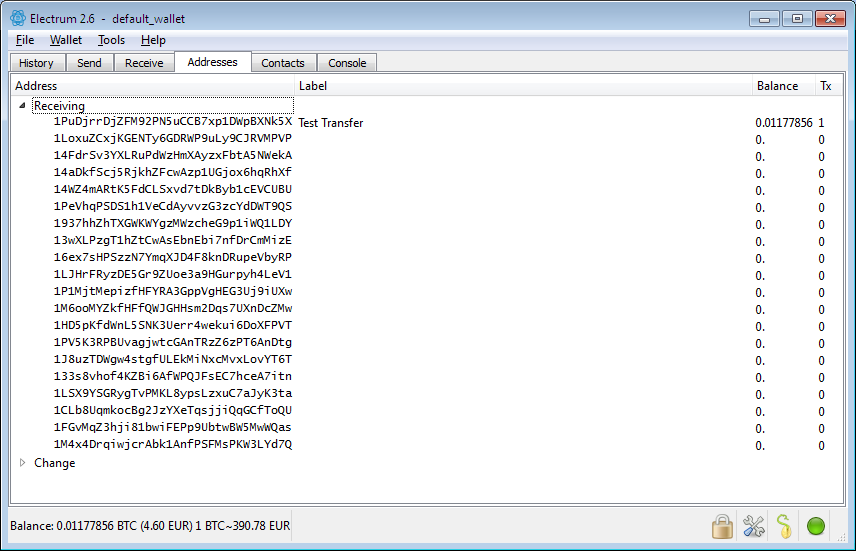
Under the address tab you can see the incoming amount and the corresponding description (which you can always change by clicking on it). This way you can see that the address was already used for receiving Bitcoins. If you click on the Send tab you will see that a new address was already queued, ready to receive the next payment. Normally you don’t need to worry about your Bitcoin addresses, Electrum will automatically use new addresses for each requested payment.

Sending Bitcoins
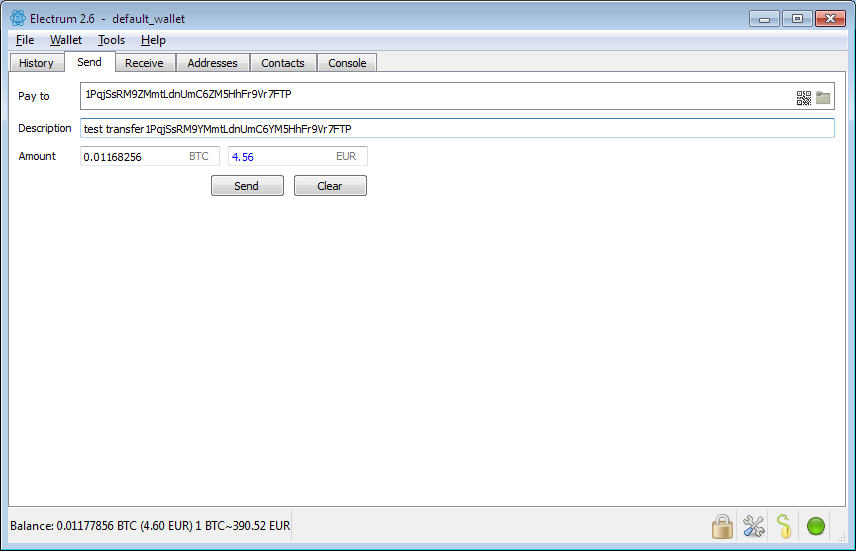
To send Bitcoins you only need to enter an amount and the receiving address under the Send tab. If you put an exclamation mark in the amount field, all your available funds will be transferred. The client will automatically deduct the necessary fee.
As mentioned in the Bitcoin Basics article, you should only send Bitcoins to addresses that you were explicitely given for this purpose by the receiver. Never assume that you can use the same address again if you want to send Bitcoins to the same person a second time. In some cases that might be the case (like for public donation addresses) but generally you should always ask the receiver.

Once you entered the amount and Bitcoin address click on “Send” to initiate the transaction. You will need to enter you wallet passphrase to finish this process.
