NOTE: IPsec/IKEv2 will only work with macOS El Capitan and later. If you have an earlier version, please refer to our Tunnelblick documentation.
Download VPN profiles for IPsec/IKEv2
Download the zipped VPN profiles first. Then extract the zip archive (Safari does that automatically).
Download
First go to the IPsec page in the download section. In the IPsec IKEv2 part scroll down to the Single configuration/location. Pick a location and click Install directly. You can download all files as ZIP-archive alternatively. Double click on the downloaded file to install the VPN profile, in the new window click on Continue.
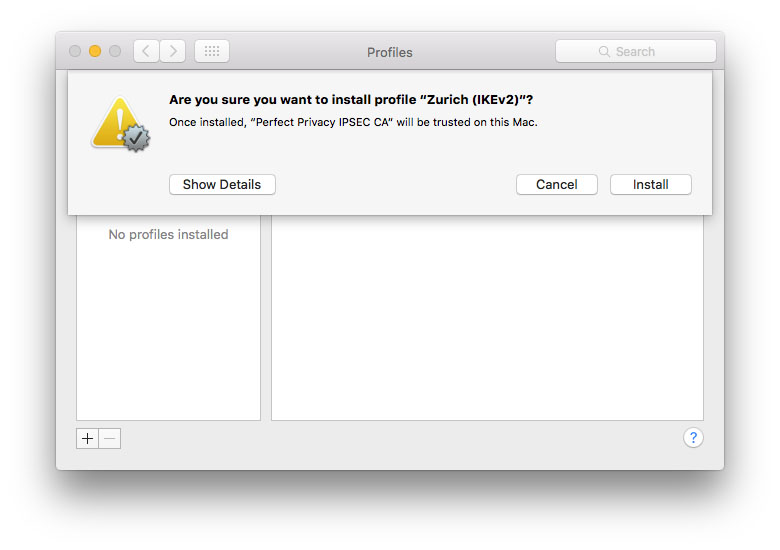
Click on Install to continue. You will need to enter your macOS login credentials.
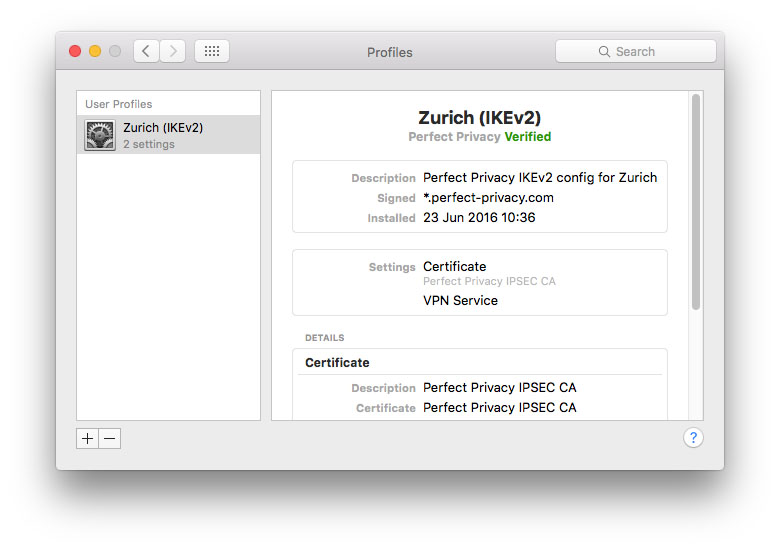
The profile is now installed. Now click on the left arrow symbol on the top right to go back to the system preferences.
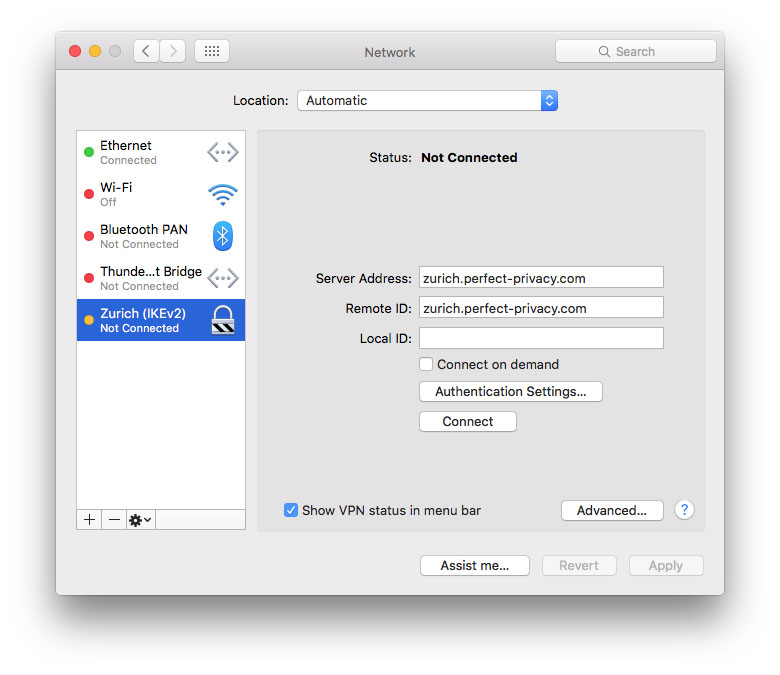
Go to Network and select the previously added VPN connection.
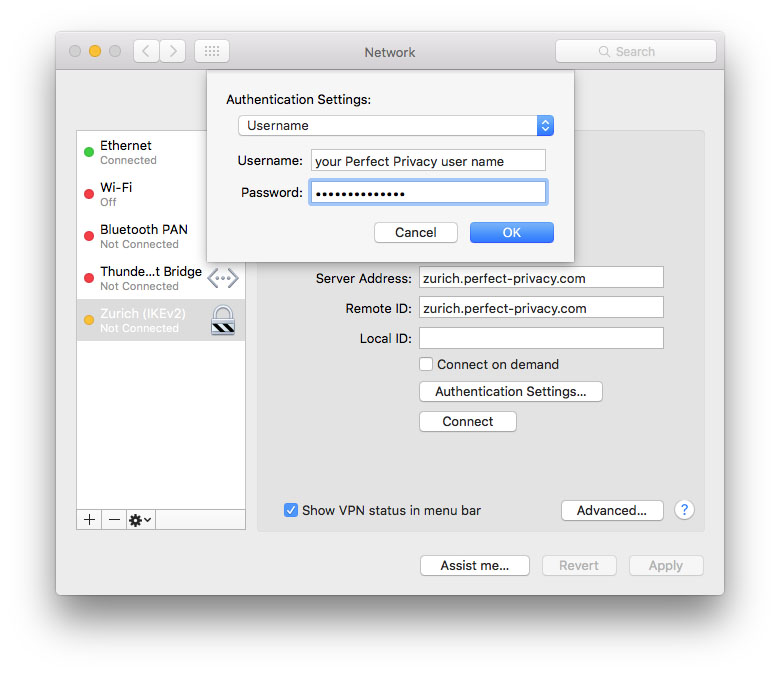
Click on Authentication Settings, choose Username instead of Certificate in the drop-down menu and enter your Perfect Privacy username and password. Then click OK and Apply to save the changes.
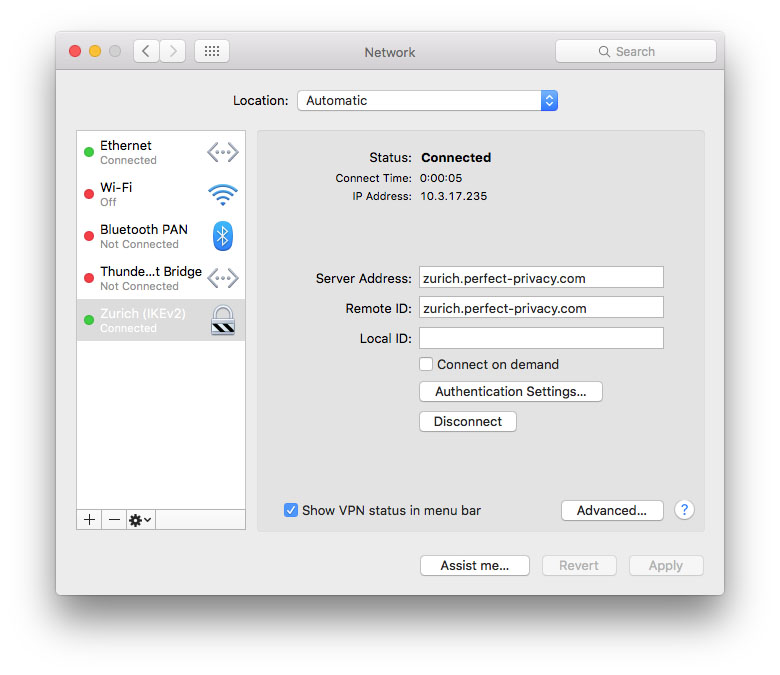
Now you can establish a VPN connection by clicking on Connect. If you want to verify your VPN connection, visit our Check IP website. If you activate Show VPN status in menu bar a symbol appears in the status menu. By clicking on it you can quickly connect and disconnect the VPN.
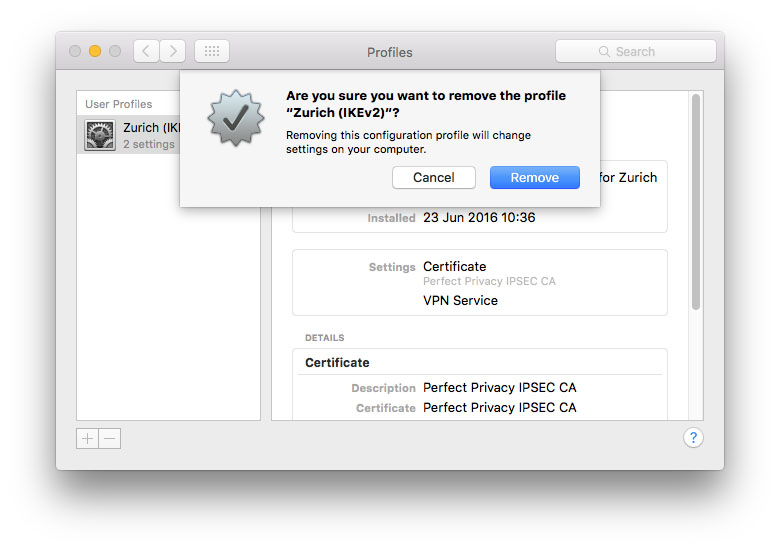
Of course you can install profiles for multiple locations. Simply repeat the steps above for any other locations you would like to add. That way you can easily switch the VPN server and country. If you want to delete the VPN connection again, you should go to System Preferences > Profiles and click on the minus symbol in the lower left. This will make sure that the complete profile including settings and certificate will be removed.


Questions?
If you have any questions, comments or other feedback regarding this tutorial, please use the corresponding thread in our community forums.