Download the Tunnelblick profiles
Download all necessary Tunnelblick profiles (OpenVPN) as a ZIP file. These are already preconfigured for use with obfsproxy.
Download View alternate downloads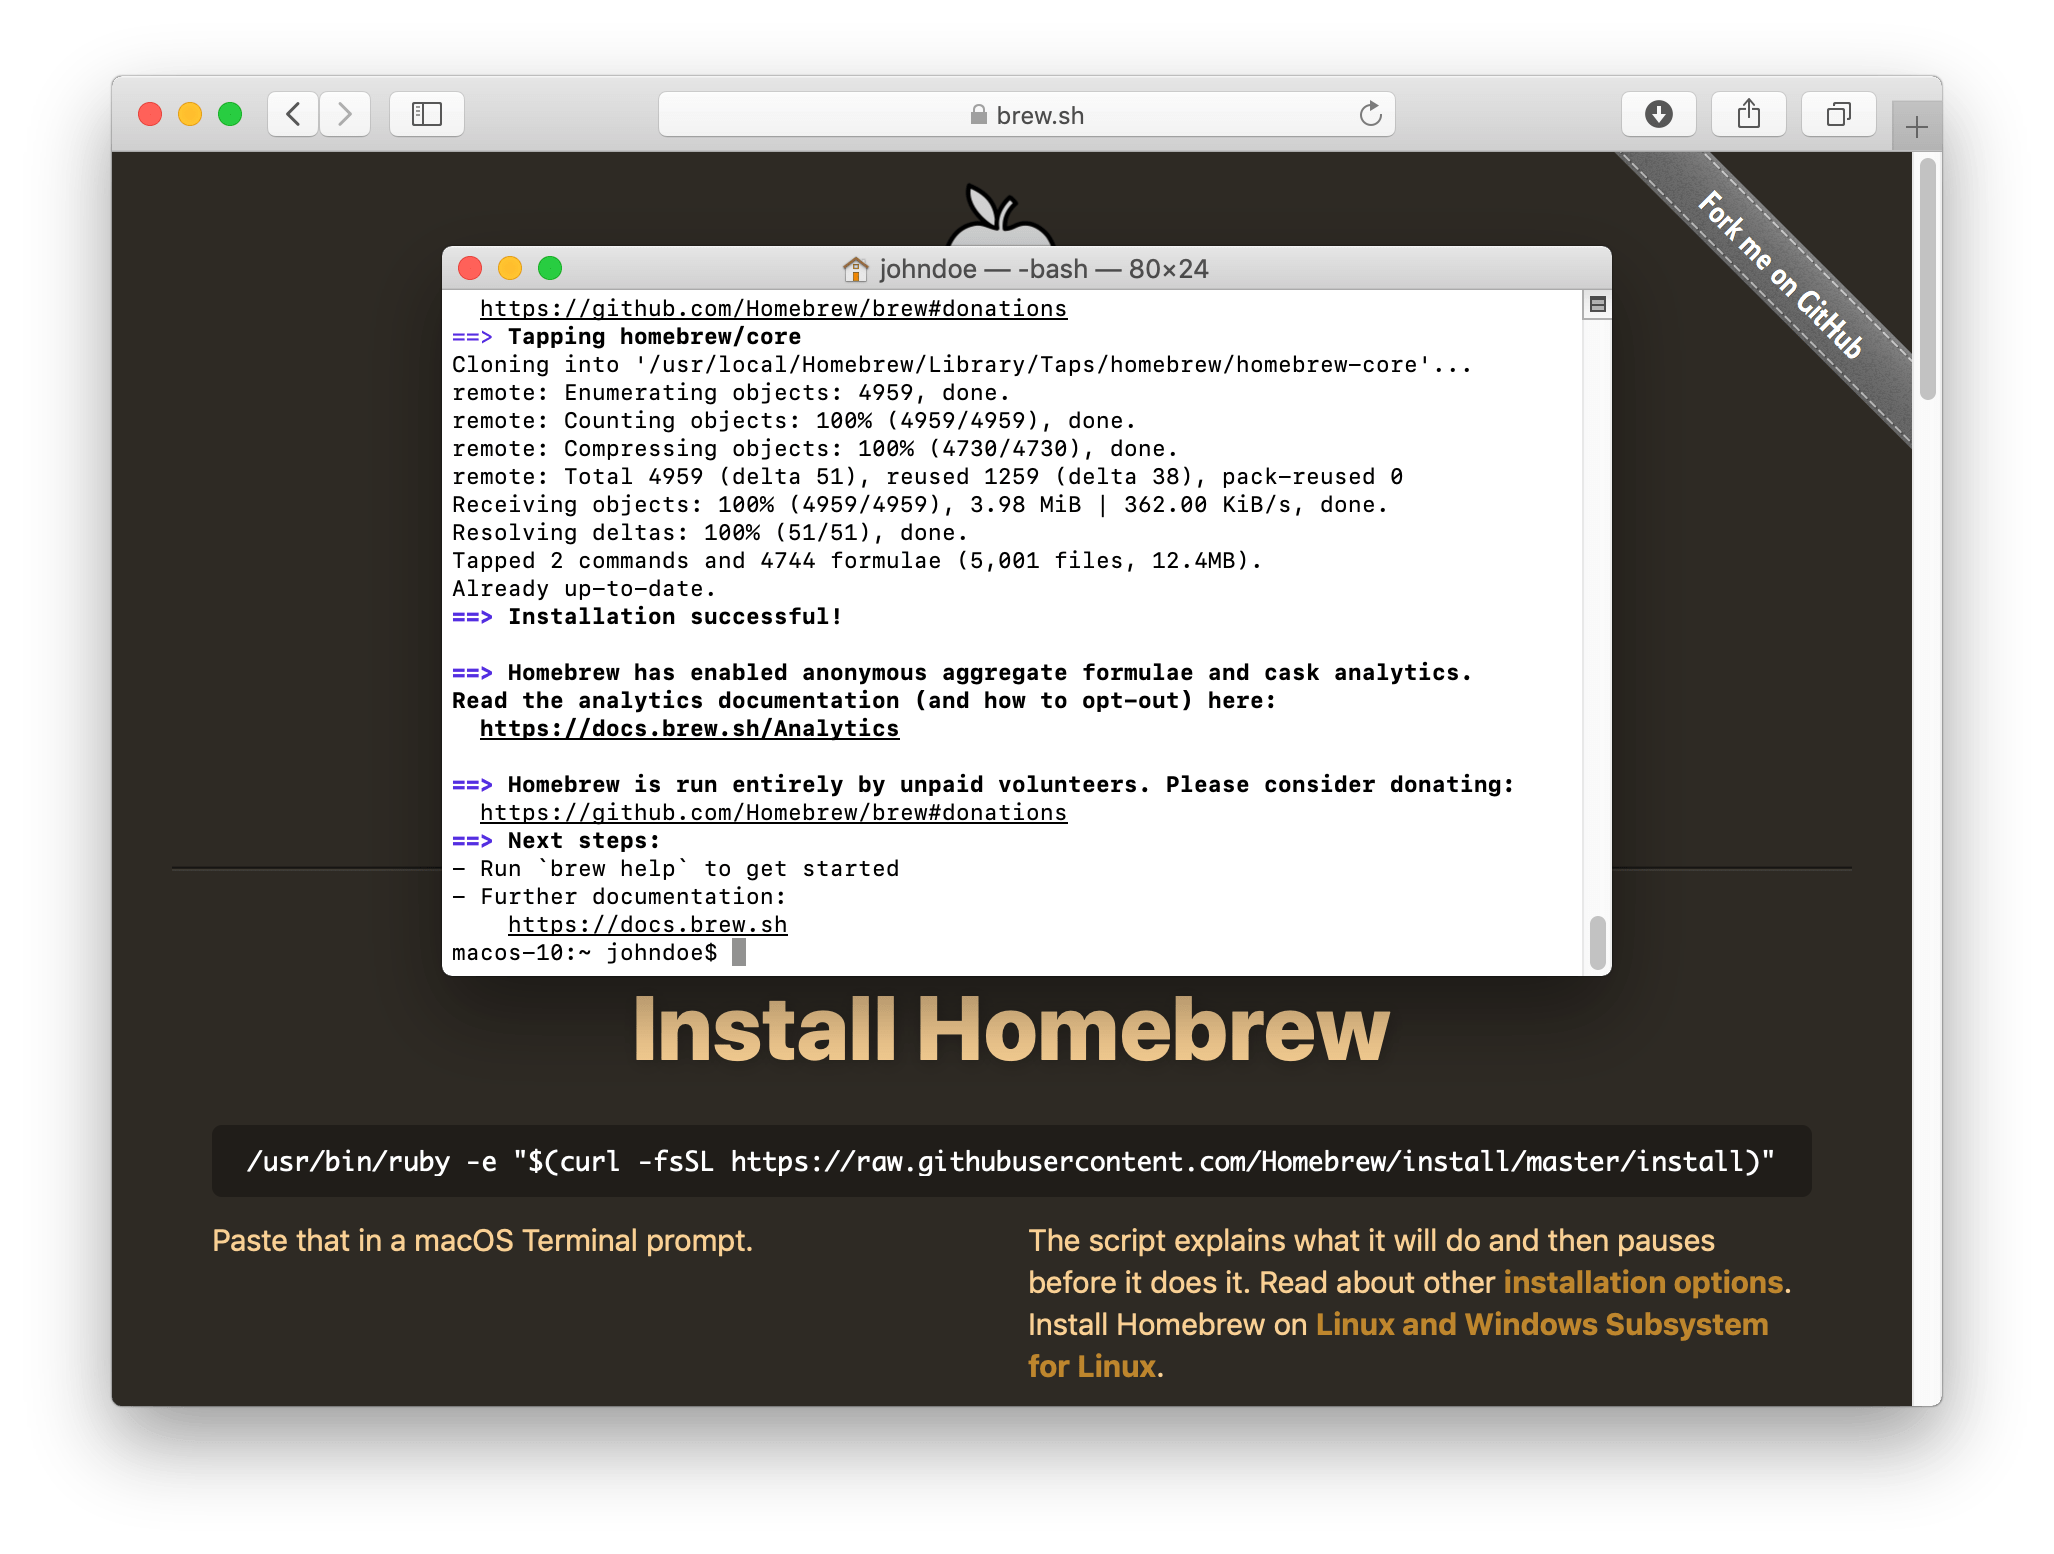
Install obfsproxy
To install obfsproxy you first need the software package management Homebrew.
Open a terminal and install Homebrew according to the installation instructions on the Homebrew website.
Installing Homebrew will take a while.
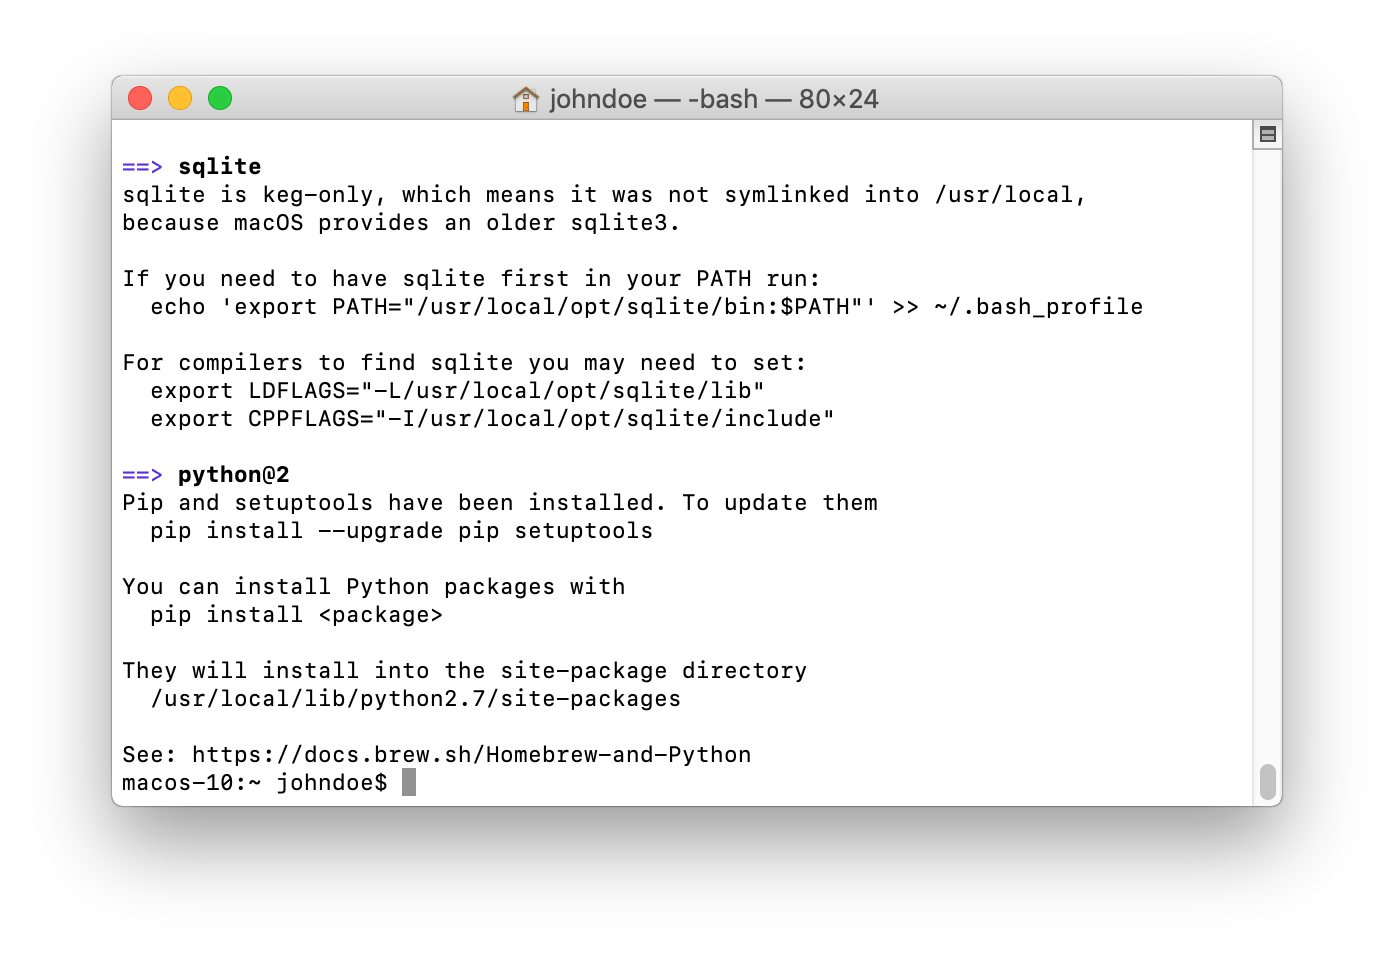
The program obfsproxy needs Python2. Install Python2 using Homebrew by copying the following line into the terminal:
brew install python2
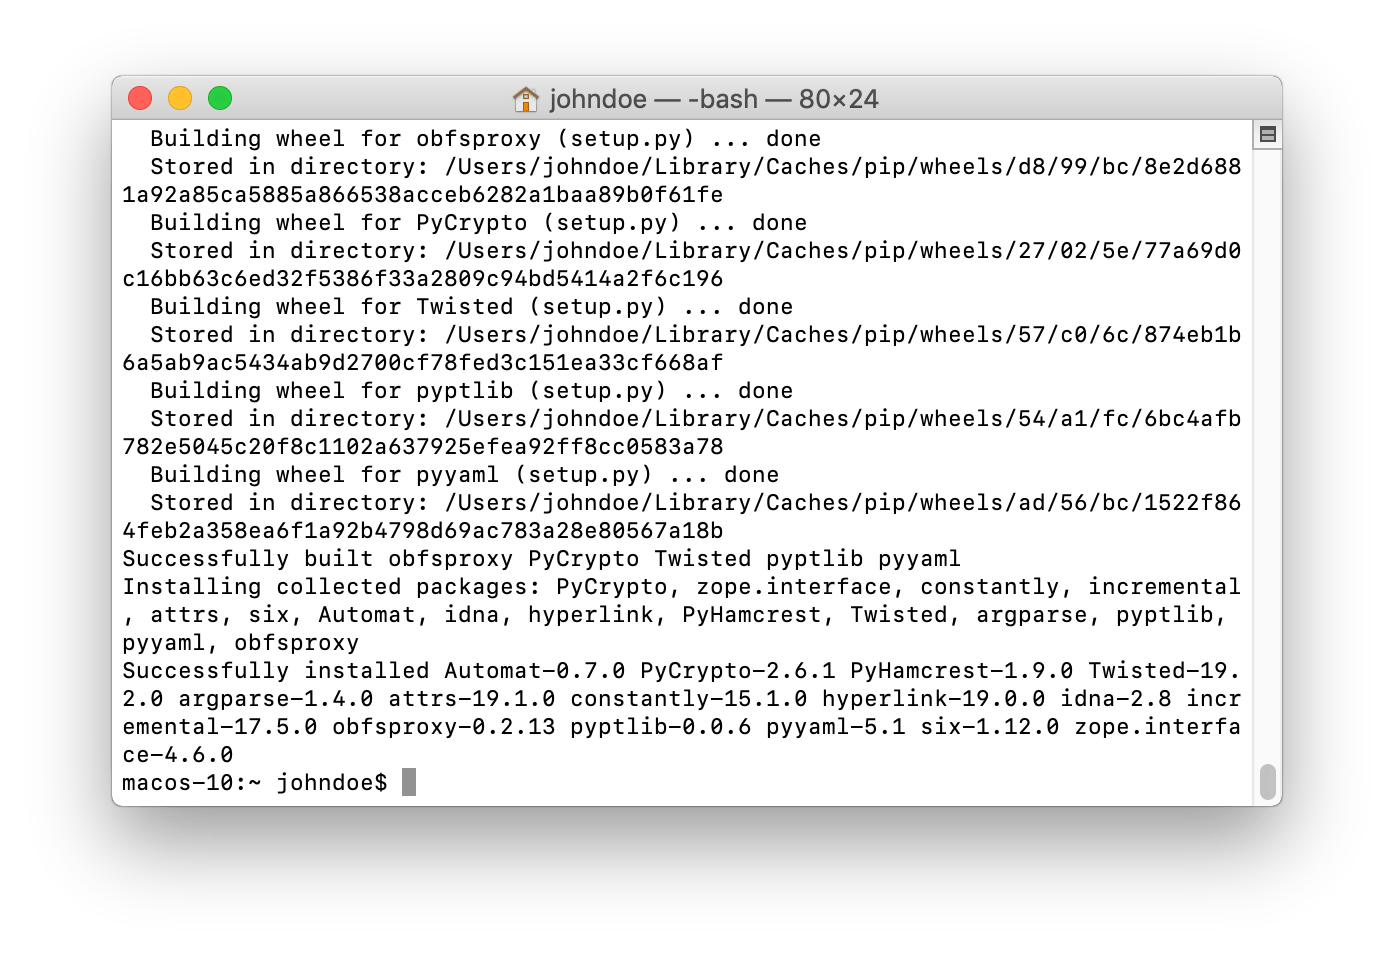
Then you can install the program obfsproxy with the Python package manager Pip2:
pip2 install obfsproxy
The required software is now installed.

Import VPN profile
To import an OpenVPN profile into Tunnelblick, unzip the downloaded ZIP file and double-click the preferred profile (file extension .tlbk).
Our tip: Choose a location that is geographically as close as possible to achieve the best speed.
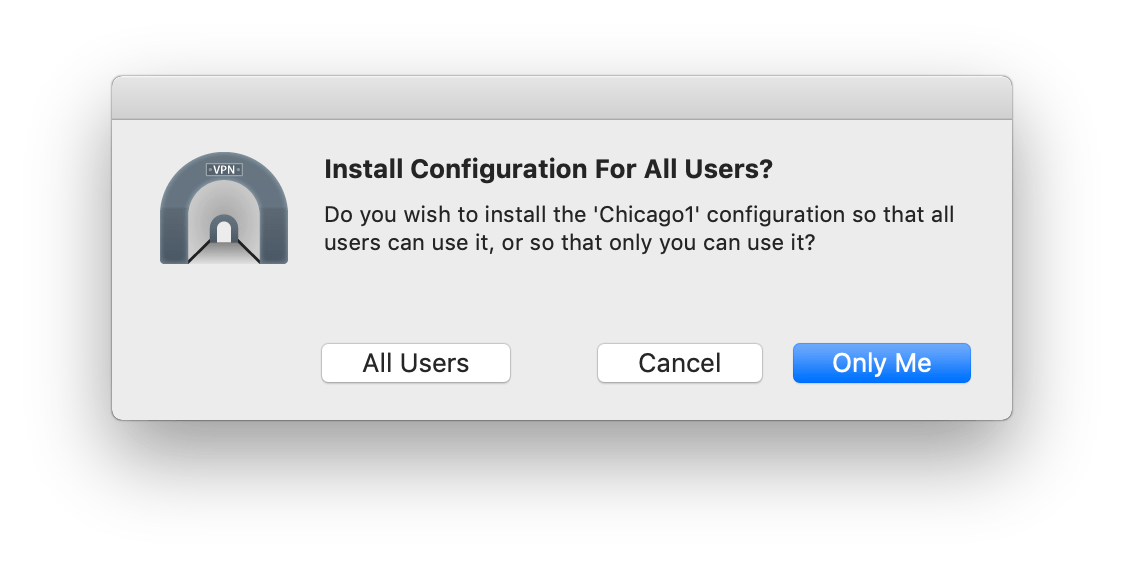
You can now decide whether the OpenVPN profile should be installed for all users of the Mac or just for you.
After entering your user password, the OpenVPN profile is imported into Tunnelblick.
Establish a VPN connection
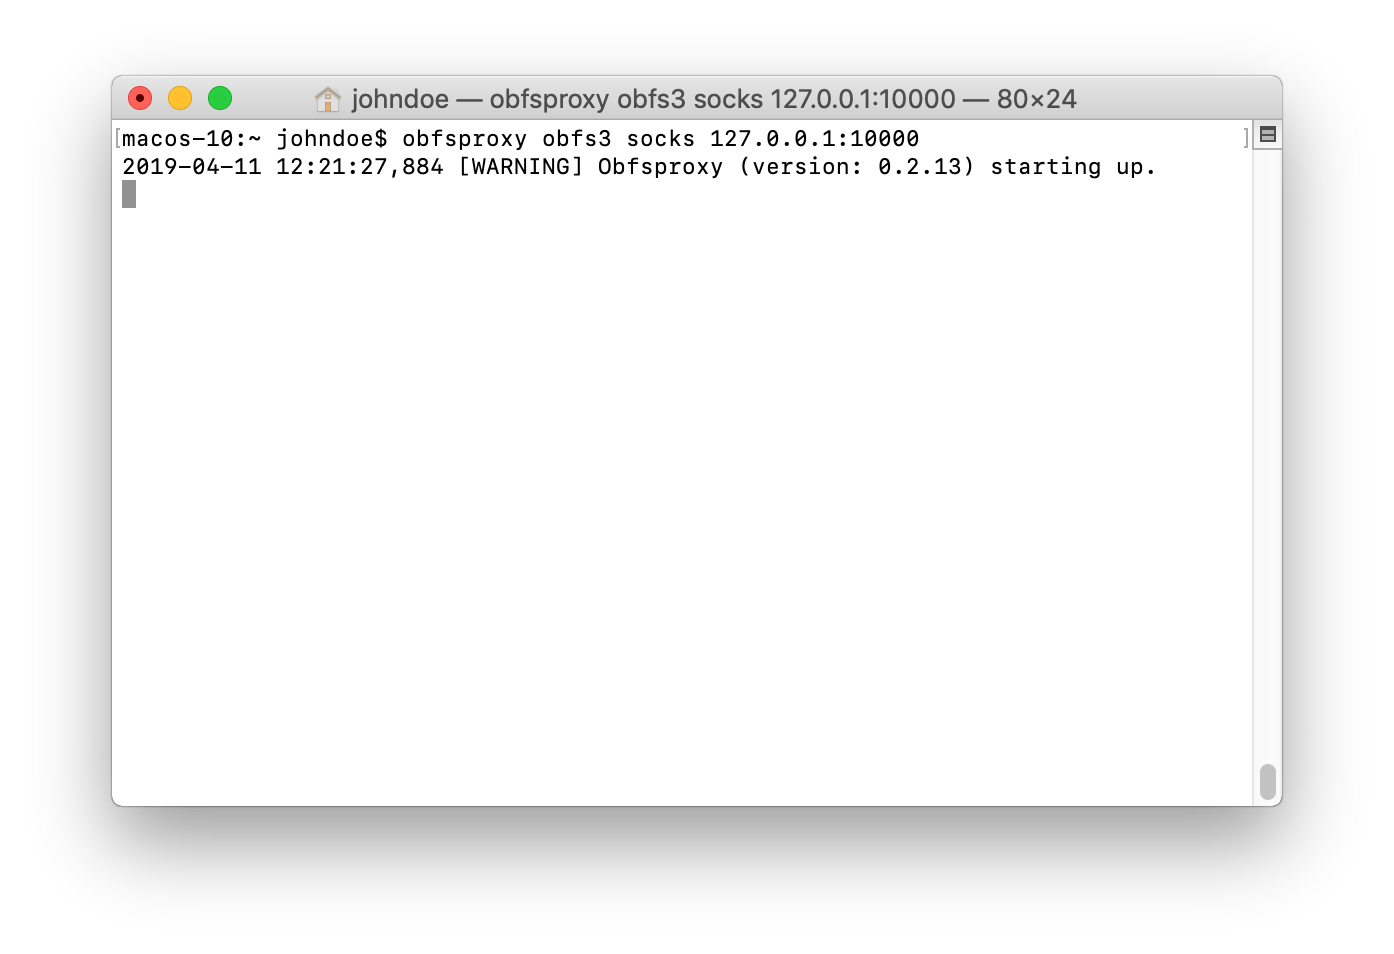
In order to establish the VPN connection, obfsproxy must first be started.
Open the terminal and enter the following line:
obfsproxy obfs3 socks 127.0.0.1:10000
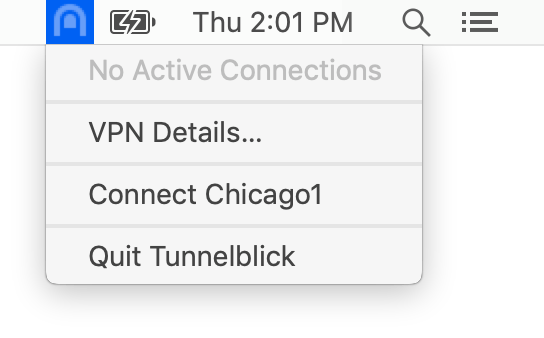
You can now establish the OpenVPN connection.
Click on the Tunnelblick icon in the system bar (top right) and select the recently imported OpenVPN profile from the list.
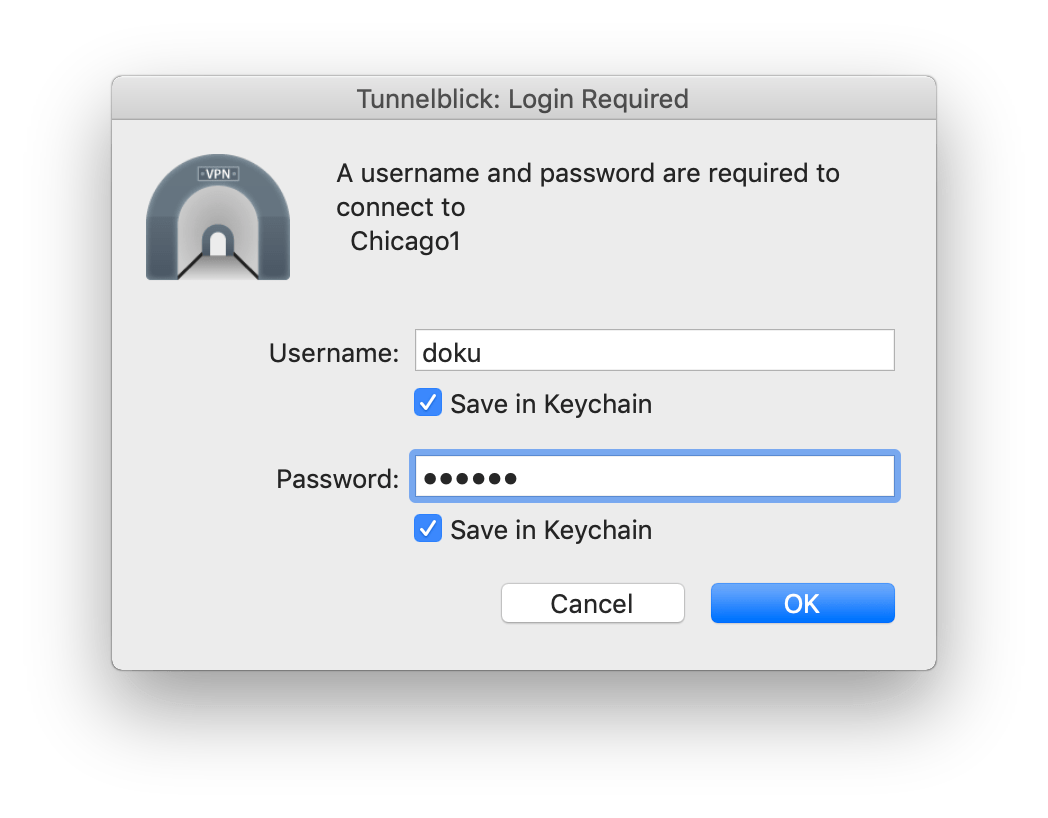
The first time you are asked for your Perfect Privacy credentials.
Check the box Save in Keychain so that you don't have to enter them again in the future.
After a few seconds the VPN connection is established.
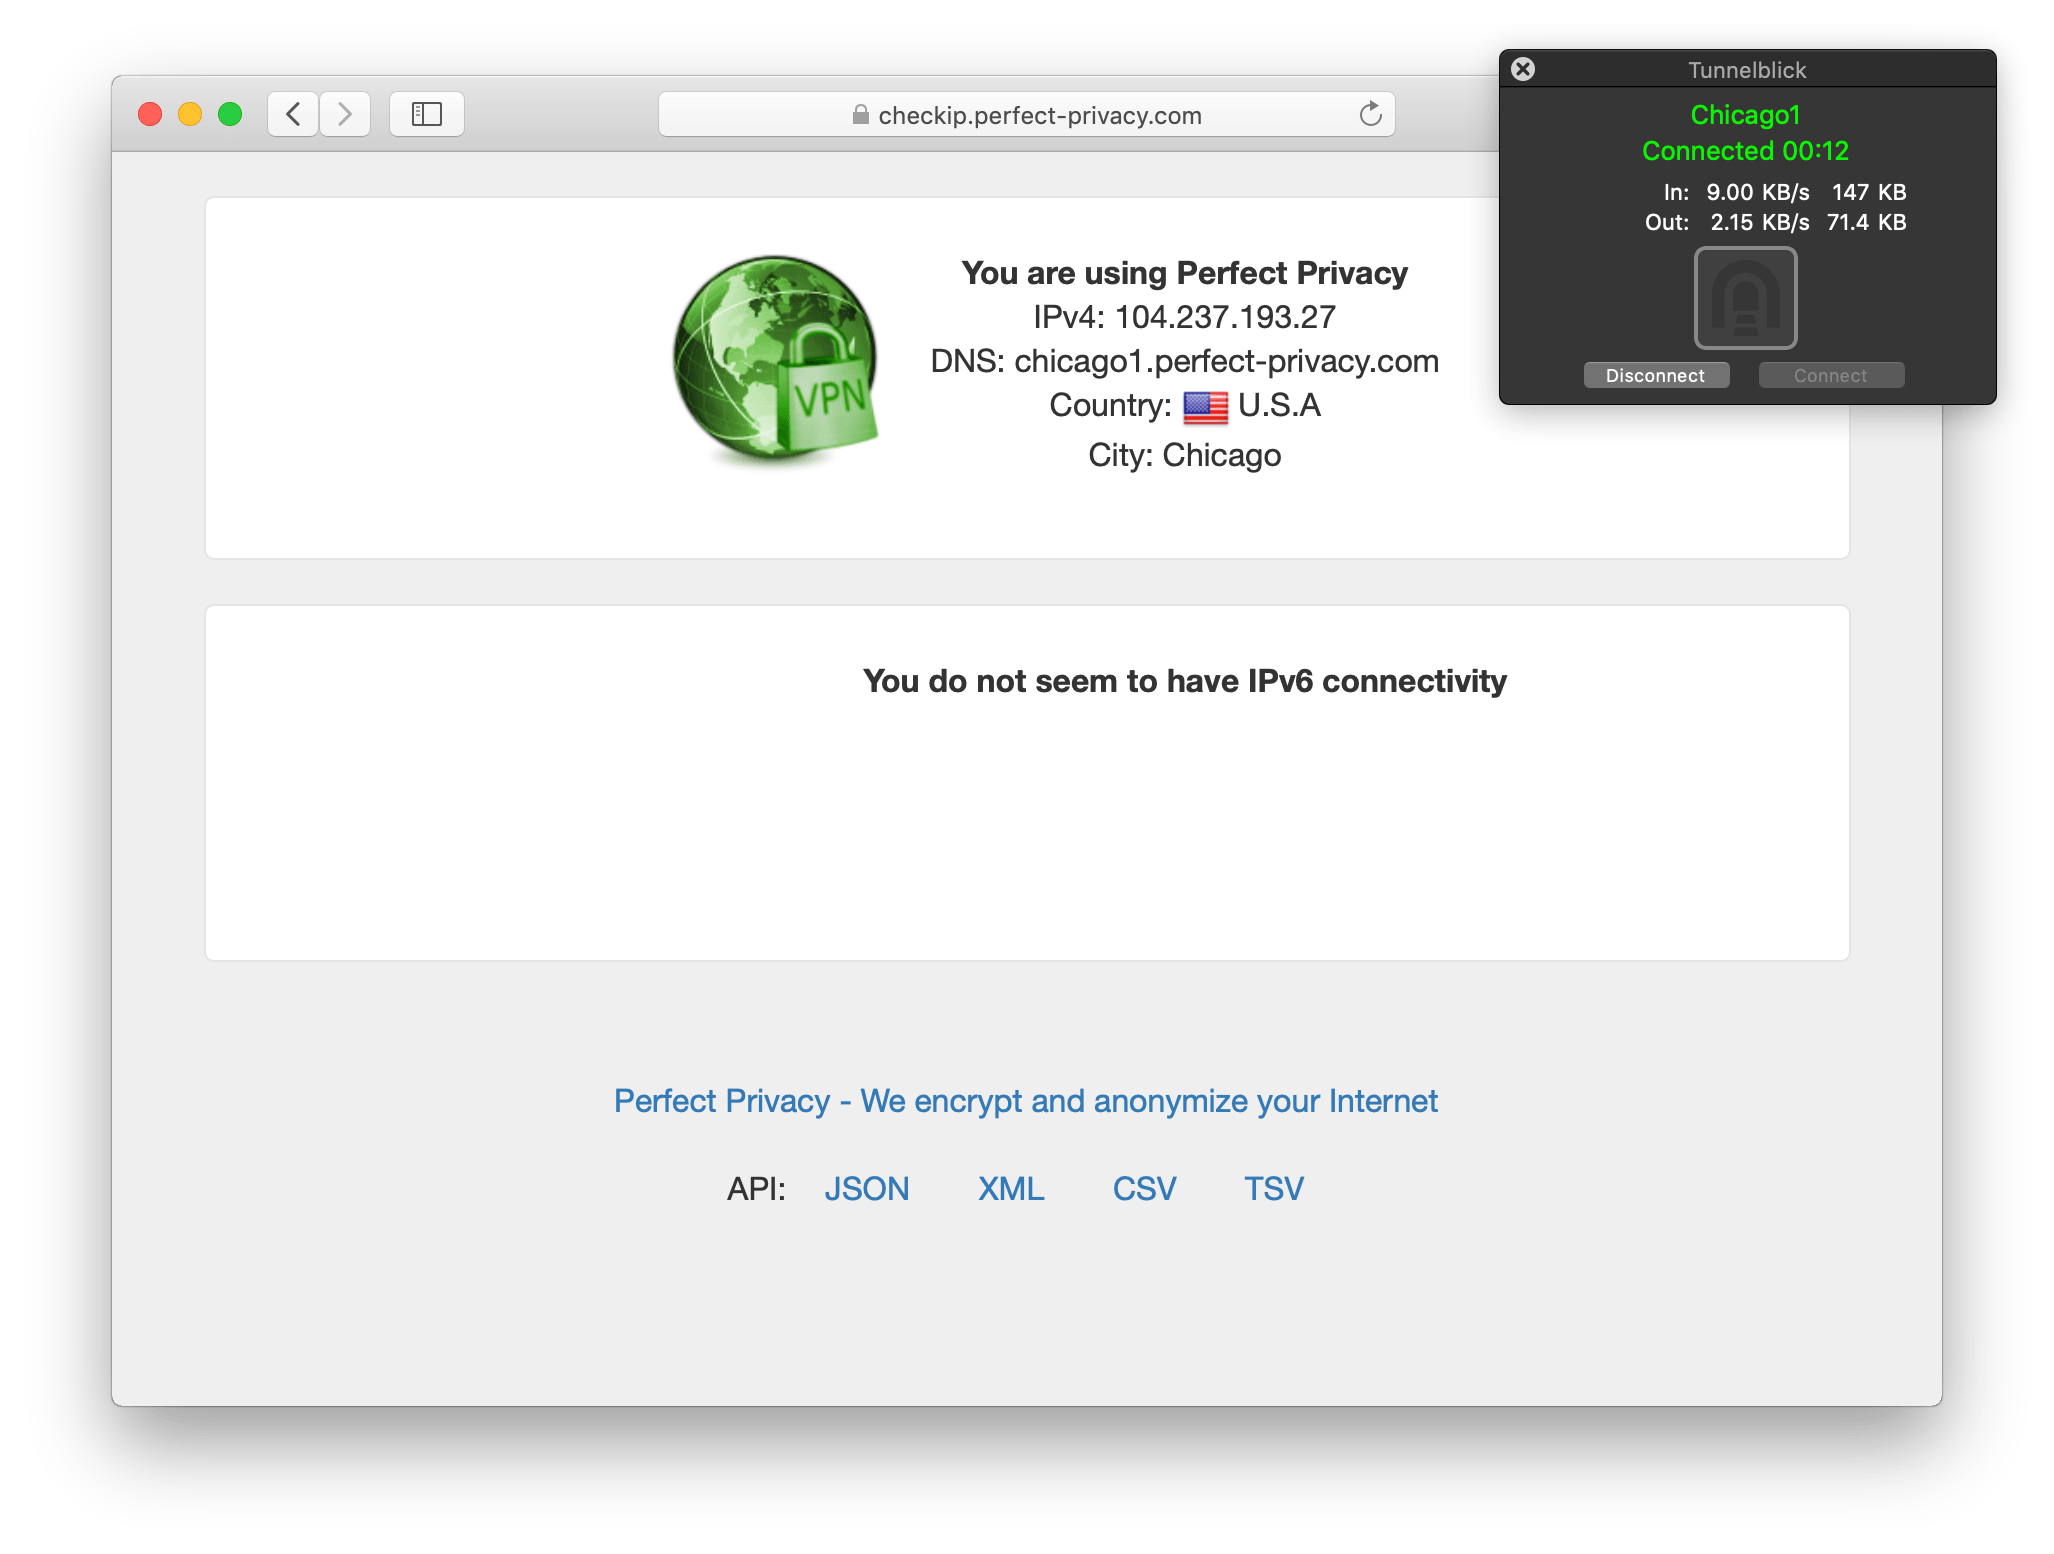
Check that the VPN connection is working correctly by going to the Check-IP web page.


Questions?
If you have any questions, comments or other feedback regarding this tutorial, please use the corresponding thread in our community forums.