Downloading the OpenVPN configuration files
Download the archive with OpenVPN configuration files and unpack it.
Download View alternate downloads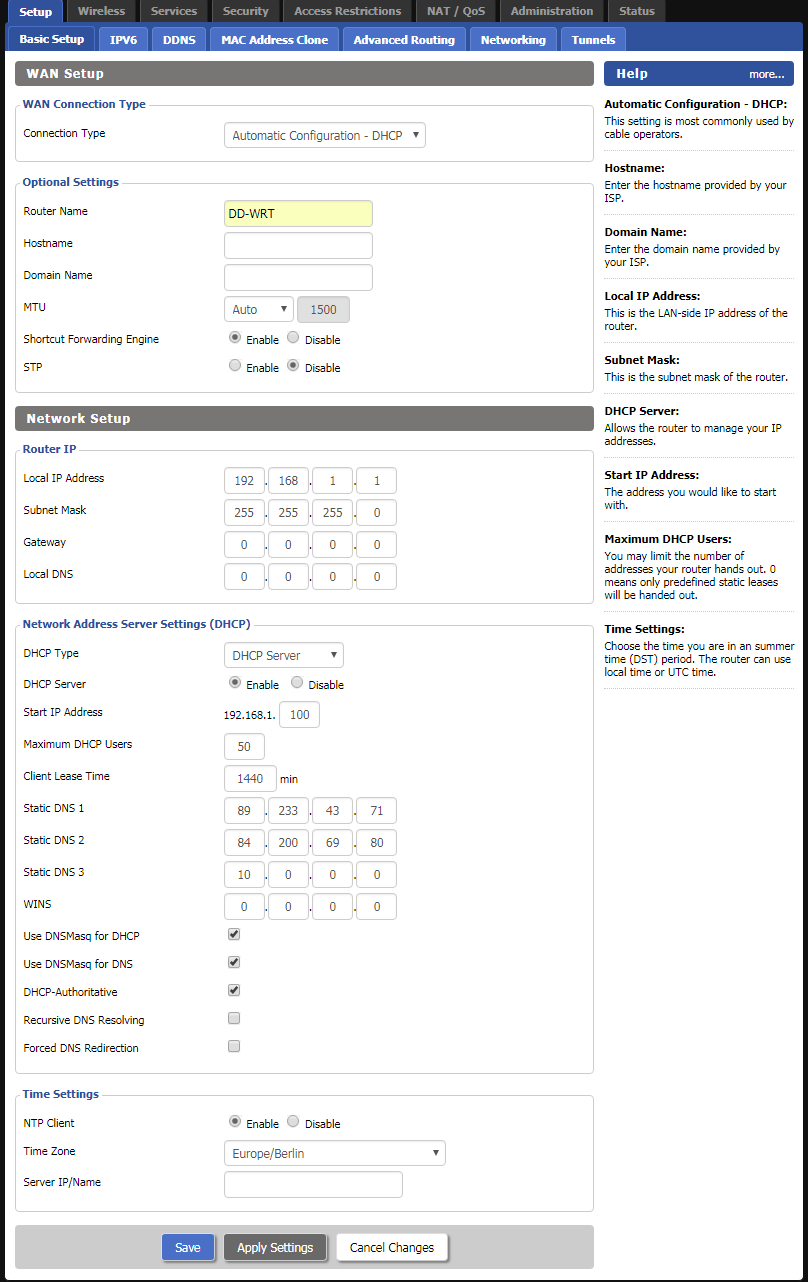
Log in to your DD_WRT router and enter at least two public DNS servers. You can either use Google’s DNS servers (8.8.8.8, 8.8.4.4) or any from the OpenNIC project. Then click on Save and Apply Settings.
Note: If you want, you can also use Perfect Privacy DNS servers (you can find the IPs on the server site in the customer area). These DNS servers will only resolve *.perfect-privacy.com domains when VPN is not connected which means that Internet access will not work without the VPN being connected. However, there will be no IP leak when using public name servers instead, since all DNS requests will be sent anonymized over the VPN tunnel while a VPN connection is established.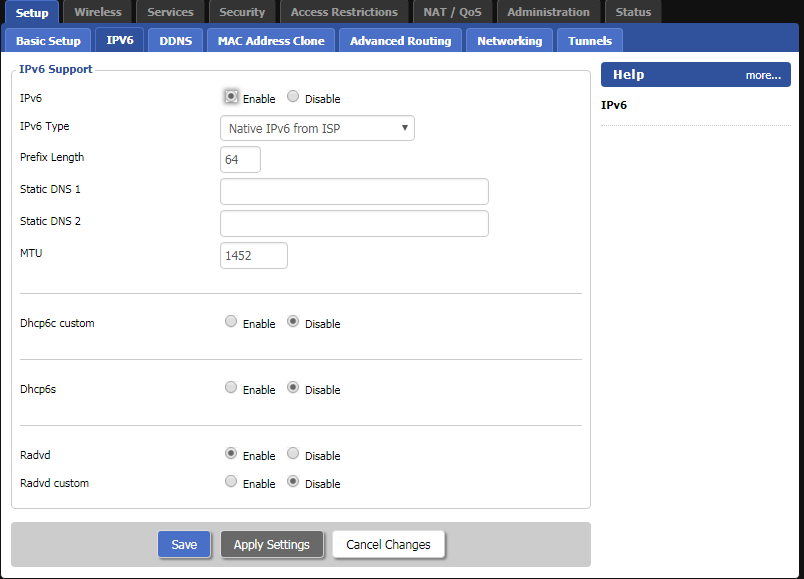
In the menu bar click on IPv6 next to the tab Basic Setup.
Set the options IPv6 and Radvd to enabled as shown on the picture on the left. Next click on Apply Settings.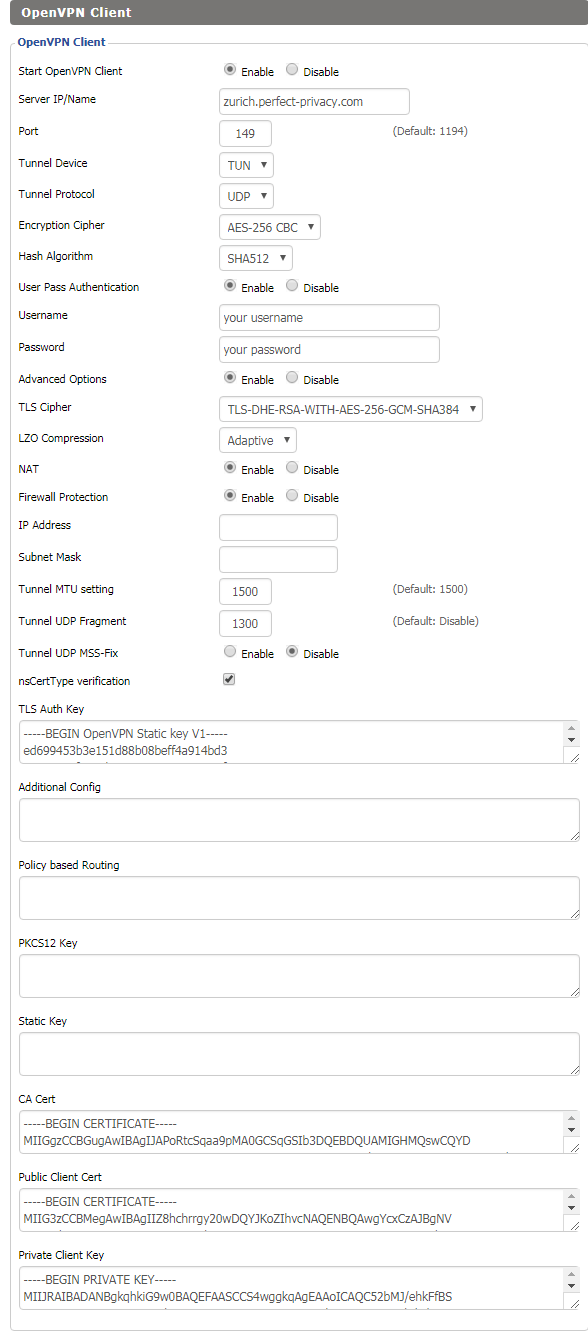
Go to Services → VPN and configure the settings as follows:
- Start OpenVPN Client:
Enable - Server IP/Name:
A Perfect Privacy server of your choice in this example zurich.perfect-privacy.com - Port:
Enter any valid port (148, 149, 150, 151, 1148, 1149, 1150 or 1151). - Tunnel Device:
TUN - Tunnel Protocol:
UDP - Encryption Cipher:
AES-256 CBC - Hash Algorithm:
SHA512 - User Pass Authentication:
Enable - Username:
Your Perfect Privacy username - Password:
Your Perfect Privacy password - Advanced Options:
Enable - TLS Cipher:
TLS-DHE-RSA-WITH-AES-256-GCM-SHA384 - LZO Compression:
Adaptive - NAT:
Enable - Firewall Protection:
Enable - Tunnel UDP Fragment
1300ns - CertType verification:
Check the box - Port:
You can find the keys and certificates in the previously downloaded configuration. Open the *.ovpn file of the server you are using, in this case Zurich.ovpn.
Copy the content between the tags <tls-auth></tls-auth> in the field TLS Auth Key.
Copy the content between the tags <ca></ca> in the field CA Cert.
Copy the content between the tags <cert></cert> in the field Public Client Cert.
Finally copy the content between the tags <key></key> in the field Private Client Key.
When finished click on Save and Apply Settings.
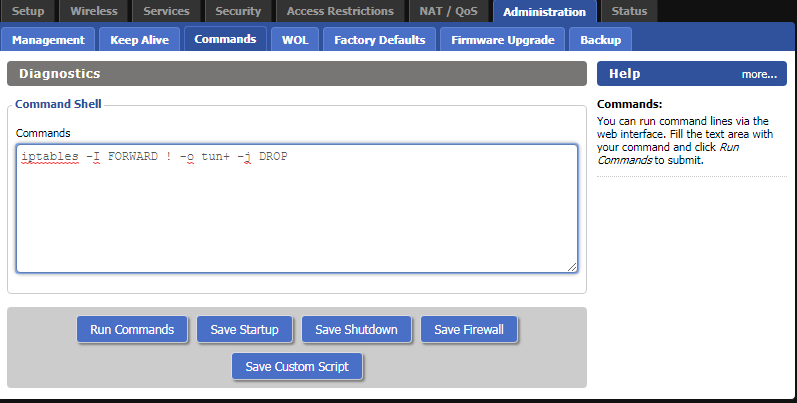
CAUTION: This step activates the firewall protection (“kill switch”) which prevents traffic leaving your network in case the VPN connection was interrupted. If you also want to access the Internet with your router when no VPN is connected, you need to skip this step.
Go to Administration → Commands and enter the following lines:
iptables --flush FORWARD
iptables -P FORWARD DROP
iptables -I FORWARD -o tun+ -j ACCEPT
iptables -I FORWARD -i tun+ -j ACCEPT
iptables -t nat -I POSTROUTING -o tun+ -j MASQUERADE
Then click on Save Firewall.
The configuration is now finished.
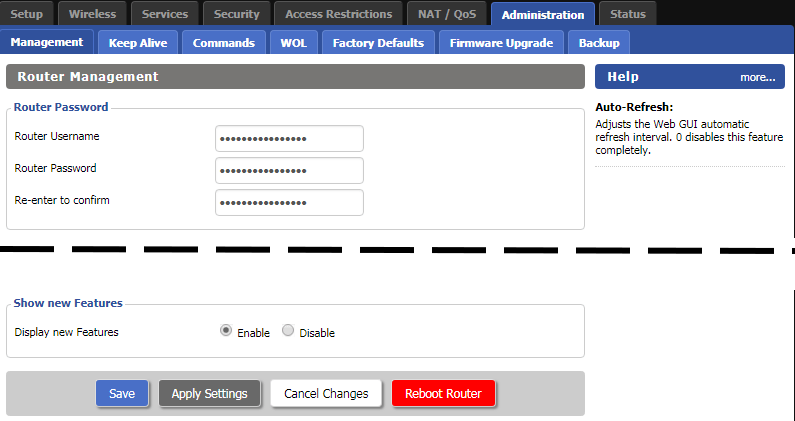
Go to Administration → Management, scroll down to the bottom and click on Reboot Router.
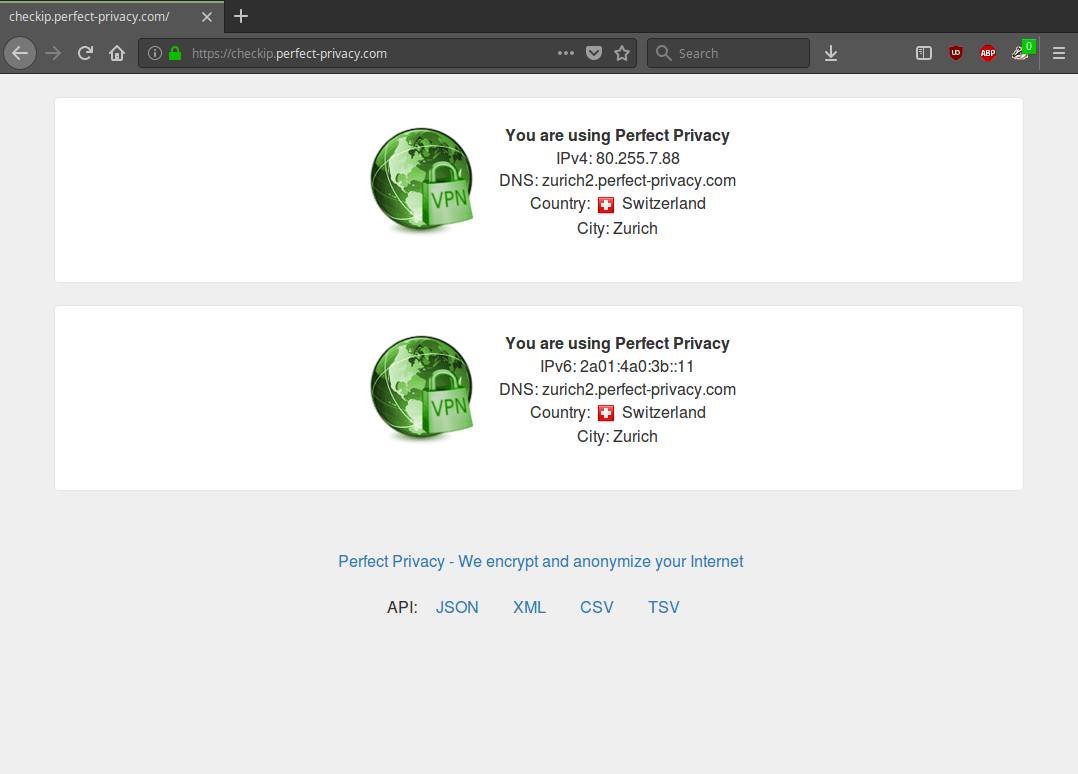
You can verify that the VPN connection is working correctly by visiting our Check IP website.


Questions?
If you have any questions, comments or other feedback regarding this tutorial, please use the corresponding thread in our community forums.