We assume you have already flashed OpenWRT 19.07.0 or newer on your router to follow this tutorial. For this tutorial we used an Asus RT-AC56U router but the steps work on any router running OpenWRT.
Downloading the OpenVPN configuration files
Download the archive with OpenVPN configuration files and unpack it.
Download View alternate downloads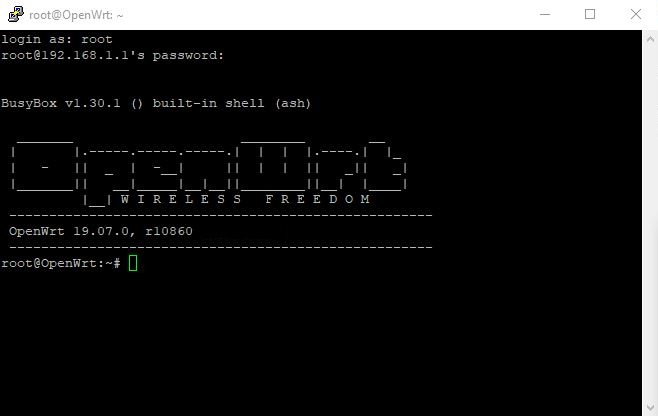
Install
First download and unpack the archive with the OpenVPN configuration files linked above. Open PuTTY or another terminal program, connect to the router and log in. Successively execute both commands: opkg update and opkg install openvpn-openssl luci-app-openvpn obfsproxy
Adjust configuration
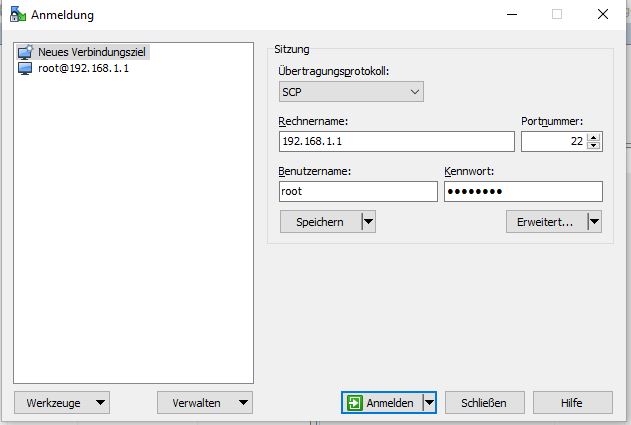
Using WinSCP (of course alternatively the ssh terminal may be used) in the /etc/openvpn/ directory of your OpenWRT router create the file up.sh with the following lines as content
#!/bin/sh
env | sed -n -e "
/^foreign_option_.*=dhcp-option.*DNS/s//nameserver/p
/^foreign_option_.*=dhcp-option.*DOMAIN/s//domain/p
" | sort -u > /tmp/resolv.conf.vpn
uci set dhcp.@dnsmasq[0].resolvfile="/tmp/resolv.conf.vpn"
/etc/init.d/dnsmasq restart
and the file down.sh with the following content
#!/bin/sh
uci set dhcp.@dnsmasq[0].resolvfile="/tmp/resolv.conf.auto"
/etc/init.d/dnsmasq restart
Open the properties of the files up.sh and down.sh to set the permissions to 755.
In /var/log/openvpn.log you later may view the log, in case any issues with the OpenVPN connections should occur.
Obfsproxy configuration
Open the file obfsproxy in the /etc/config/ directory. Replace its content with the following text and save it afterwards:
config obfsproxy 'obfsproxy'
 # Set by "option enabled" 1 to enable and 0 to disable this instance
 option enabled 1
 option transport 'obfs3'
 option mode 'socks'
 option listen_host '127.0.0.1'
 option listen_port '10000'
 option log_file '/var/log/obfsproxy.log'
Should you later decide to disable OpenVPN, then do not forget to also disable Obfsproxy. To do so open the file obfsproxy in the /etc/config/ directory and change the line:
option enabled 1to
option enabled 0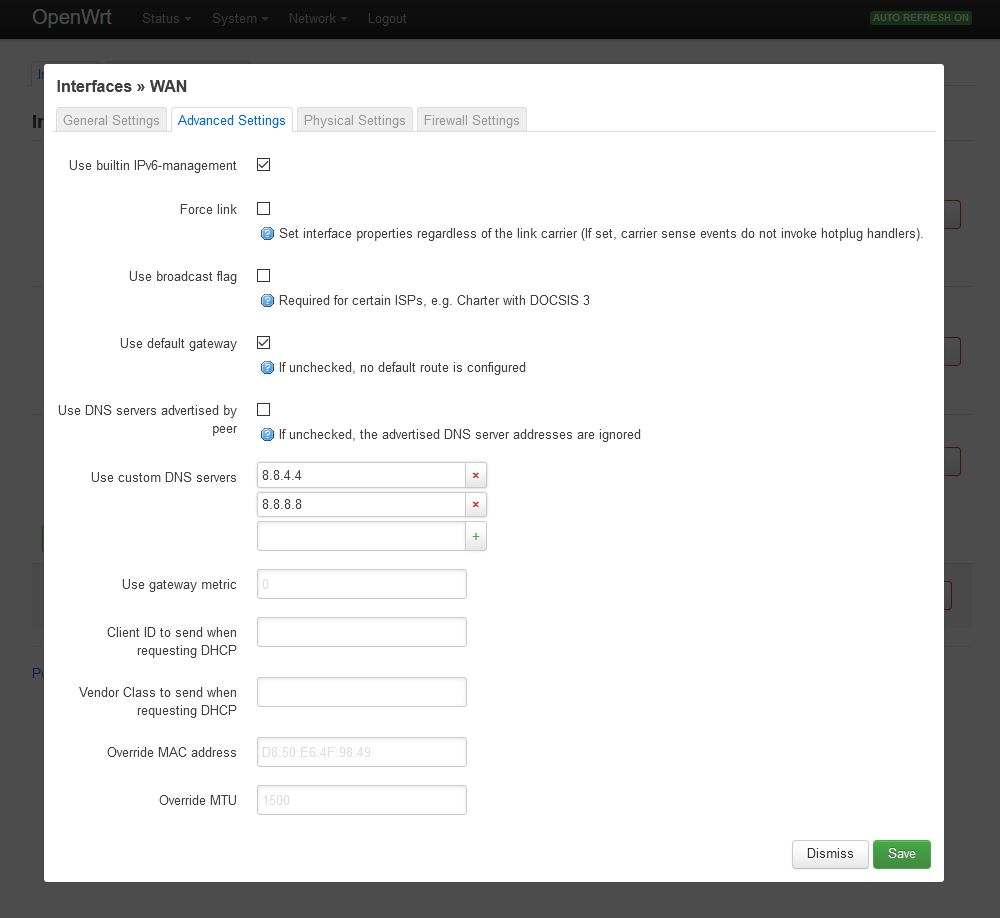
DNS server configuration
Log in on your OpenWRT router using a web browser (192.168.1.1). Change to the Network=>Interfaces=>WAN=>Edit=>Advanced Settings tab and deactivate Use DNS servers advertised by peer. At Use custom DNS servers enter at least two publicly usable IPv4 DNS servers (e.g. 8.8.8.8 and 8.8.4.4) and click on the Save button.
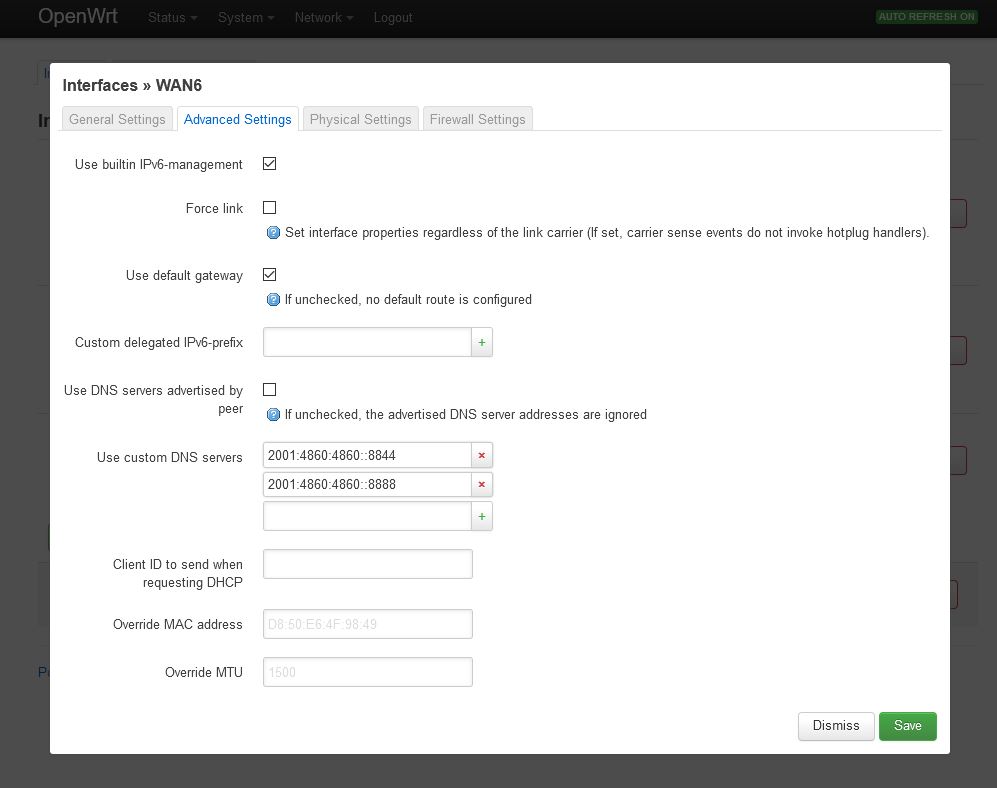
Do the same in the WAN6 tab and enter at least two IPv6 DNS servers. Then click the Save and the Save & Apply button. You can either use the DNS servers from Google (IPv4: 8.8.8.8 and 8.8.4.4 IPv6: 2001:4860:4860::8888 and 2001:4860:4860::8844) or use some of the OpenNIC project.
Note: If you want, you can also use Perfect Privacy DNS servers (you can find the IPs on the DNS server page in the customer area). These DNS servers will only resolve *.perfect-privacy.com domains when VPN is not connected which means that Internet access will not work without the VPN being connected. However, there will be no IP leak when using public name servers instead, since all DNS requests will be sent anonymized over the VPN tunnel while a VPN connection is established.
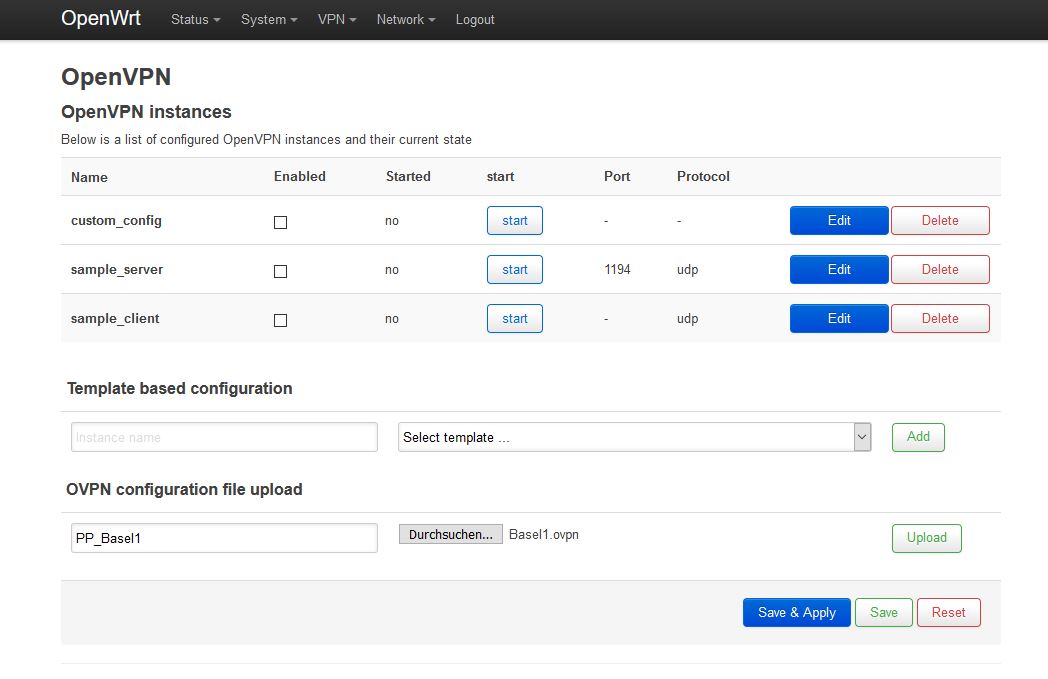
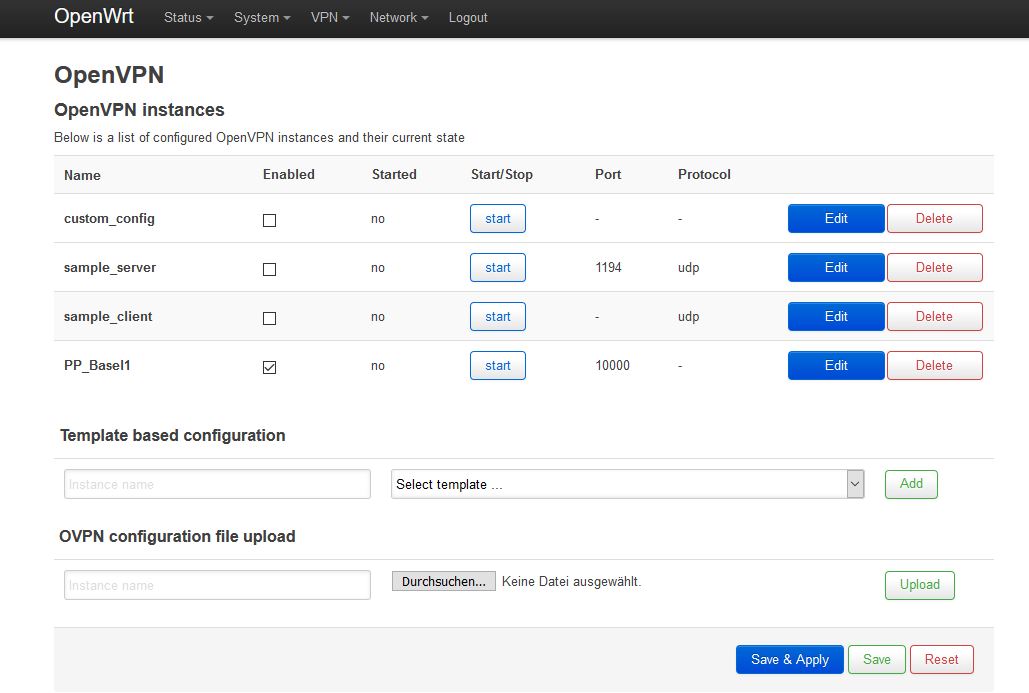
OpenVPN configuration
In the menu go to VPN=>OpenVPN and at OVPN configuration file upload enter PP_Basel1. Then click on Search and choose the previously downloaded Basel1.ovpn file from Perfect Privacy. Click on the Upload button afterwards.
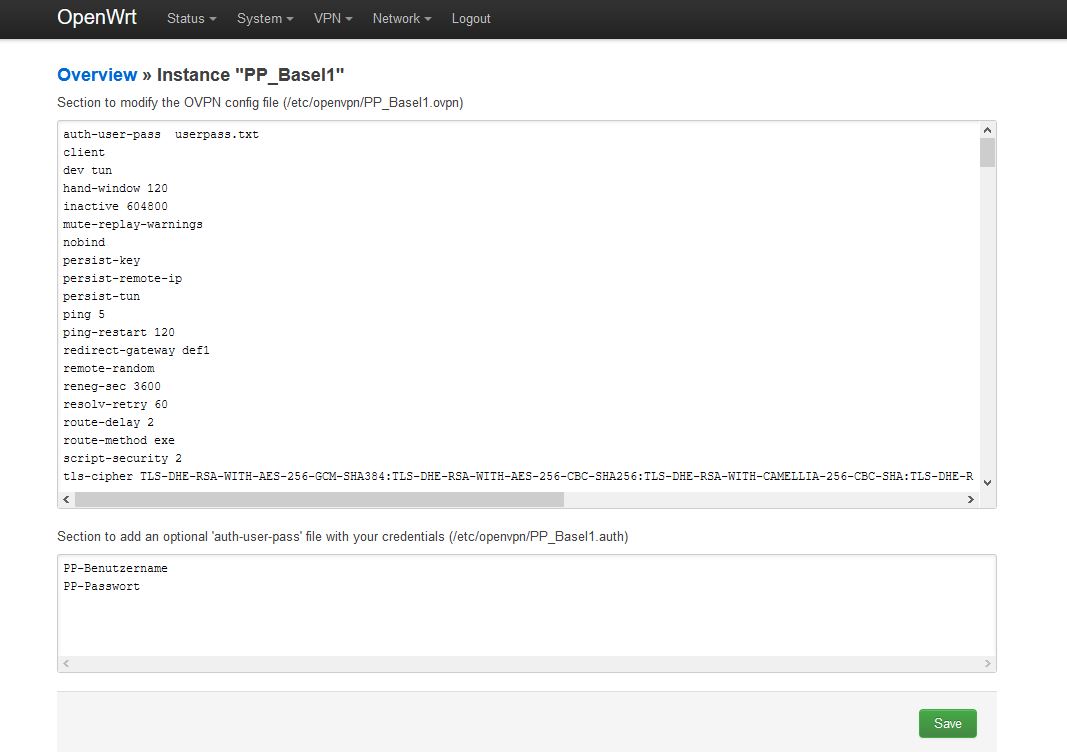
Open the newly created instance PP_Basel1 by clicking Edit and in the first line replace the text "
If you want to restrict OpenVPN connections to use certain ports only (e.g. 443 and 53) comment out the other entries in the used OpenVPN configuration file
Ensure the formatting has been taken on correctly by the browser and that all the remote commands are underneath each other in separate lines.
In the second field fill in your Perfect Privacy username and the corresponding password and then save them by clicking the Save button.
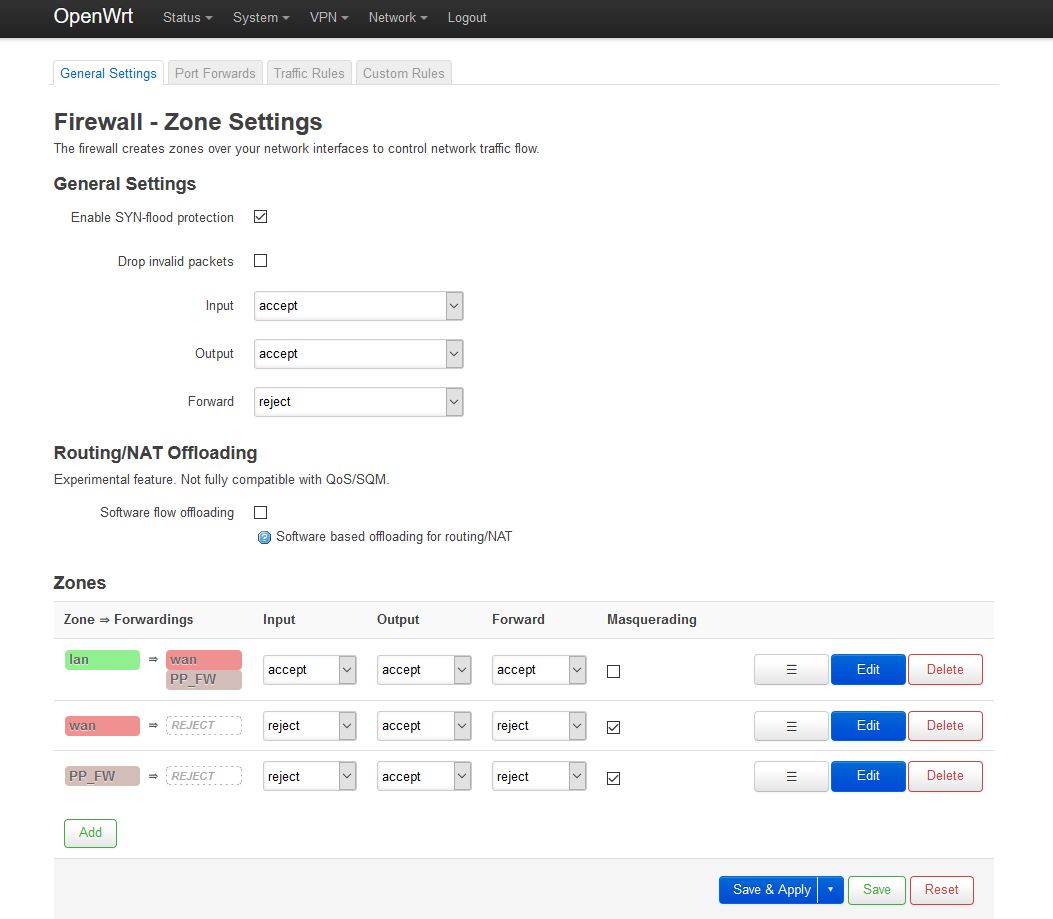
Firewall configuration
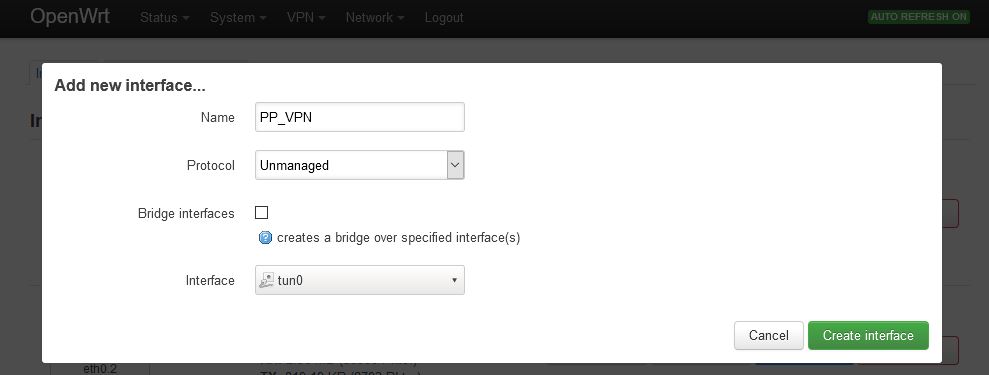
Navigate to the menu Network=>Interfaces and click on Add new interface….
- Name:
PP_VPN - Protocol:
Unmanaged - Interface: In the last line enter
tun0
Accept the settings with the Create interface button.
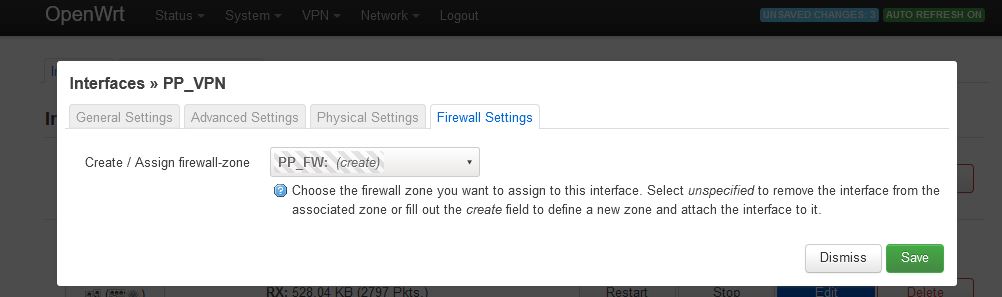
In the newly created interface change to the Firewall Settings tab. Open the choice field next to Create / Assign firewall-zone, and in the last line enter

Afterwards navigate to Network=>Firewall and to the right of
- Name:
PP_FW - Input:
reject - Output:
accept - Forward:
reject - Masquerading:
activate - MSS clamping:
activate - Covered networks:
PP_VPN
In the lower field select the following:
- Allow forward from source zones: activate
lan
Use the Save button to accept the settings and then click on Save & Apply.
Activate OpenVPN
Go to the menu Services=>OpenVPN and set the checkmark at Enabled. Then first click on the button Save & Apply and then start
Optional: Activate the kill-switch
Attention: This step activates the firewall protection ("kill switch"), which ensures in case off an interruption of the internet service no data can bypass the VPN tunnel. If you want to access the internet via your router without VPN too, you have to skip this step.
Navigate to Network=>Firewall and underneath Zones open the zone lan using the Edit button.
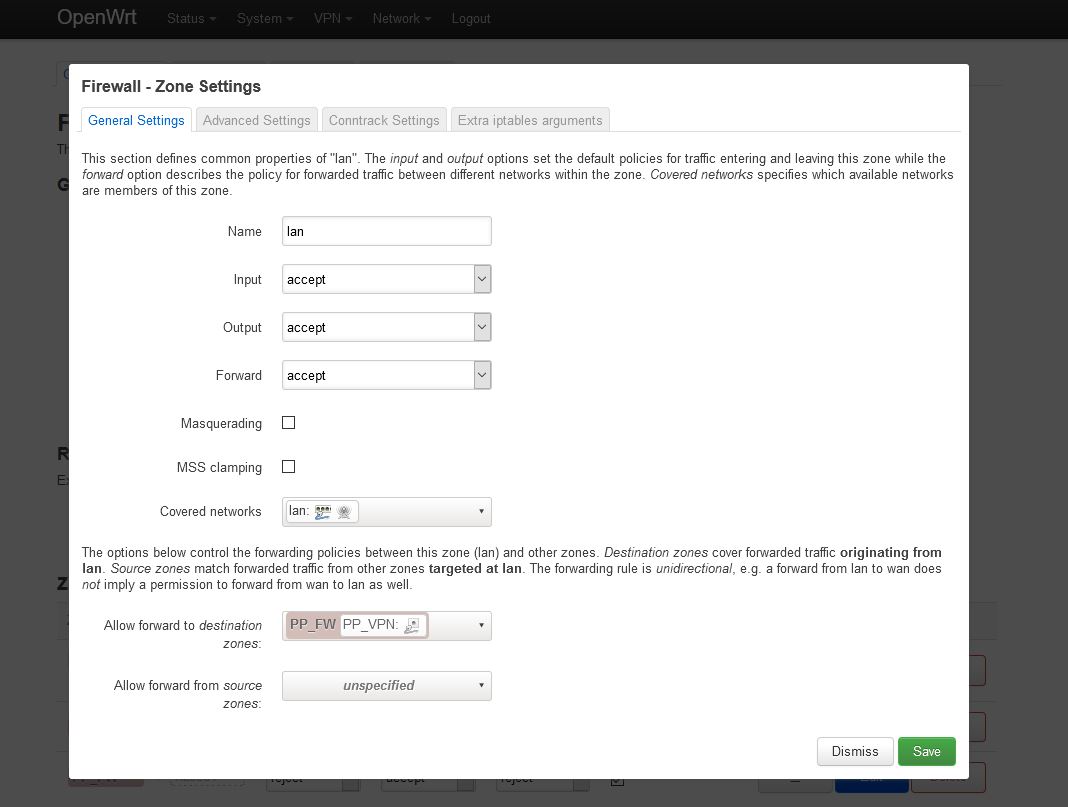
Scroll down and next to Allow forward to destination zones activate only PP_FW. Then click on the button Save & Apply.
If you want to disable the firewall protection ("kill switch") again, next to Allow forward to destination zones: additionally to PP_FW activate WAN and WAN6.
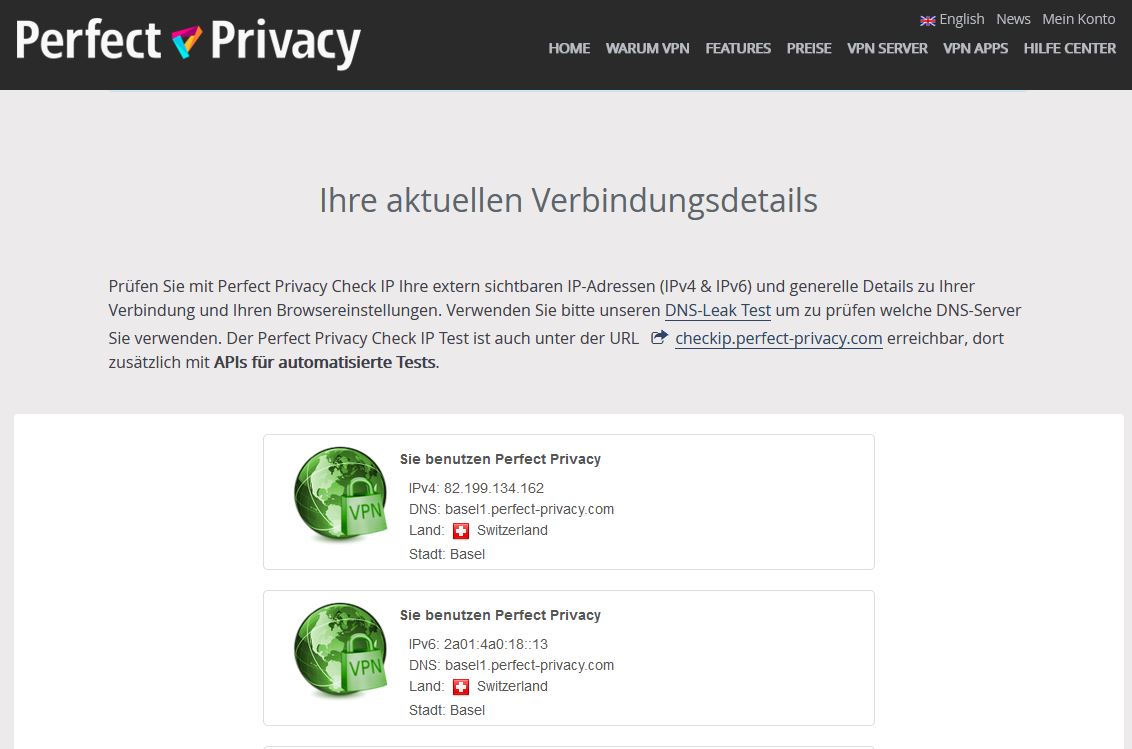
You can verify that the VPN connection is working correctly by visiting our Check-IP website from any device connected to the router.


Questions?
If you have any questions, comments or other feedback regarding this tutorial, please use the corresponding thread in our community forums.