Downloading the OpenVPN configuration files
Download the archive with OpenVPN configuration files and unpack it.
Download View alternate downloads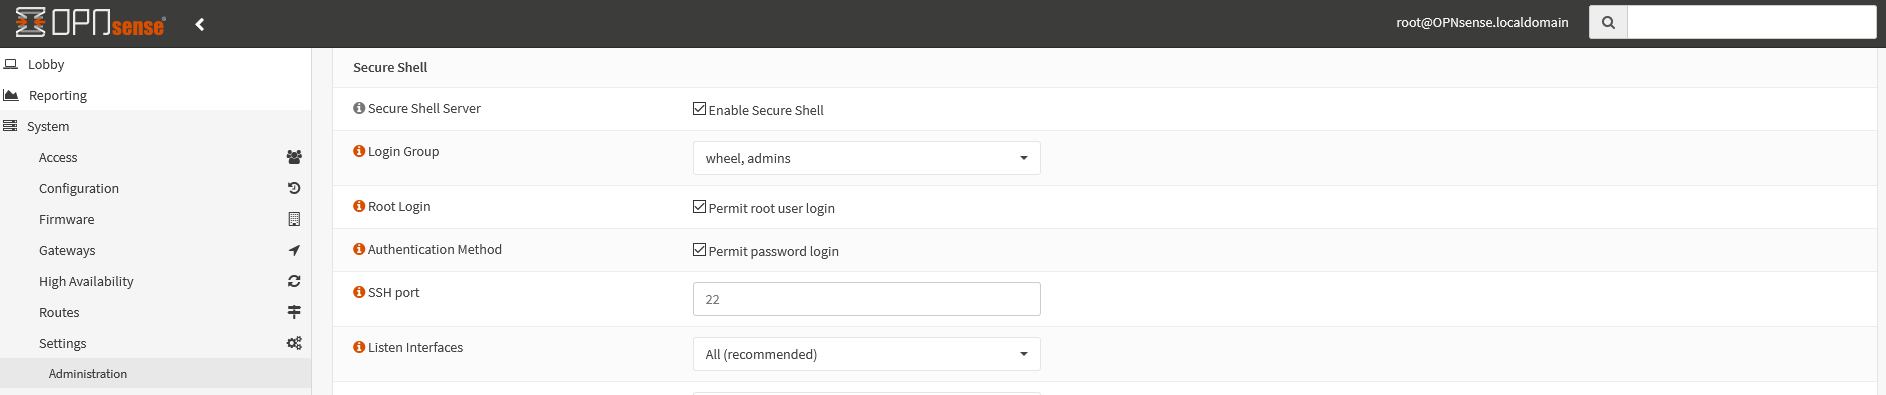
Activate SSH
Use the menu to go to System → Settings → Administration and activate the SSH server.
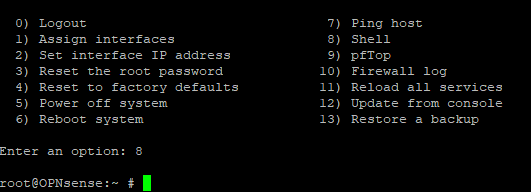
Use PuTTY or another terminal program of your choice to create a connection to OPNsense and pick option 8) Shell.
Visit the website https://github.com/ddowse/opnsense-vpn-dns and install the opnsense-vpn-dns script.
The script registers the DNS servers of the VPN provider, which are announced when a VPN connection gets established, to be used and removes them later when the connection is terminated.
Add certificates
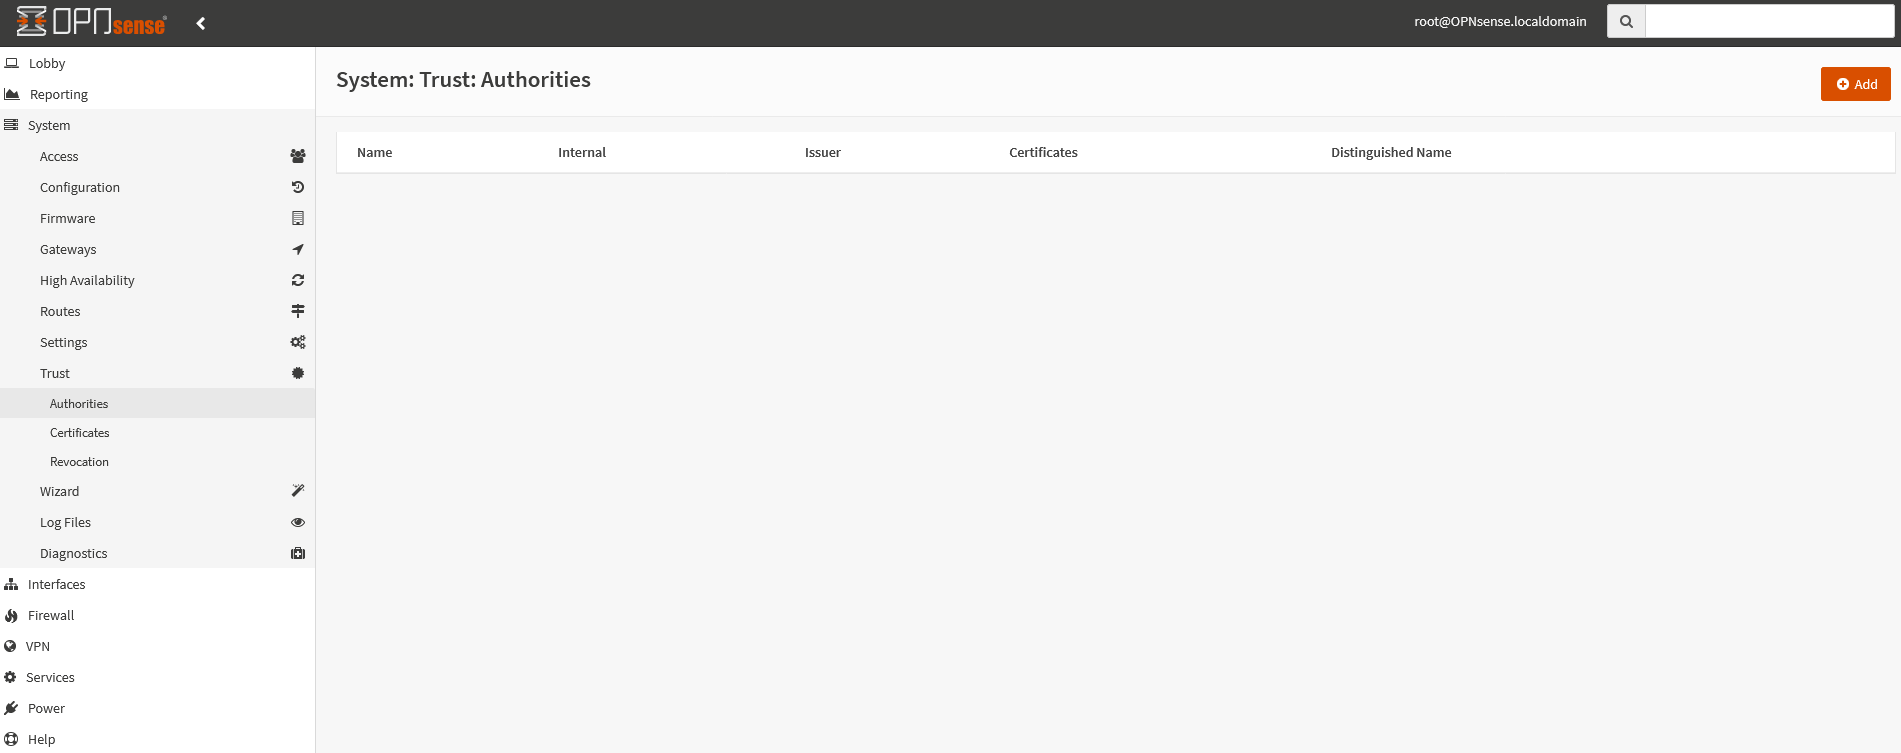
Use the menu to go to System → Trust → Authorities and click the + Add button.
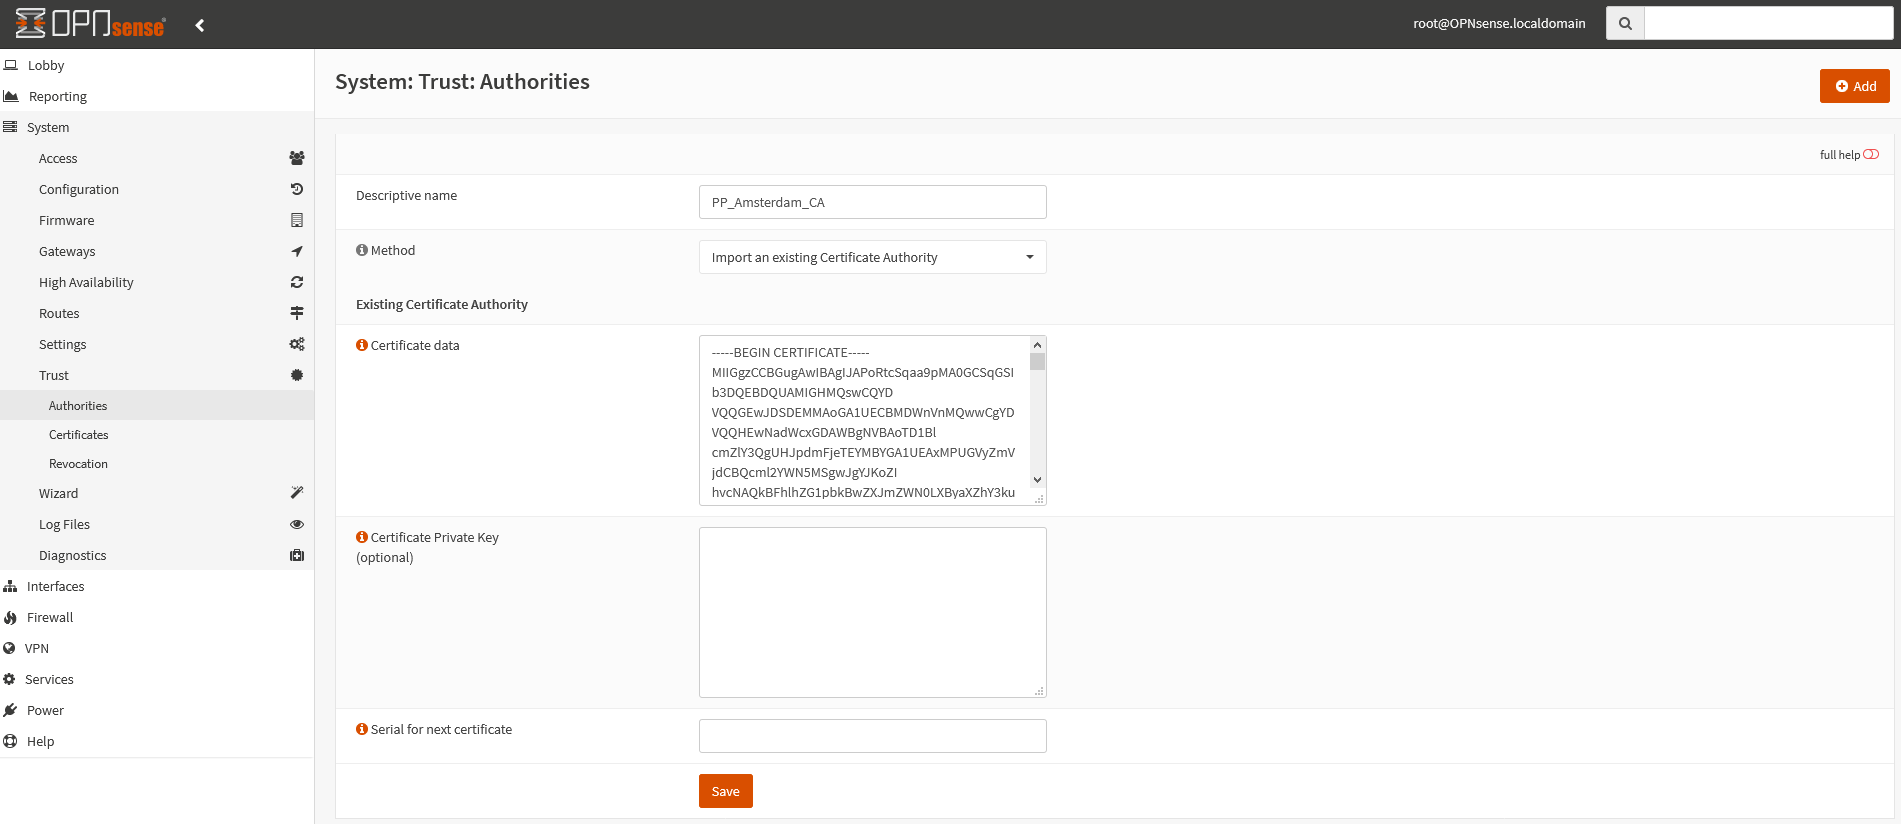
In the field Descriptive name enter
At Method choose Import an existing Certificate Authority.
Open one of the *.conf files from the opnsense_op24_udp_v4_AES128CBC_AU_in_ci.zip archive and copy the content between the <ca></ca> tags into the field Certificate data, as shown in the picture on the left.
Afterwards click on the Save button.

Use the menu to go to System → Trust → Certificates and click on the button + Add.
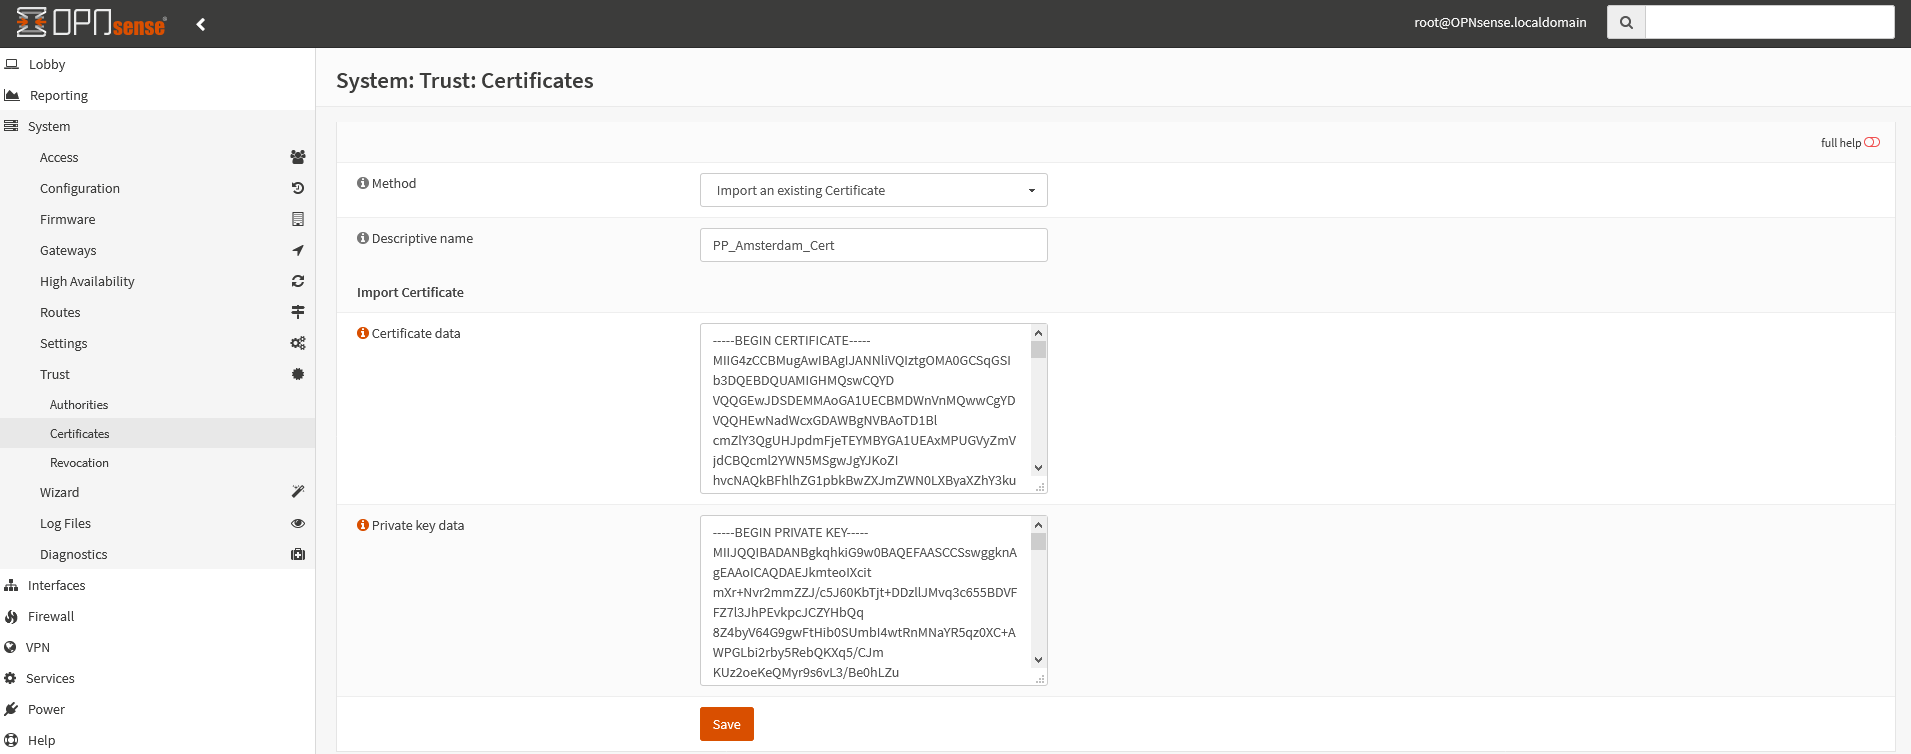
At Method pick Import an existing Certificate.
In the field Descriptive name enter
Copy the content between the <cert></cert> tags into the field Certificate data and the content between the <key></key> tags into the field Private key data.
Click on the Save button.
Set up OpenVPN
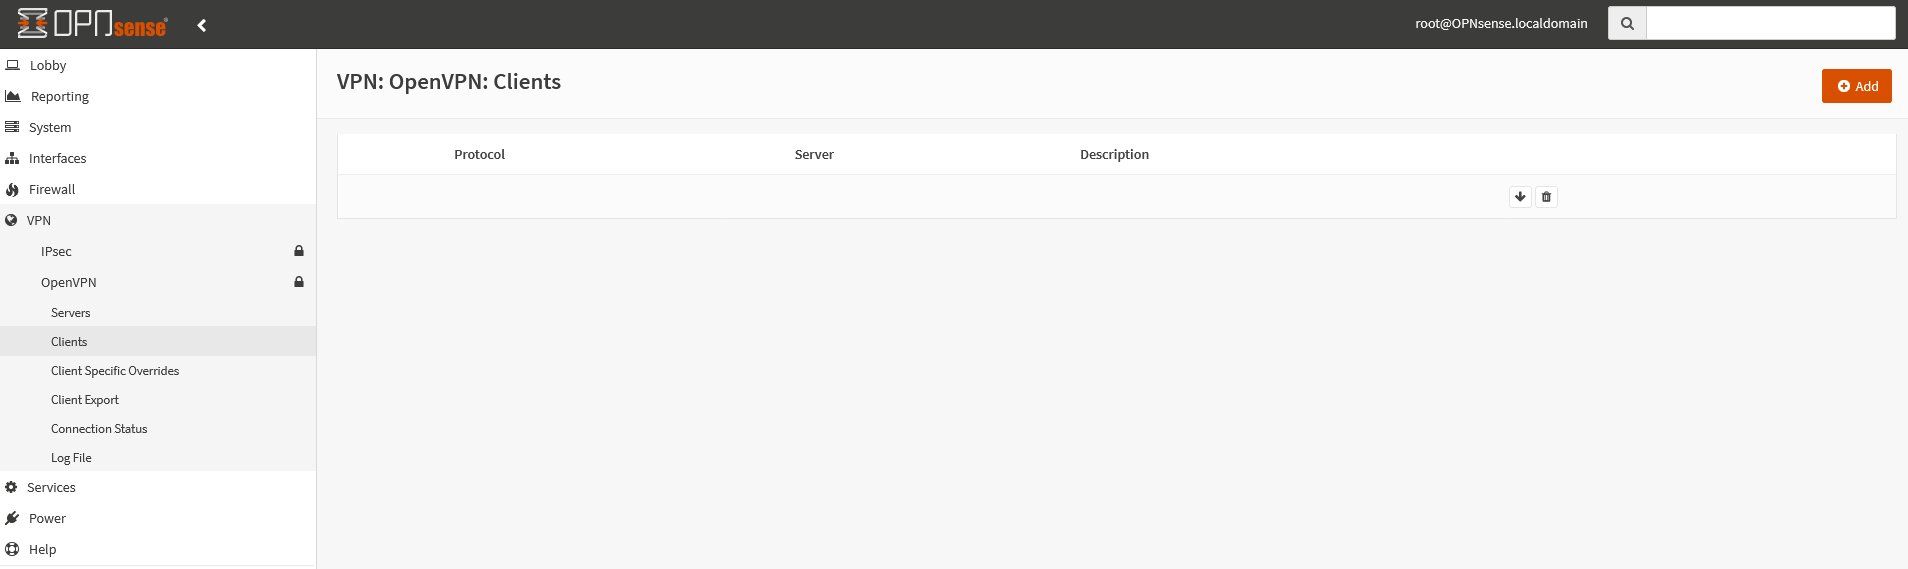
Now use the menu to go to VPN → OpenVPN → Clients and click on the button + Add.
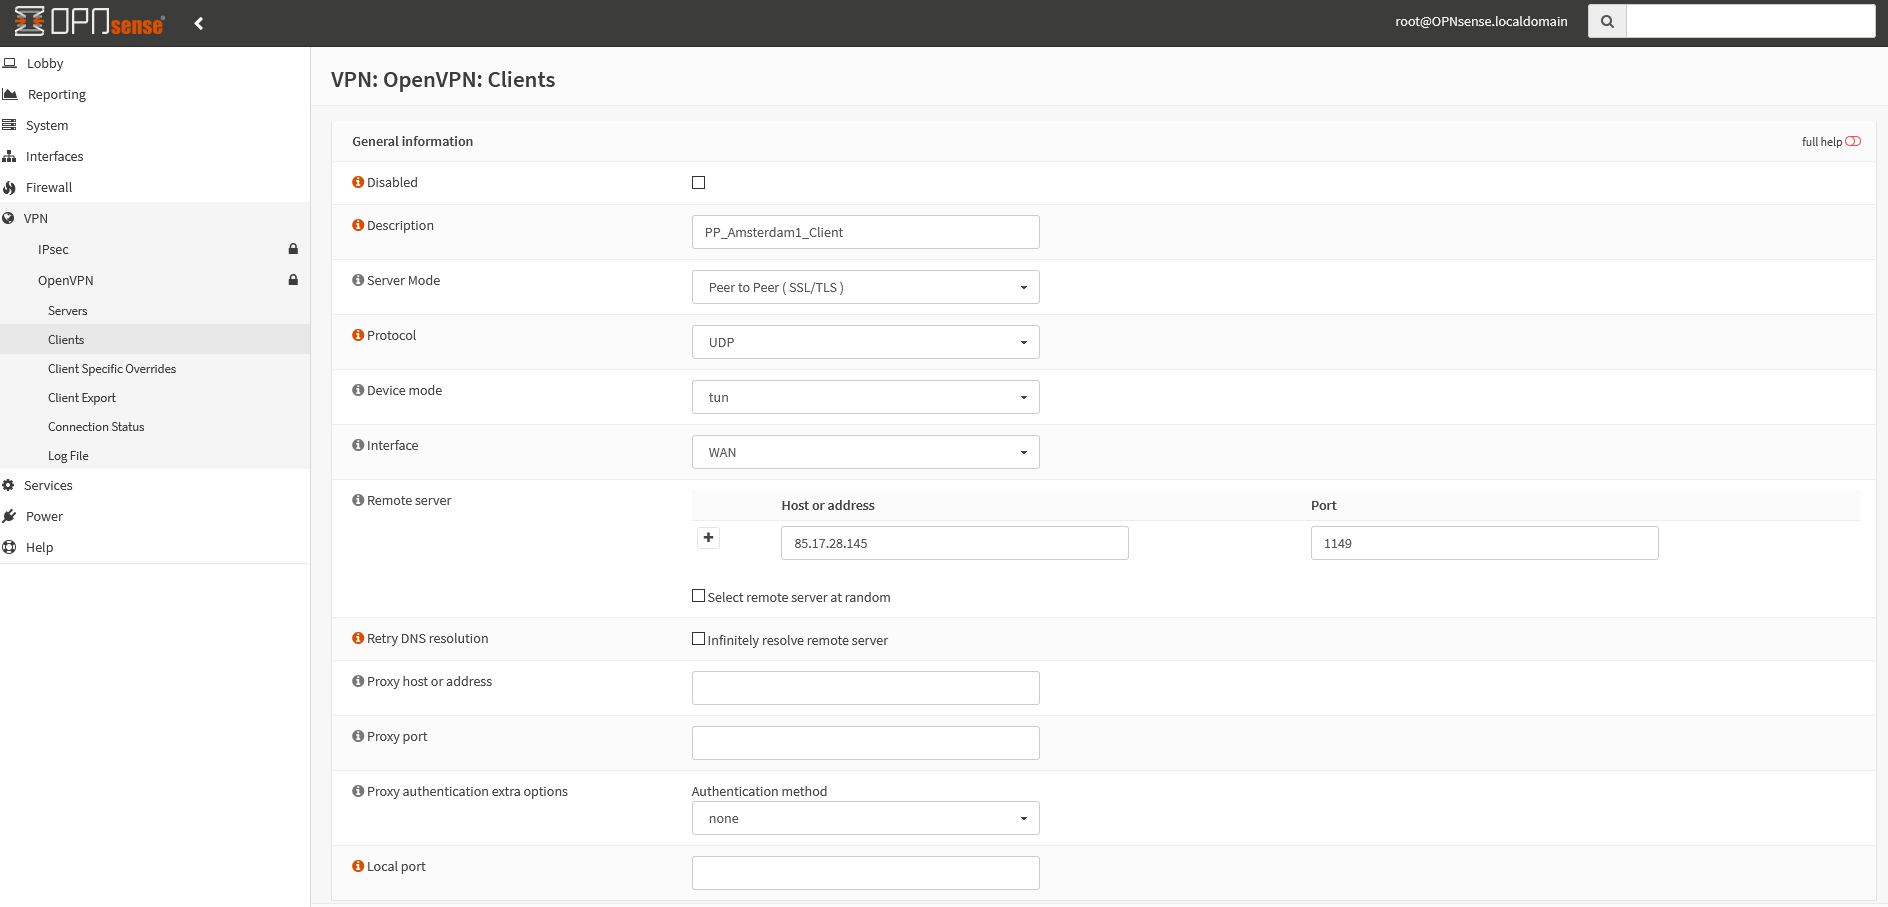
- Description:
PP_Amsterdam1_Client - Protocol:
UDP - Interface:
WAN - Server Host or Address:
85.17.28.145 oramsterdam1.perfect-privacy.com - Server Port:
1149
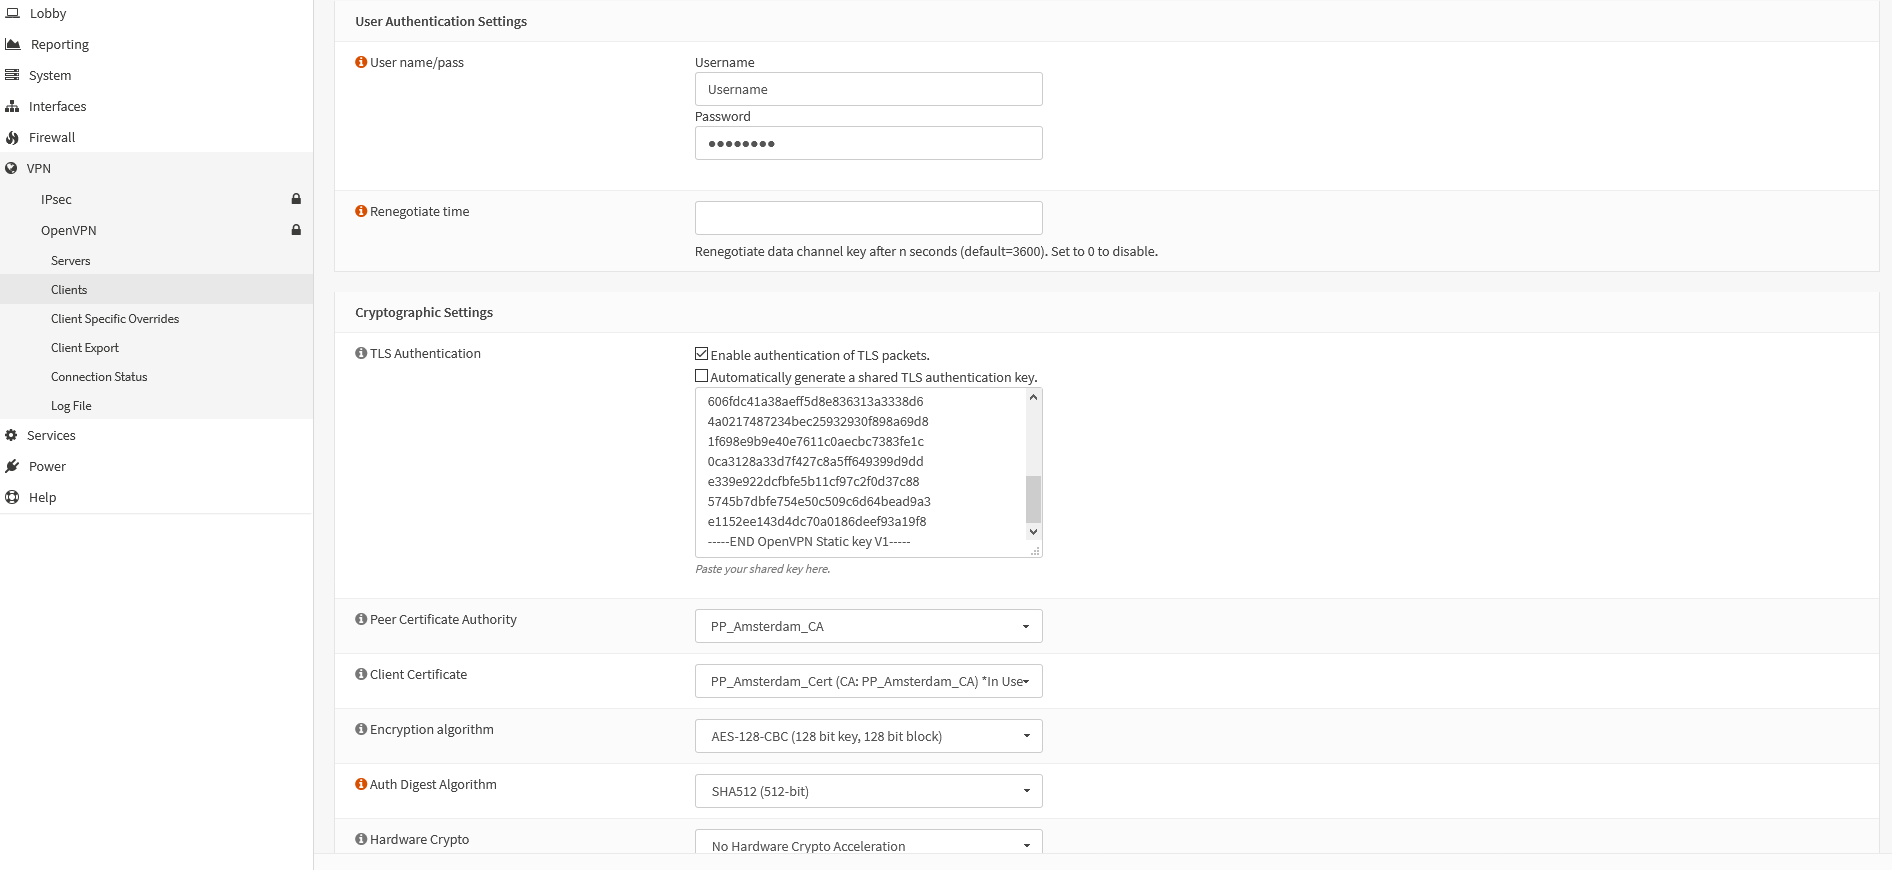
- Username:
Your Perfect Privacy username - Password:
Your Perfect Privacy password
Deactivate the option Automatically generate a shared TLS authentication key and copy the text between the <tls-auth></tls-auth> tags from the *.conf file into the field below.
- Peer Certificate Authority:
PP_Amsterdam_CA - Client Certificate:
PP_Amsterdam_Cert
Tip: Depending on the CPU performance on your router you may want to use the weaker encryption AES-128-CBC to get better speed and bandwidth. In this case choose AES-128-CBC for Encryption algorithm.
- Auth Digest Algorithm:
SHA512
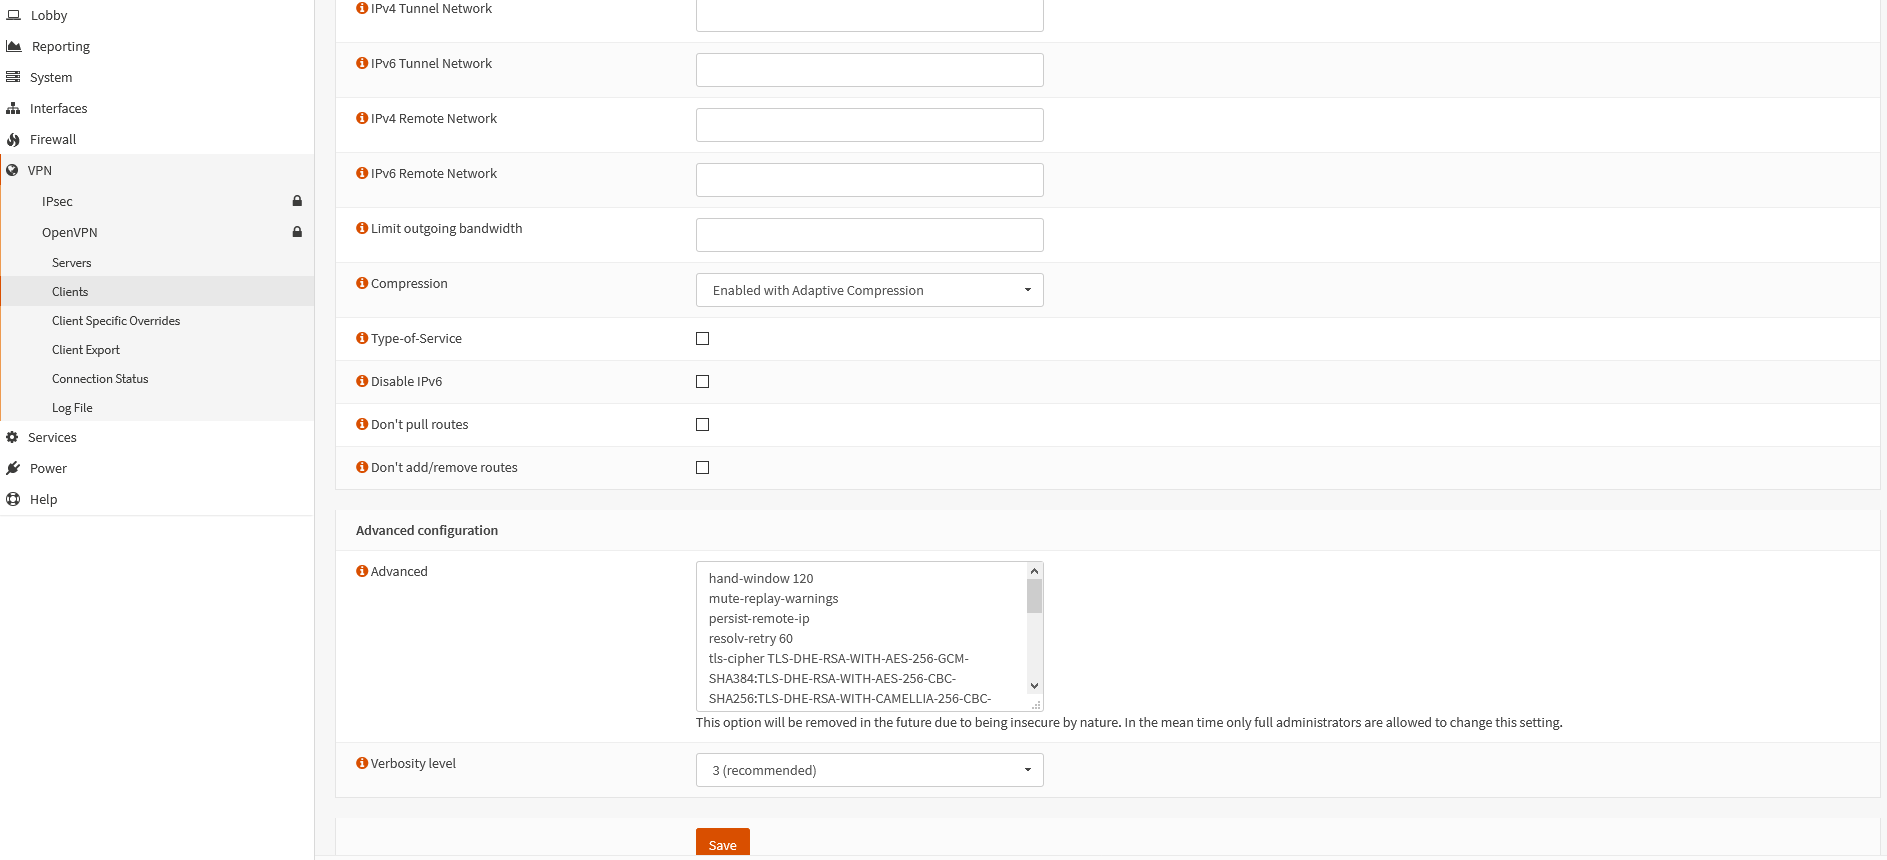
- Compression:
Enabled with Adaptive Compression - Disable IPv6: Leave disabled to be able to use IPv6
Copy the following text block into the field Advanced:
hand-window 120
mute-replay-warnings
persist-remote-ip
reneg-sec 3600
resolv-retry 60
tls-cipher TLS_CHACHA20_POLY1305_SHA256:TLS-DHE-RSA-WITH-AES-256-GCM-SHA384:TLS-DHE-RSA-WITH-AES-256-CBC-SHA:TLS-DHE-RSA-WITH-AES-128-GCM-SHA256:TLS-DHE-RSA-WITH-AES-128-CBC-SHA:TLS_AES_256_GCM_SHA384:TLS-RSA-WITH-AES-256-CBC-SHA
tls-timeout 5
tun-mtu 1500
fragment 1300
mssfix
remote-cert-tls server- Verbosity level:
3 (recommended)
Now click on the Save button.
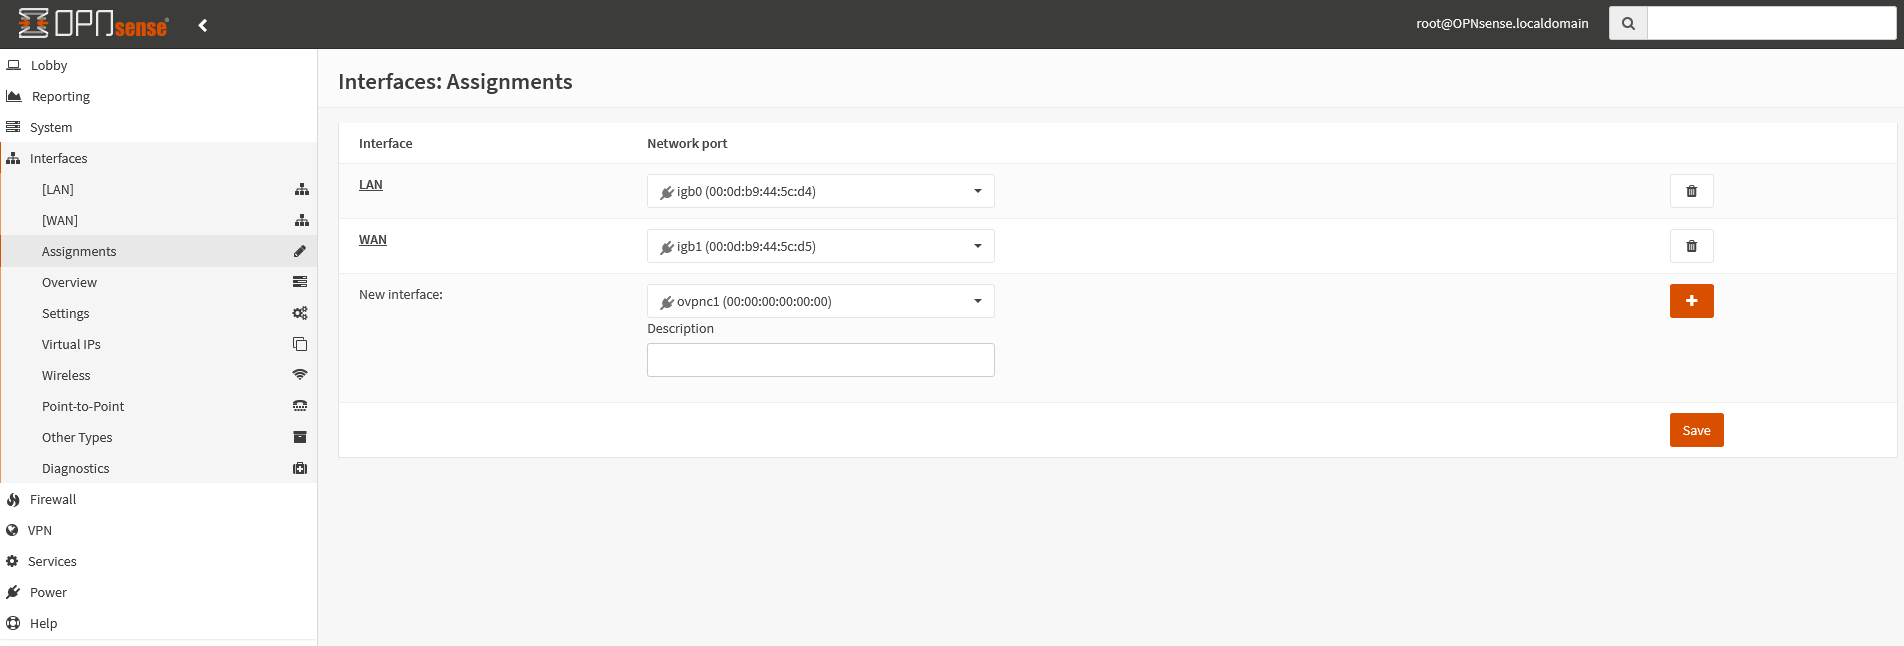
Use the menu to go to Interfaces → Assignments and at New Interface select
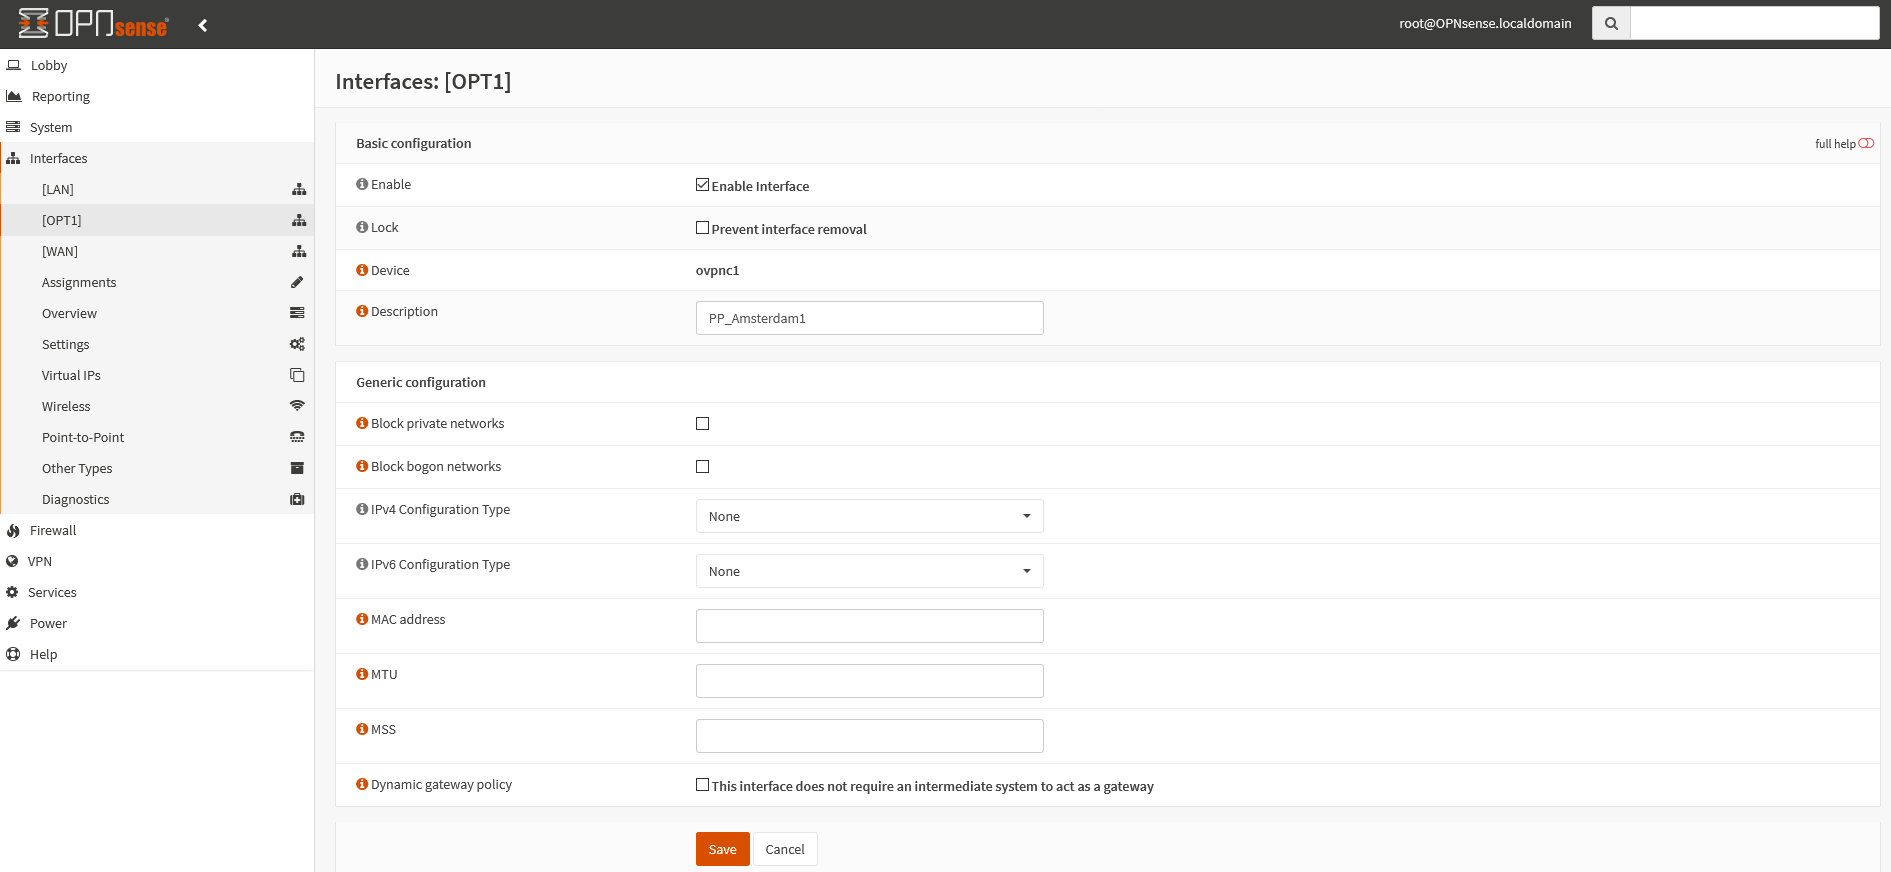
Click on the newly generated interface and as Description enter

This step is only required for an IPv6 connection. Skip it if you don't want to use IPv6.
Navigate to the menu Firewall → Rules → WAN and create an ICMP rule for the IPv6 protocol with the following options:
- Action:
pass - Interface:
WAN - TCP/IP Version:
IPv6 - Protocol:
ICMP - ICMP Type:
Echo request - Source:
any - Destination:
any
Backup & Restore
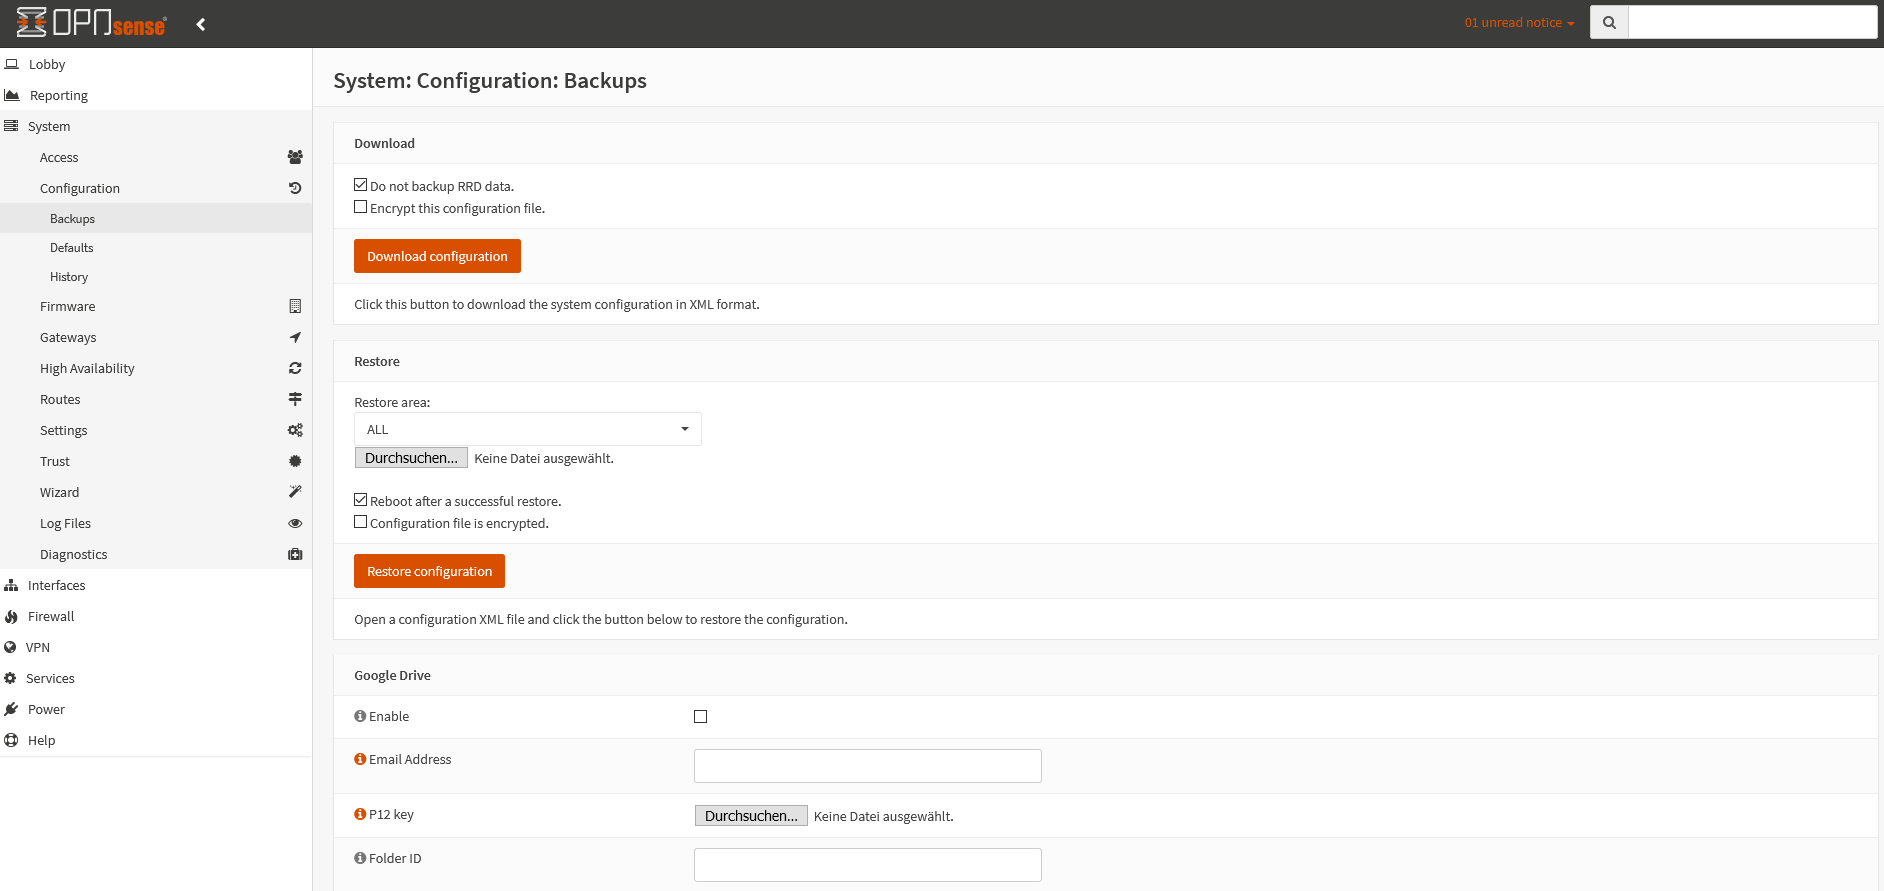
Use the menu to navigate to System → Configuration → Backups and create a backup of the current configuration by using Download configuration. Should you later wish to get rid of the OpenVPN configuration you may do so using Restore configuration.
Set up DNS-Leak protection
If you want to access the Internet without VPN as well you should configure public name servers, for instance those from Cloudflare, Google or any from the OpenNIC-Project. If the VPN is connected, DNS requests will be sent anonymously over the VPN tunnel.
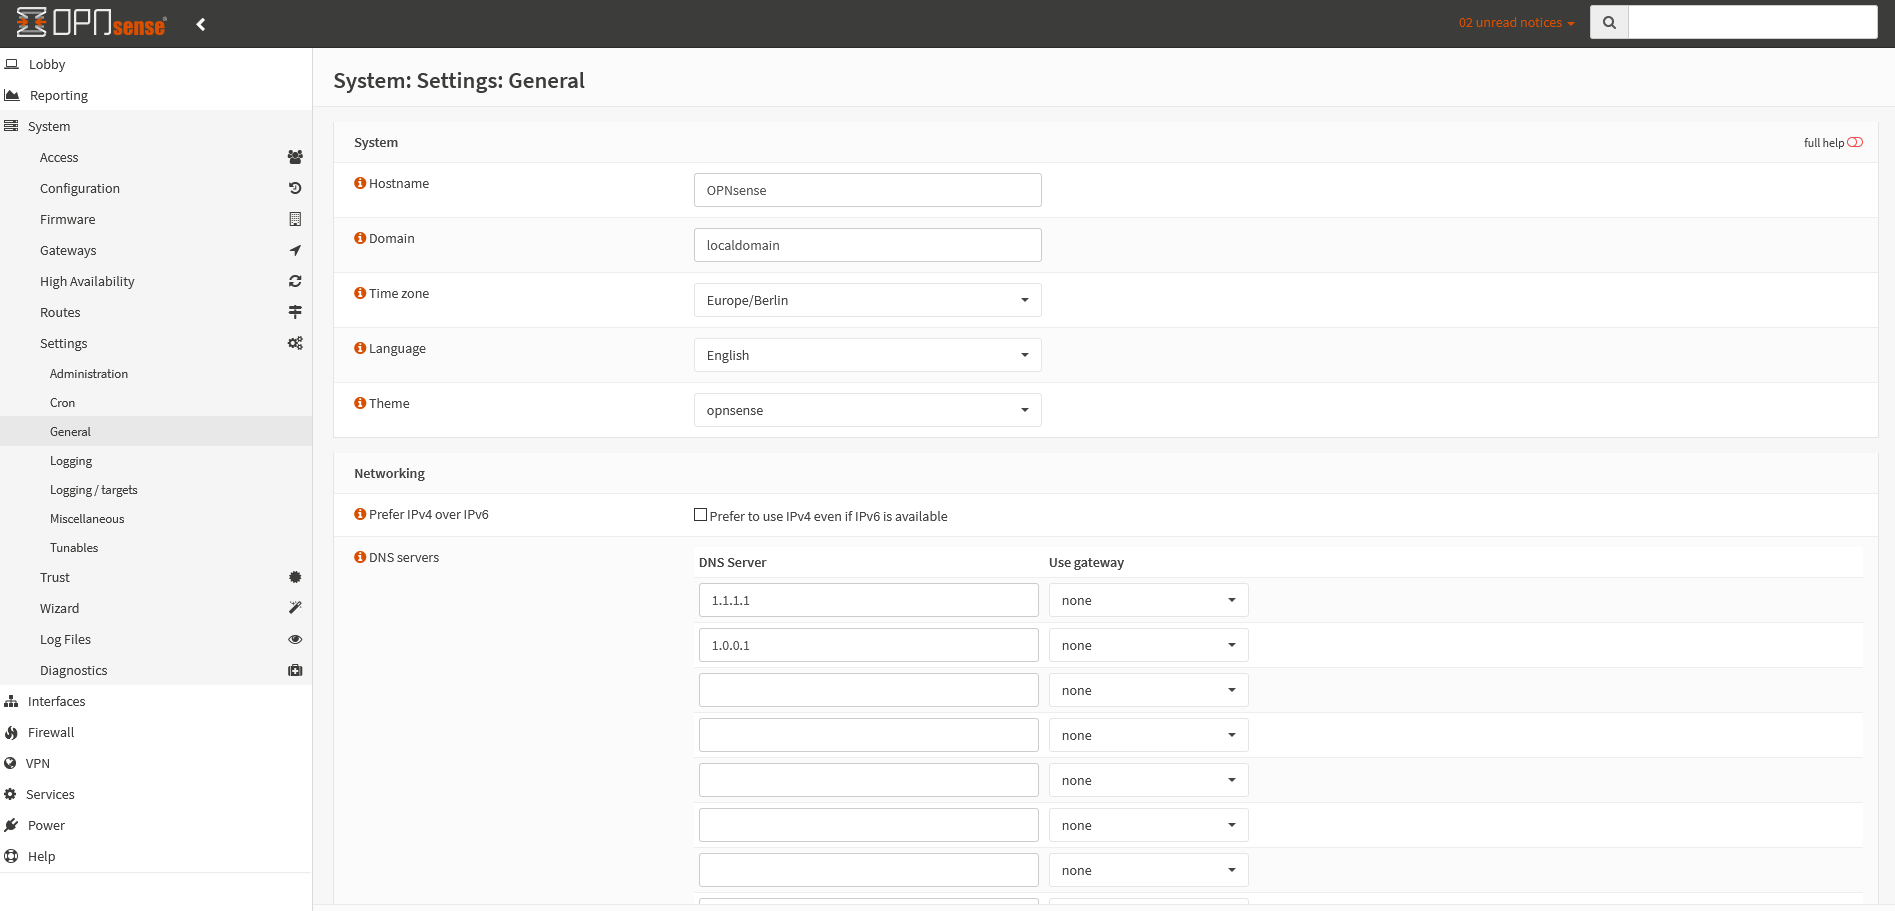
Go to the menu System → General Settings and enter at least two DNS servers of your choice. In this example we are using the DNS servers 1.1.1.1 and 1.0.0.1.
To configure DNS servers for IPv6 too, optionally add at least two DNS servers (for example 2606:4700:4700::1111 and 2606:4700:4700::1001).
Deactivate the option Allow Override of DNS server list by DHCP/PPP on WAN. Leave the other settings as they are.
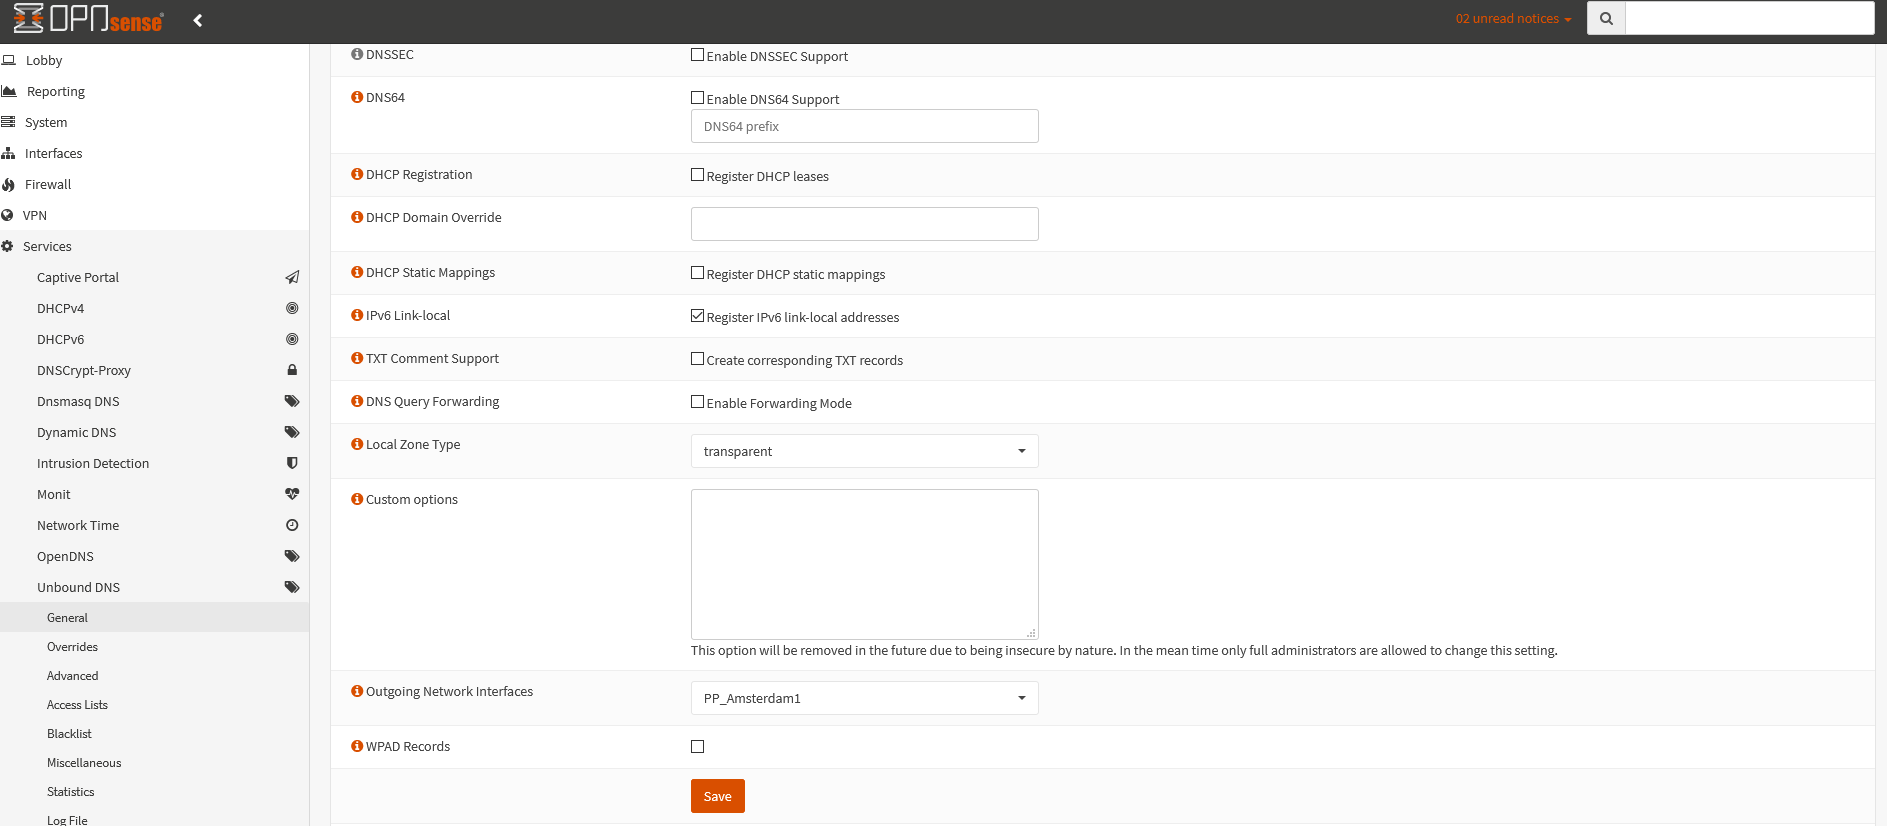
Next to Advanced click on Show Advanced Options and at Outgoing Network Interfaces select
Note: With the default settings DNS queries are sent directly to the internet servoce provider, therefore it is important to select a VPN interface as outgoing network interface for DNS queries to prevent DNS leaks.
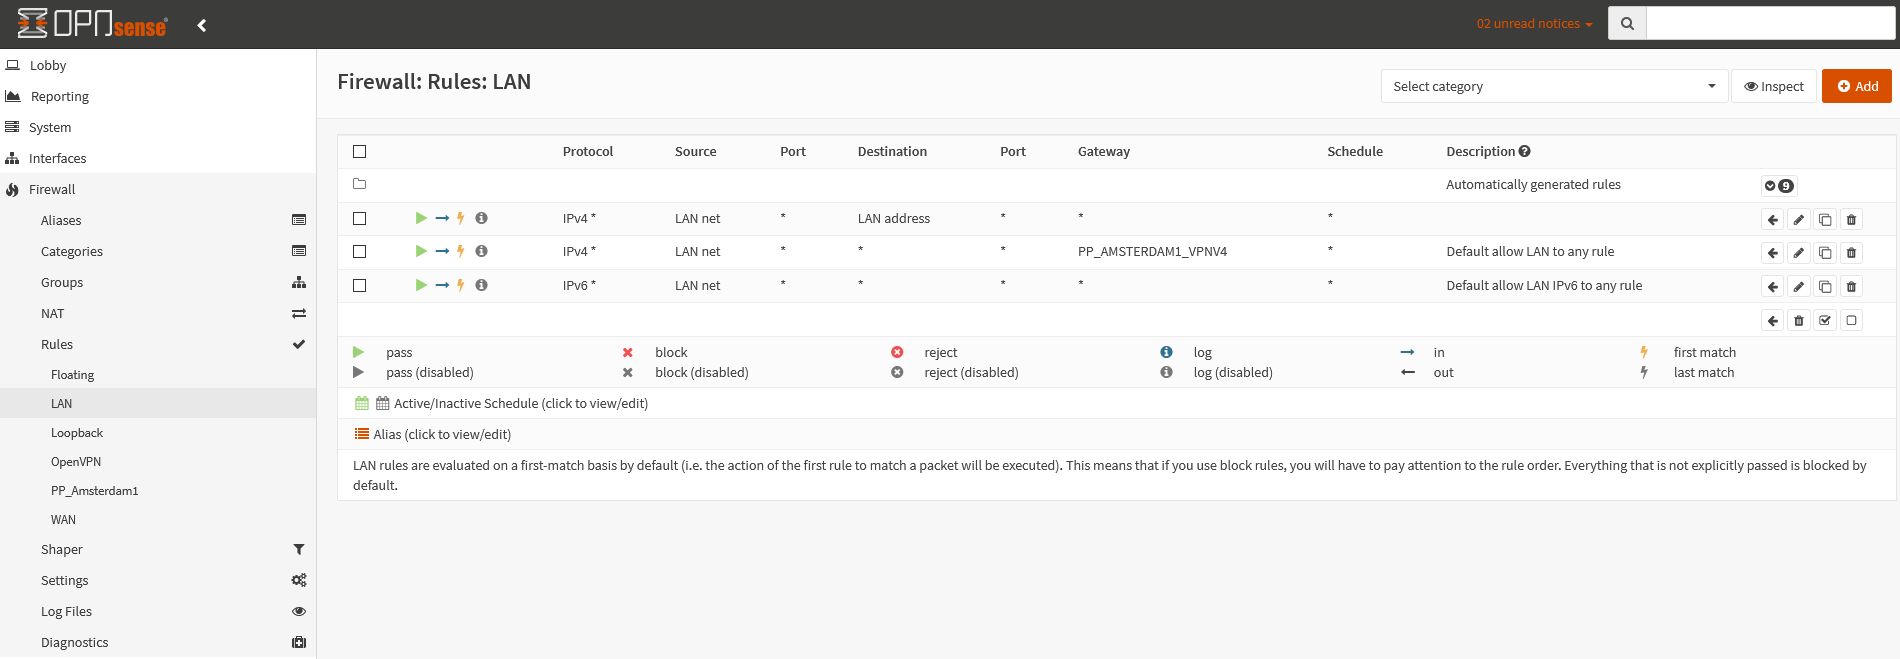
Navigate to Firewall → Rules → LAN and deactivate the rule for IPv6 (if the use of IPv6 is not desired).
Add a new firewall rule above the existing ones with the following settings:
- Action:
pass - Quick:
Set checkmark - Direction:
in - TCP/IP Version:
IPv4+IPv6 - Protocol:
any - Source:
LAN net - Destination:
LAN address
Save with a click on the Save button.
Then open the IPv4 rule by clicking on the pen-symbol (edit). Choose
Set up Kill Switch
CAUTION: This step will activate the firewall protection (leak protection or „kill switch“).
If you proceed with these steps, the Internet connection will only work when a VPN tunnel has been established.
Open the IPv4 rule by clicking on the pen symbol (Edit). Activate Advanced options by clicking on Hide/Show.
At Set local tag enter:
If needed repeat this step for the IPv6 rule. Otherwise deactivate the IPv6 rule.
The traffic thereby is happening via the selected gateways only.
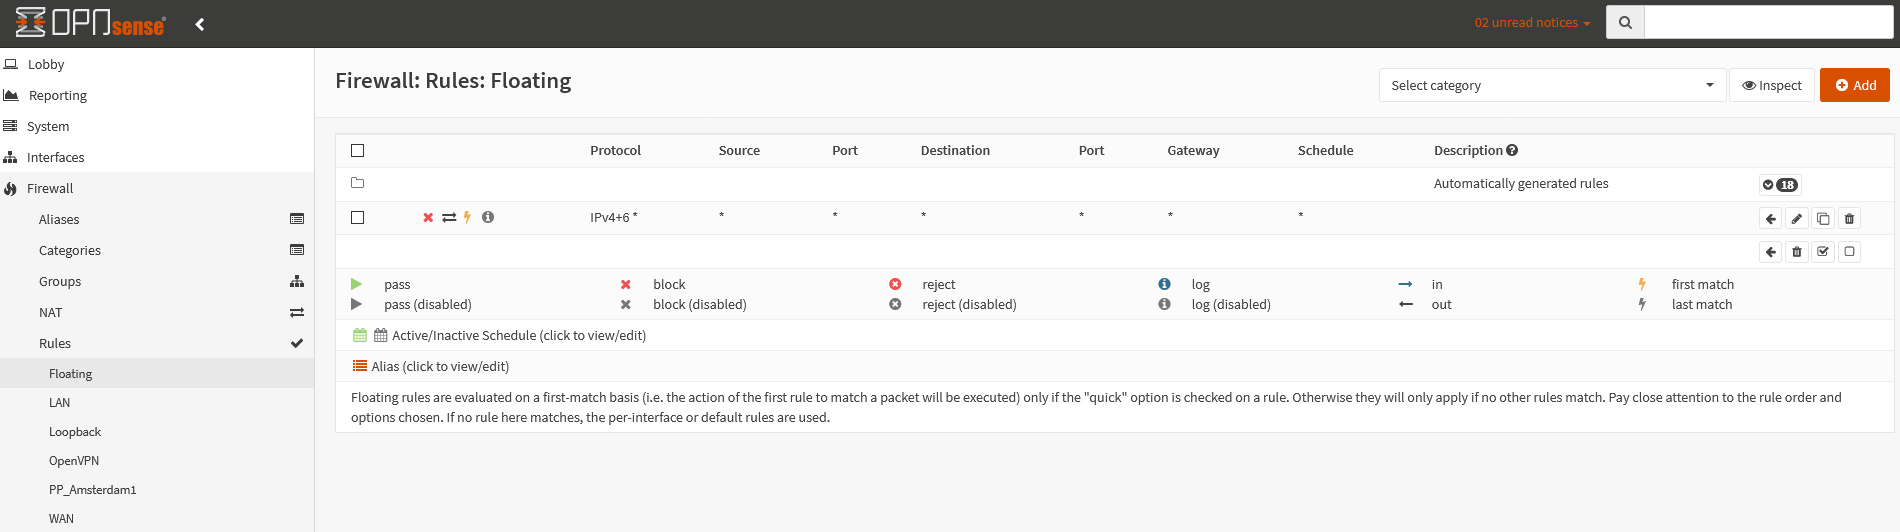
Now a floating rule is required to ensure all traffic is blocked in case the OpenVPN connection is offline.
Change to Firewall → Rules → Floating and create a new block-rule with the following settings:
- Action:
Block - Quick:
Set checkmark - Interface:
WAN - Direction:
any - TCP/IP Version:
IPv4+IPv6 - Protocol:
any - Source:
any - Destination:
any
Activate Advanced options by clicking on Hide/Show.
- Match local tag:
NO_WAN_EGRESS
Then save.
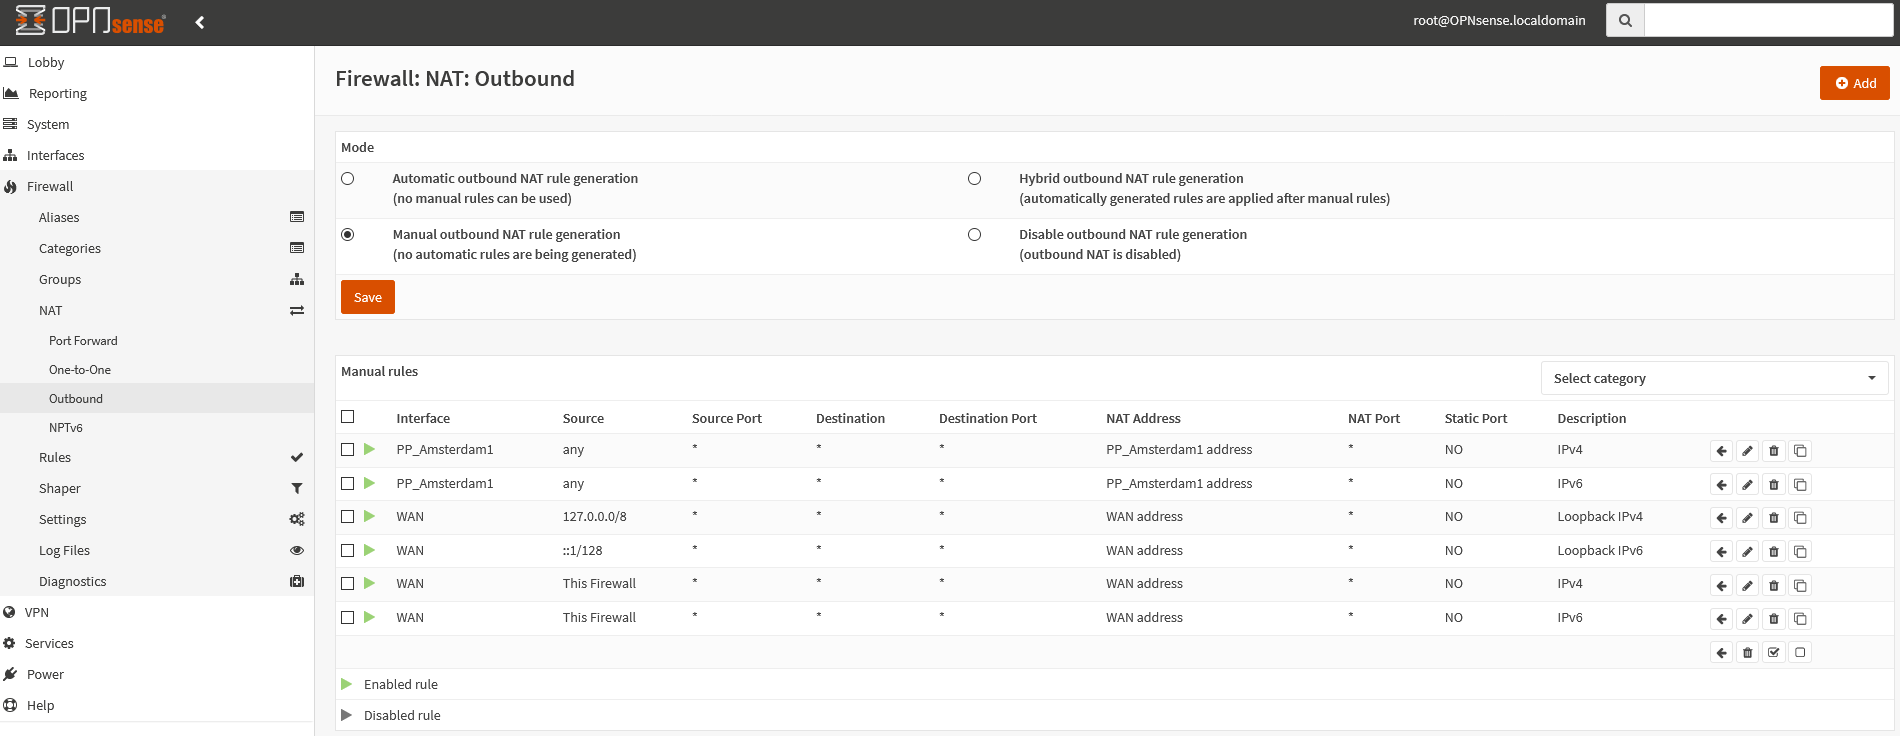
Use the menu to go to Firewall → NAT → Outbound and select the option Manual Outbound NAT rule generation and click on Save.
Create the following rules, as shown in the image on the left. The first two NAT rules are with the interface
- Interface:
PP_Amsterdam1 - TCP/IP Version:
IPv4 - Translation / target:
PP_Amsterdam1 Address - Description:
IPv4
- Interface:
- Interface:
PP_Amsterdam1 - TCP/IP Version:
IPv6 - Translation / target:
PP_Amsterdam1 Address - Description:
IPv6
- Interface:
- Interface:
WAN - TCP/IP Version:
IPv4 - Source:
Single host or network 127.0.0.0/8 - Translation / target:
WAN Address - Description:
Loopback IPv4
- Interface:
- Interface:
WAN - TCP/IP Version:
IPv6 - Source:
Single host or network ::1/128 - Translation / target:
WAN Address - Description:
Loopback IPv6
- Interface:
- Interface:
WAN - TCP/IP Version:
IPv4 - Source:
This firewall - Translation / target:
WAN Address - Description:
IPv4
- Interface:
- Interface:
WAN - TCP/IP Version:
IPv6 - Source:
This firewall - Translation / target:
WAN Address - Description:
IPv6
- Interface:
The following NAT rules are needed for smooth process (connections from the router itself to the internet).
Check VPN connection
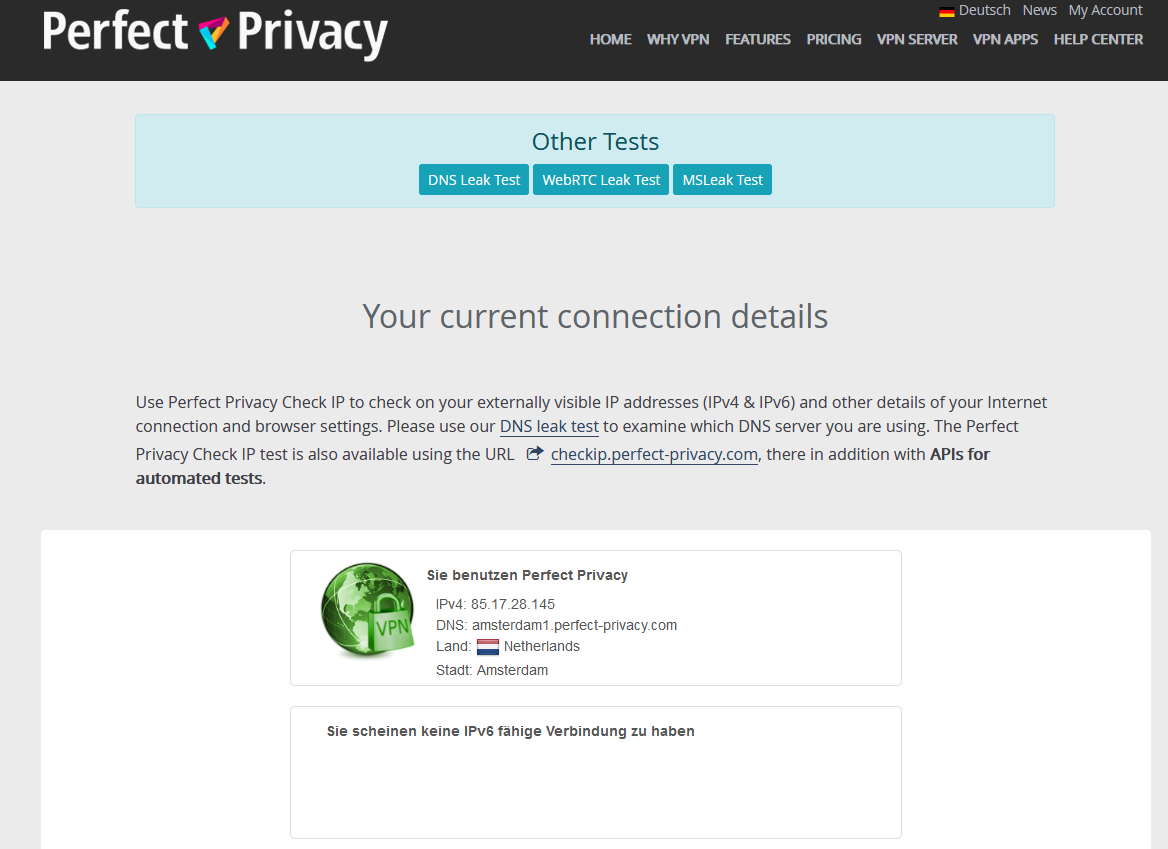
You can verify that the VPN connection is working properly by visiting our Check IP website on any device connected to the Internet via the router.
If the VPN connection doesn't work, the cause is most likely the opnsense-vpn-dns script. There is an easy workaround: At the end of configuring terminate the OpenVPN client using the menu VPN → OpenVPN → Connection status and then start the VPN connection again.


Questions?
If you have any questions, comments or other feedback regarding this tutorial, please use the corresponding thread in our community forums.