This manual describes the functions and features of the Windows VPN Manager in detail.
If you need help with the installation, go to the installation instructions first.
VPN Manager
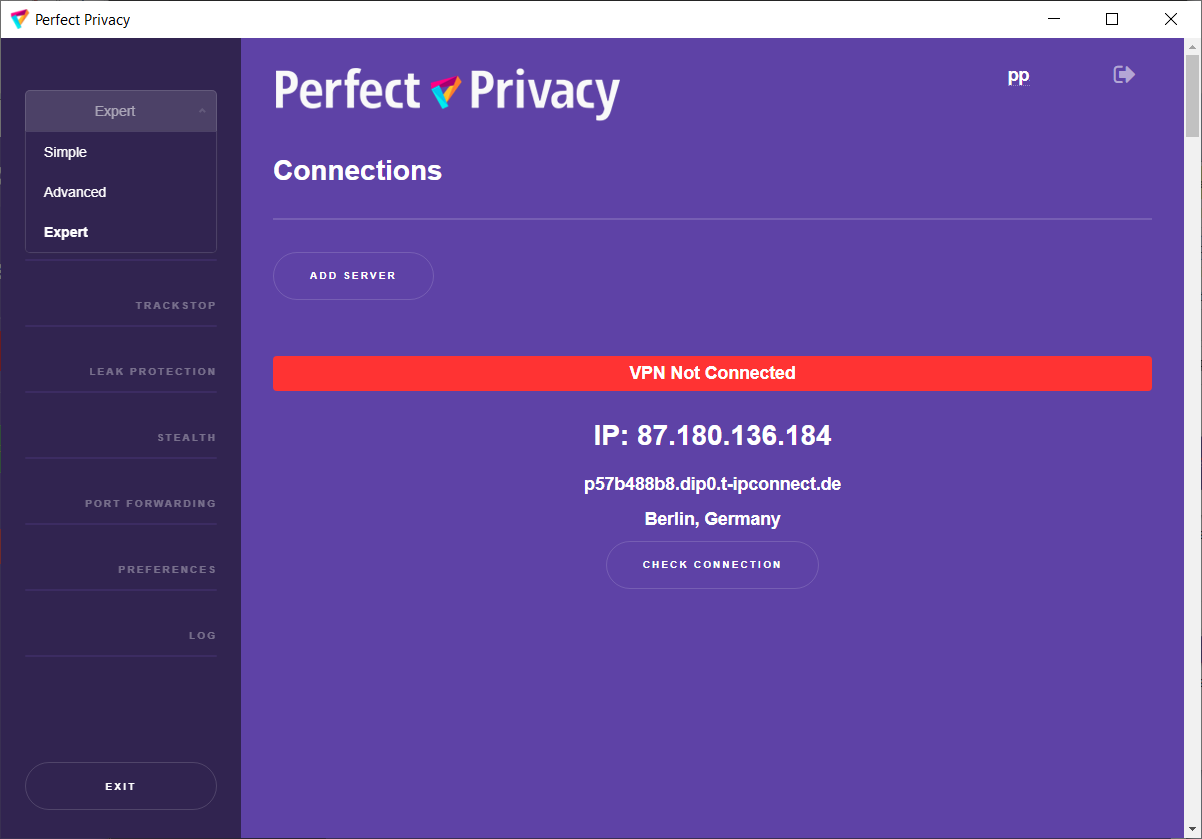
The VPN Client has 3 different modes, which you can change in the top left of the window: Simple, Advanced and Expert. After the first installation, Simple is the default and contains the most important settings for your security.
If you want to use more functions, you can use Expert and Advanced for further settings, which are described below. If you have configured yourself, you can return to the standard settings by clicking on Simple. All settings you have made in Expert and Advanced mode will then be reset and may have to be made again. All setting options in Expert mode are described below.
Dashboard
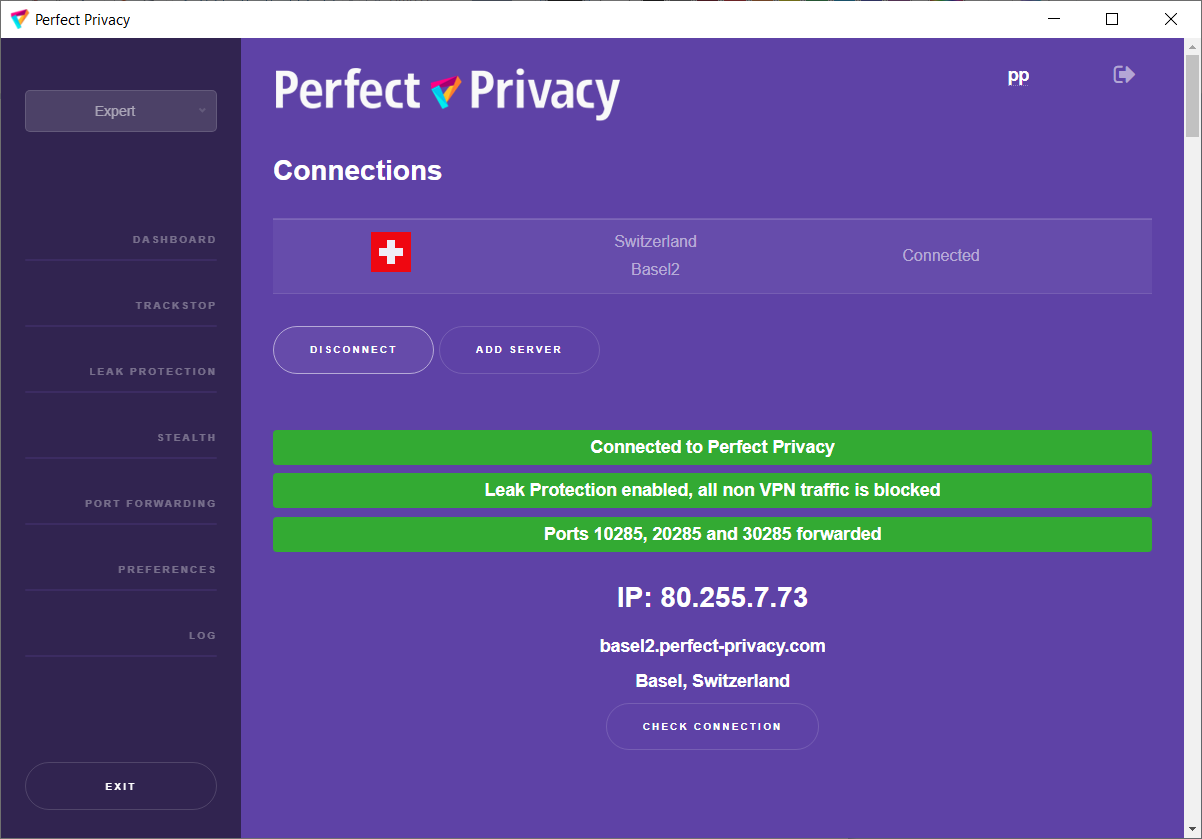
In the VPN Client dashboard, you can connect to a server of your choice by clicking on the corresponding Connect button. We have selected one of our gigabit servers for you by default. However, we recommend selecting a server location that is physically close to you in order to have the best possible connection (speed and ping). To do this, click on the Disconnect button and then on the Remove button.
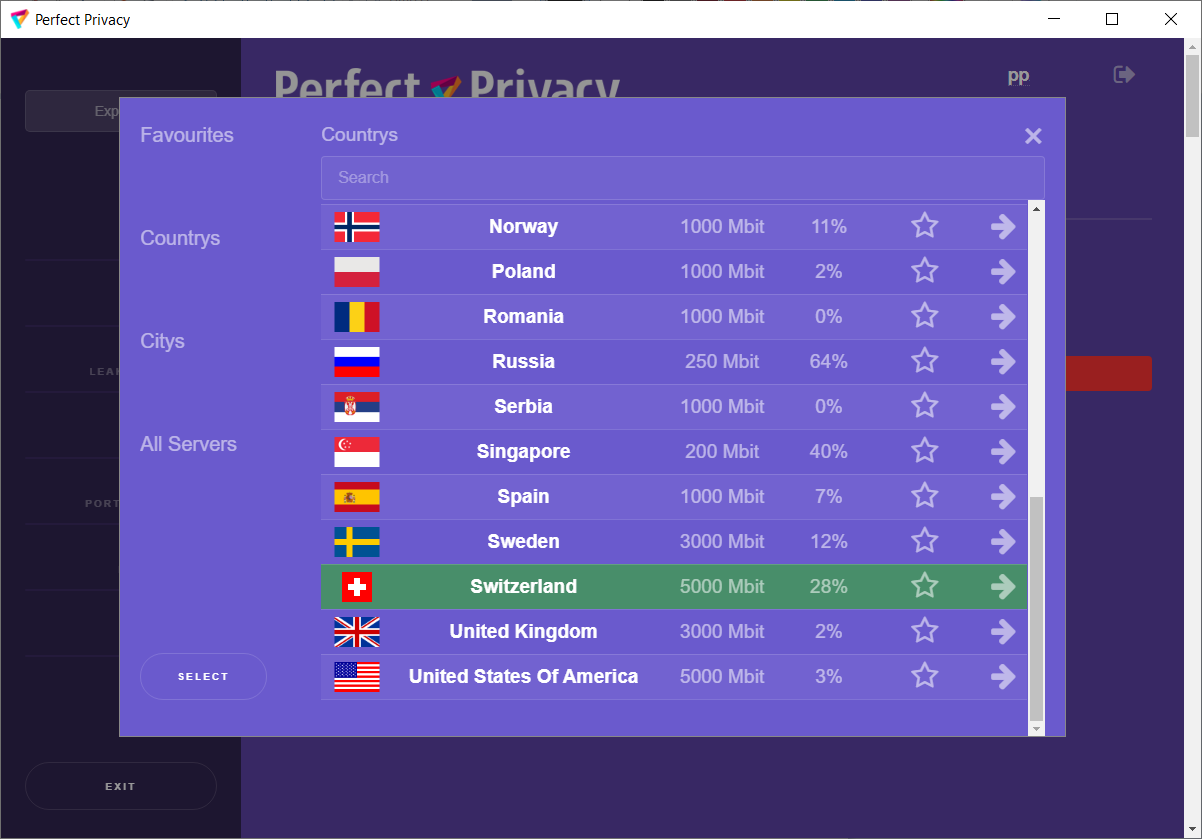
Then click the Add Server button to select your desired server. In the server overview displayed, you can either search for your country or scroll until you find the desired server location. On the left, you will see Favourites, Countries, Cities or All servers, so that you can quickly filter out the ideal server for you. You can set favourites by clicking on the star symbol of your server. Under Load you can see what percentage of the server's capacity is used. By clicking on the desired server, it is displayed as green. Click on the Select button to return to the Dashboard and click on the Connect button.
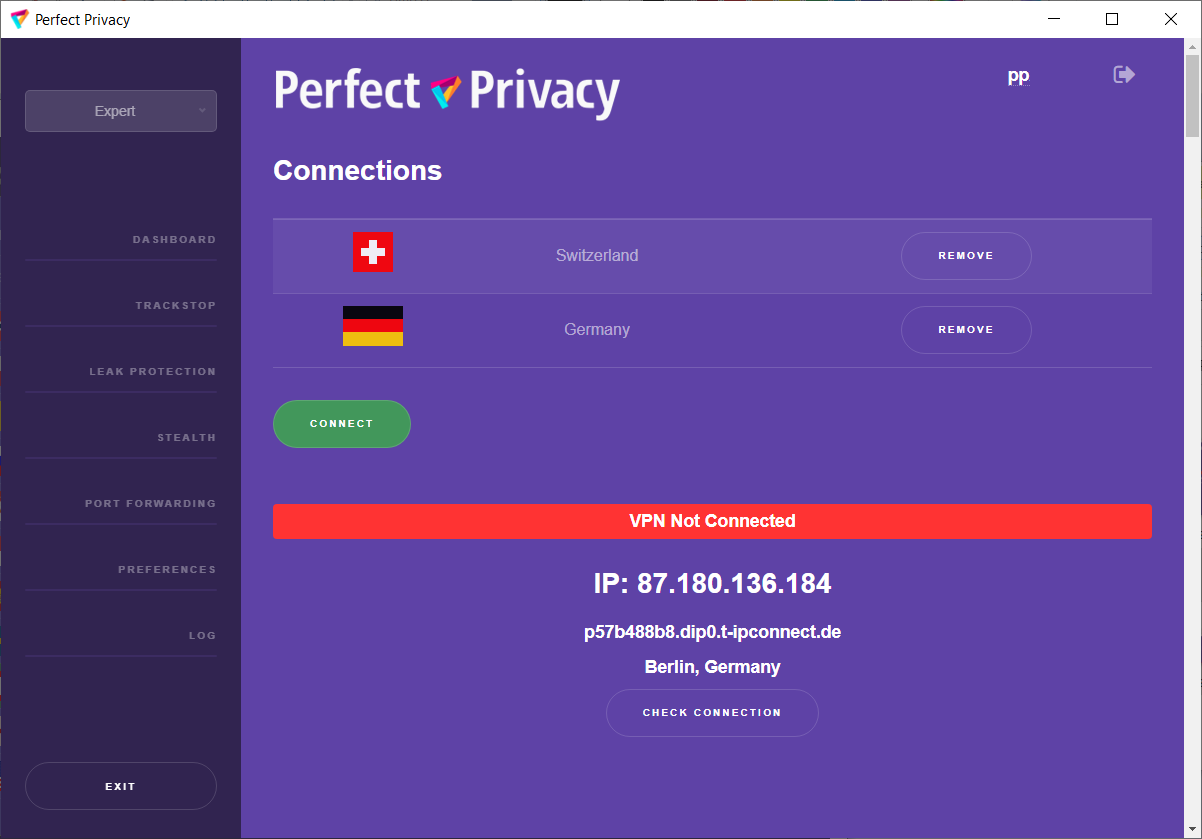
If you want to set up a multi-hop connection, click on the Add Server button and select another server as described above. By default, 2 hops are pre-installed. We support up to 4 hops. See the 'Preferences' chapter for how to set up more hops.
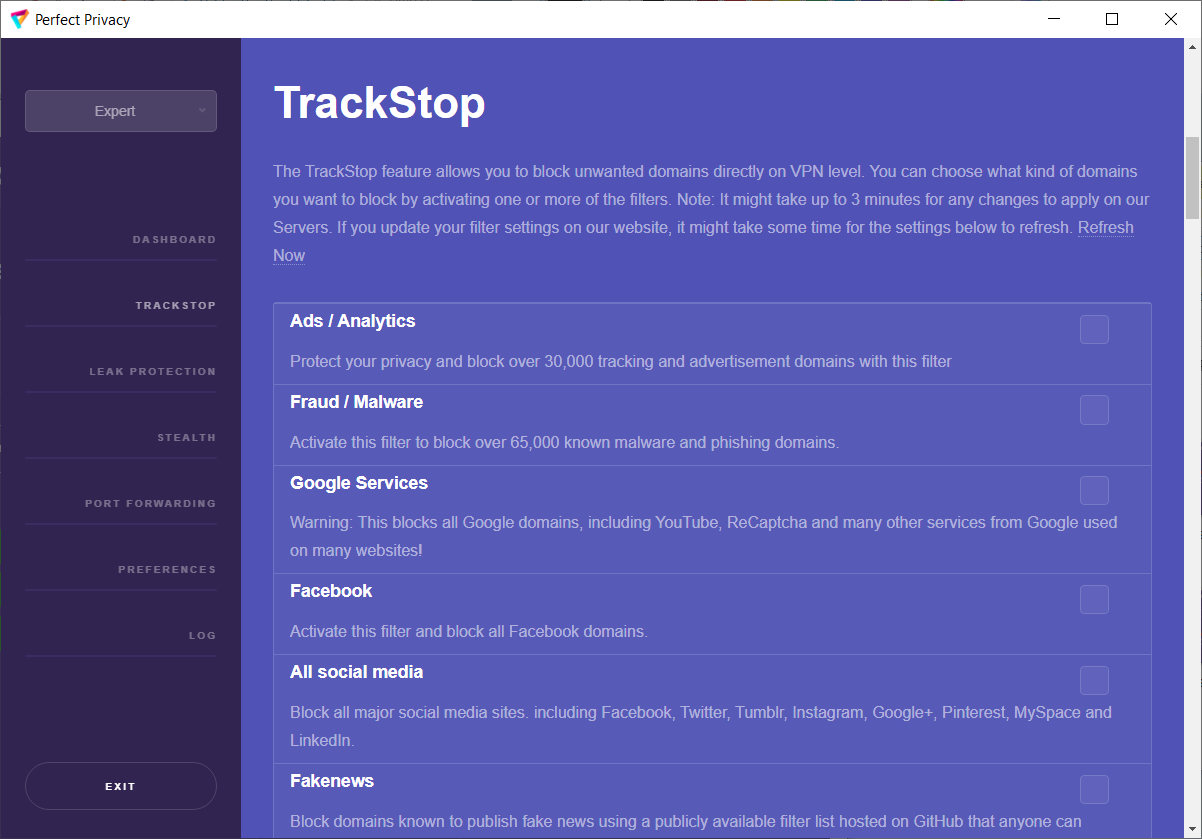
TrackStop
Clicking on Trackstop takes you to the TrackStop menu. There you can block certain domains directly on our VPN servers according to your desired criteria. To do this, place a tick in your desired category on the right. Please note that certain services will no longer be accessible to you if you select the Google filter, Facebook filter or one of the social media filters. Login with Facebook or Google to name just one. Especially with Google, there are services that you don't immediately think of.
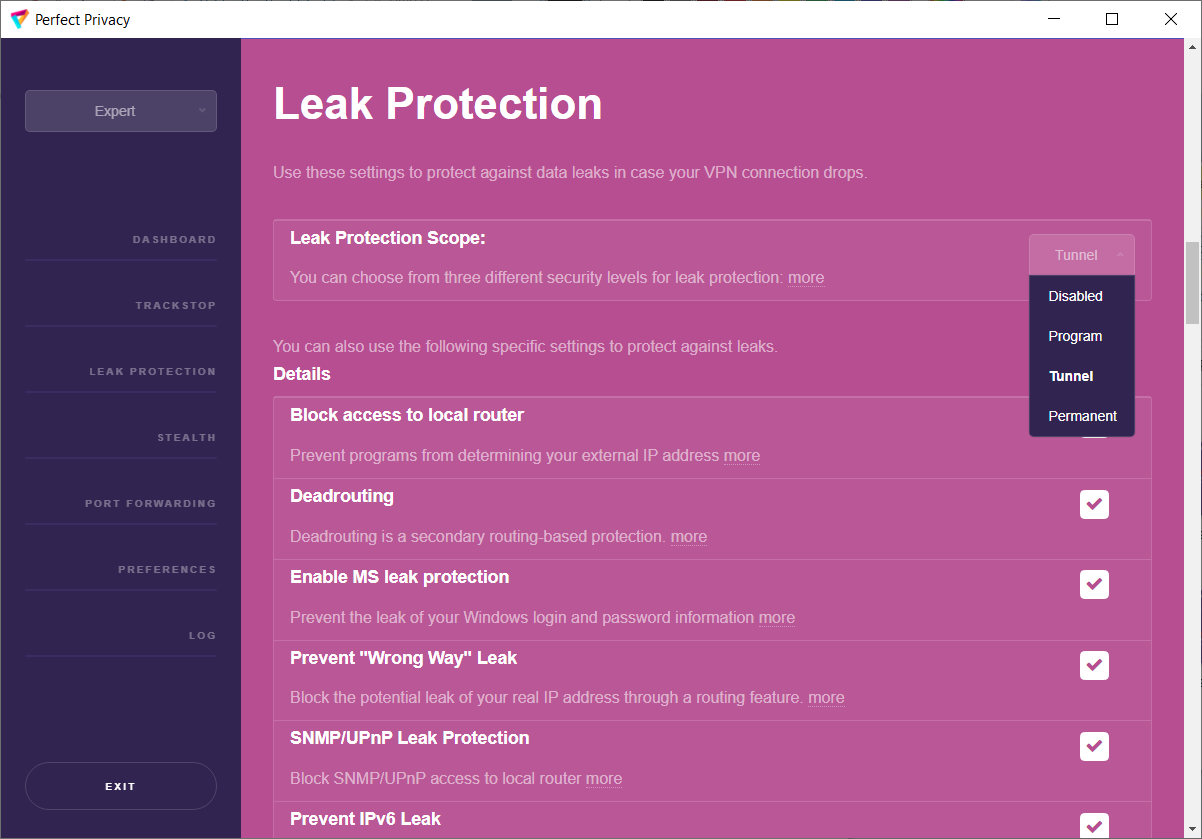
Leak Protection
Here you can define the behaviour of the firewall and DNS leak protection (killswitch). The default here is Tunnel.
Tunnel
Activate at tunnel start: This is the default setting. Leak protection is active as long as a VPN connection exists and the user does not disconnect it.
Program
Activate at programme start: This setting switches on the firewall or DNS leak protection as soon as you start the VPN manager. This means that there is no Internet connection as long as the VPN Manager is running but no VPN connection has been established.
Permanent
Activate permanently: Leak protection is always active. This means that the Internet only works when a VPN connection exists, regardless of whether the VPN Manager is running.
Disabeld
If you select Disabeld, all firewall settings are switched off again (not recommended).
Block access to local router
By default, Block access to local router is enabled. This prevents direct access to your local router (LAN still works, but you cannot send packets directly to the router).
Prevent DNS leak
By default, this function is enabled. It prevents your data from being leaked off the VPN tunnel.
Custom DNS Servers
If you want to use your own DNS servers and not those of Perfect Privacy, set a check mark and then enter your desired servers.
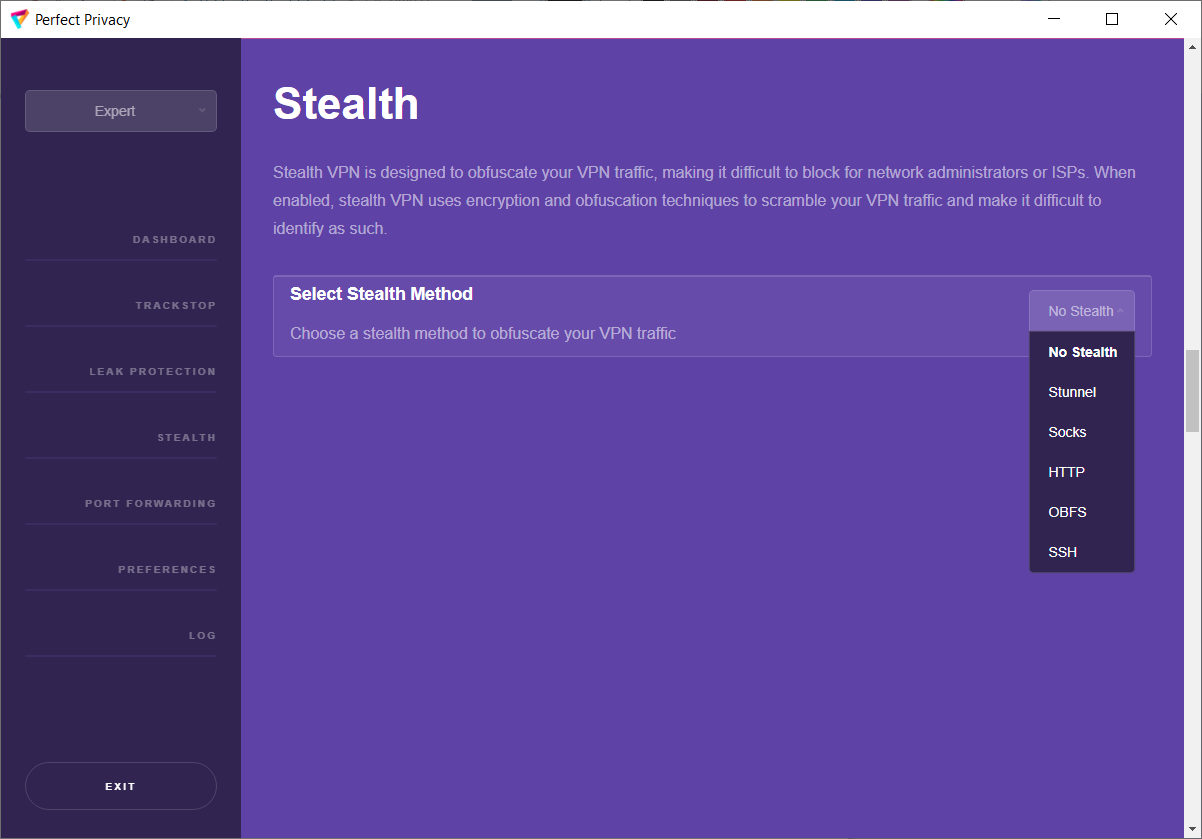
Stealth
With Stealth VPN you can disguise your VPN traffic. To do this, click on the No Stealth selected by default and choose your desired method. You can choose between Stunnel, Socks, HTTP, OBFS or SSH. After selecting a method, you can choose which port to use. The ports change depending on whether the default recommended TLS Crypt or the older TLS Auth is selected under 'Preferences' for the encryption protocol.

Stunnel: (TLS Crypt) auto, 54, 442, 8084 TLS (Auth) auto, 53, 443, 8085, 9009, 36315
Socks: auto, 21, 508, 5080 (Auth) auto, 21, 508, 5080
HTTP: auto, 3128, 8080 (Auth) auto, 3128 8080
OBFS: auto, 81, 444, 8088 (Auth) auto, 53, 443, 8085, 9009, 36315
SSH: auto, 22, 222 (Auth) auto, 22, 222
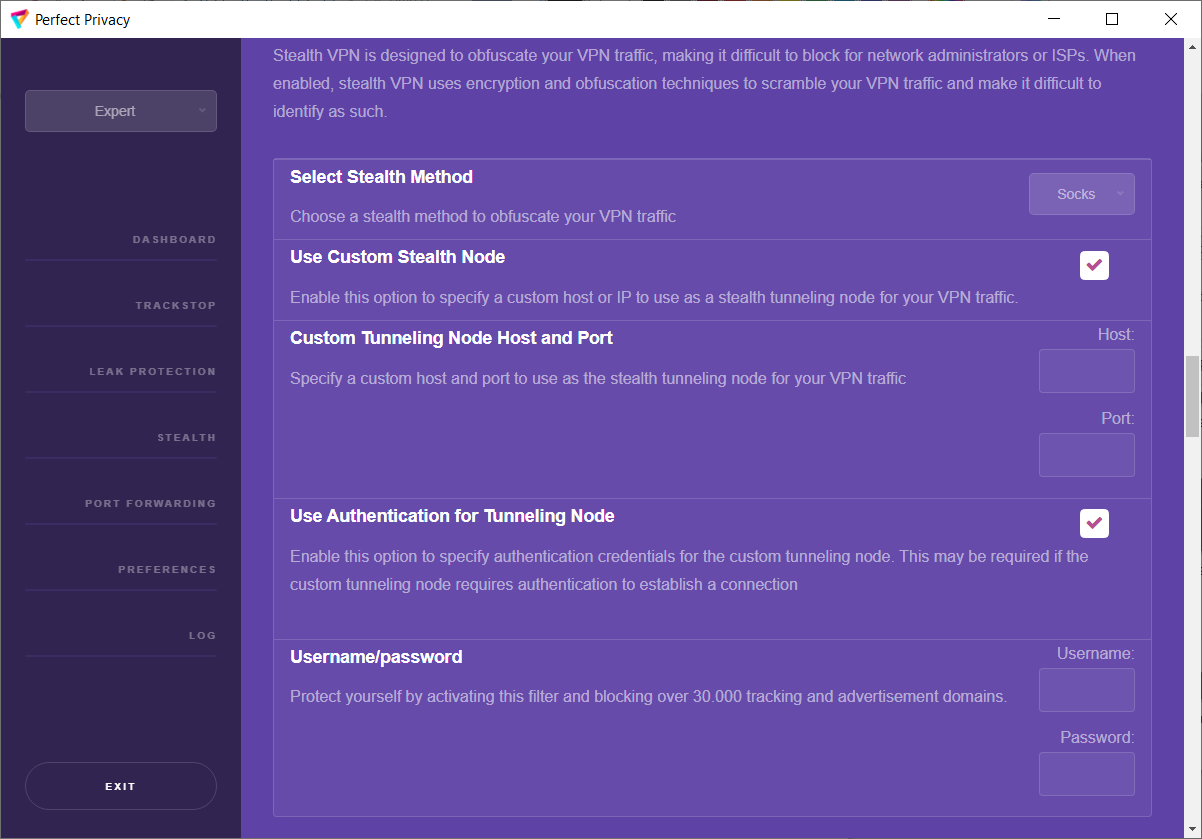
In addition, other options are available depending on the stealth method. Such as the 'Custom Tunneling Node Host and Port' and 'Use Authentication for Tunneling Node', which you can set after the check mark has been activated.
On the one hand, this is useful to be able to surf freely even in countries with censored Internet access. On the other hand, Obfuscation allows you to bypass firewall blocks in school, university and company networks, as traffic on port 53 and 443 is normally allowed.
When you enable Stealth VPN, it automatically switches to TCP configuration and requires you to re-establish the VPN connection. Depending on how the firewall in your country or network is configured to block VPN traffic, you should try all options until you can establish a VPN connection.
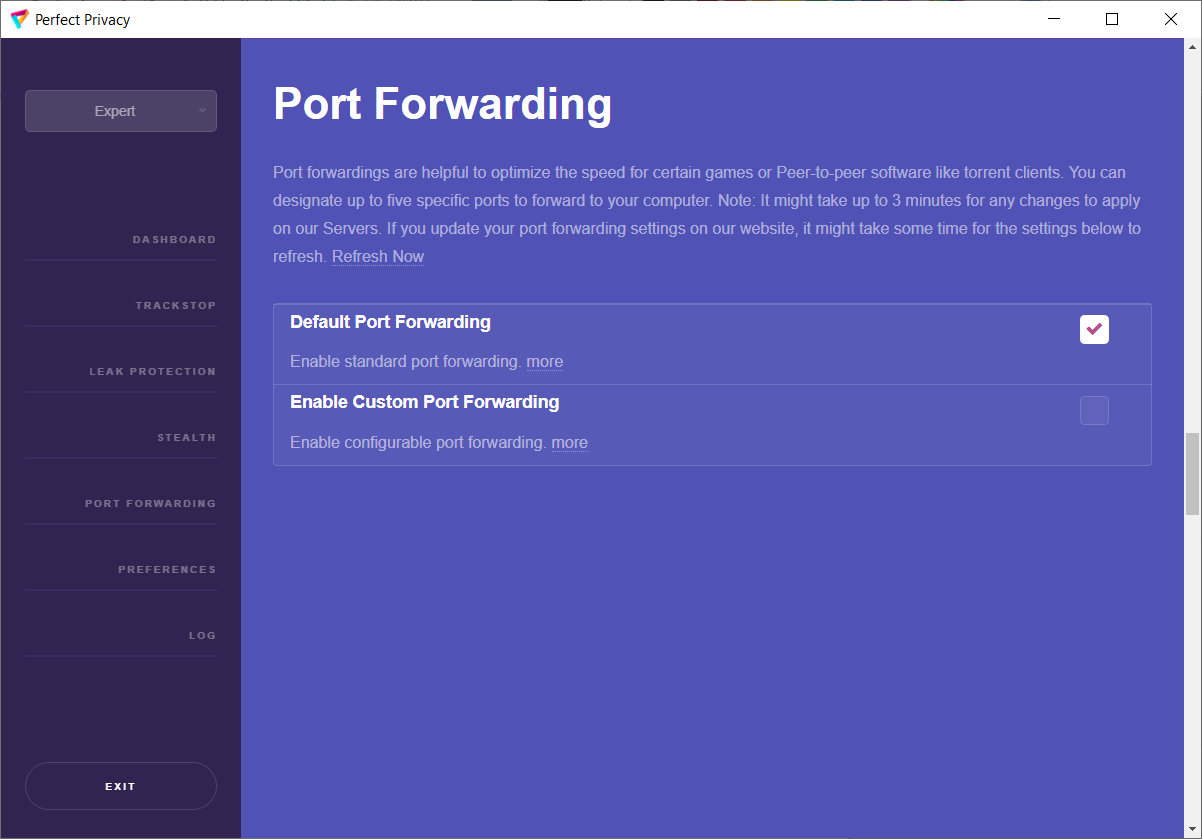
Port Forwarding
By default, 'Default Port Forwarding' is enabled and opens three ports that are forwarded by the Perfect Privacy server. The ports are displayed in the dashboard. If you activate 'Enable Custom Port Forwarding', you can define ports for forwarding yourself.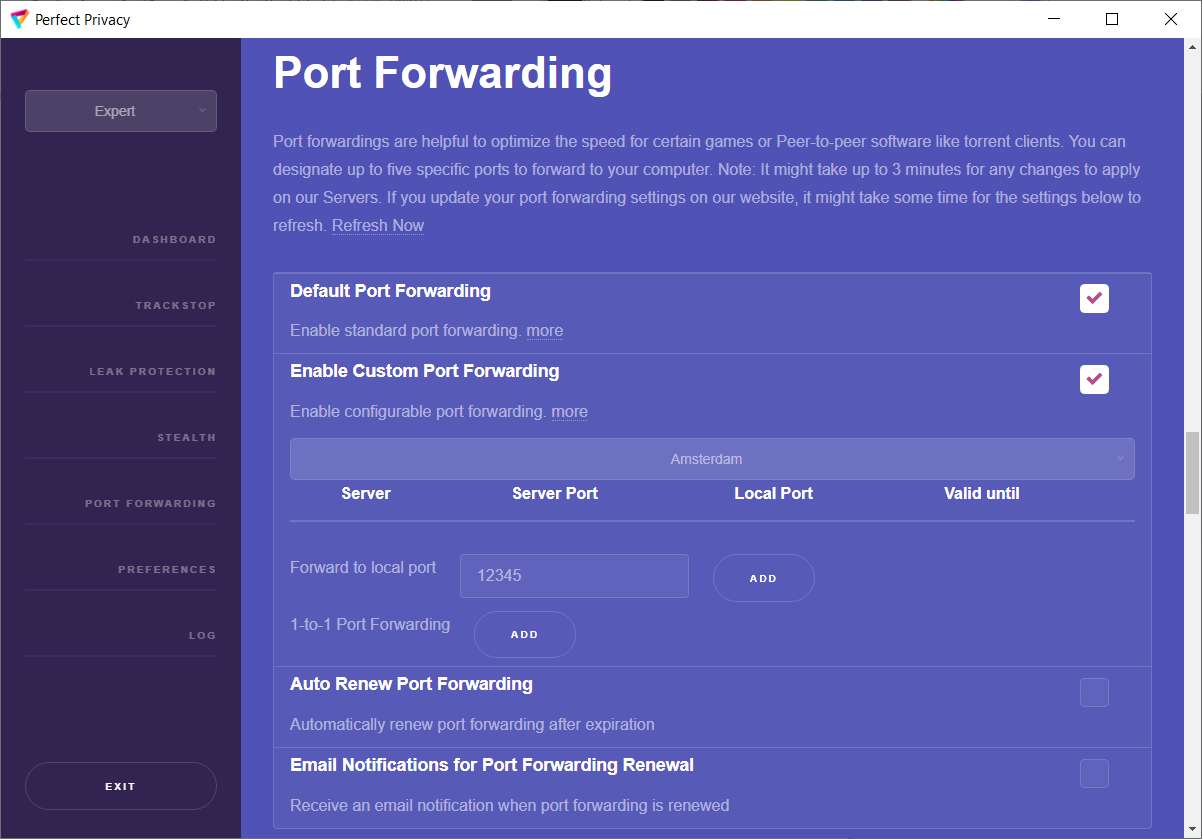
To do this, select a server and click on the server bar (Amsterdam is preset). Then you can enter the desired local port below and click on ADD to select further ports.
You can also specify random ports for forwarding with '1-to-1 Port Forwarding'.
Please note that port forwarding expires after seven days. If you enable 'Auto Renew Port Forwarding', ports will be automatically renewed after seven days. You can also enable 'Email Notifications for Port Forwarding Renewal' and be notified by email when ports renew.
Preferences
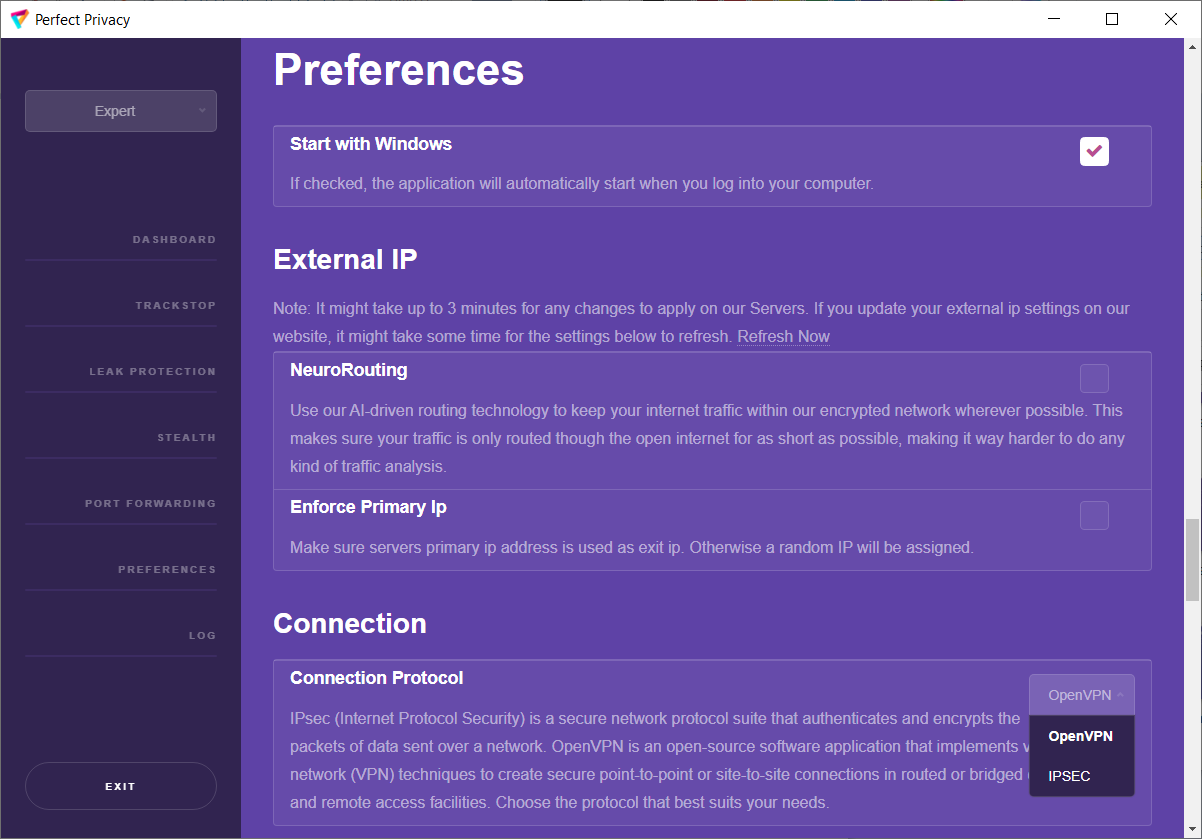
Under 'Preferences' you can change the start-up behaviour of the client. You can set the VPN Manager to start automatically when Windows is booted and to connect to a VPN server. To do this, place a check mark next to 'Start With Windows'.
If you activate 'NeuroRouting', your data will remain in Perfect Privacy's strongly encrypted VPN network for as long as possible. A neural network and our algorithms constantly calculate the best routes for your destinations on the Internet. This happens dynamically - depending on the websites you visit. Please note that, for example, the outgoing server is displayed during an IP check, as this is usually located closer to the IP check page than the server you have selected under 'Preferences'.
If you need a primary IP address, you can check 'Enforce Primary IP'. By default this is not selected, so you will get a random IP address.
Under 'Connection' you can select whether you want to use the connection protocol OpenVPN or IPSEC for your VPN connection.
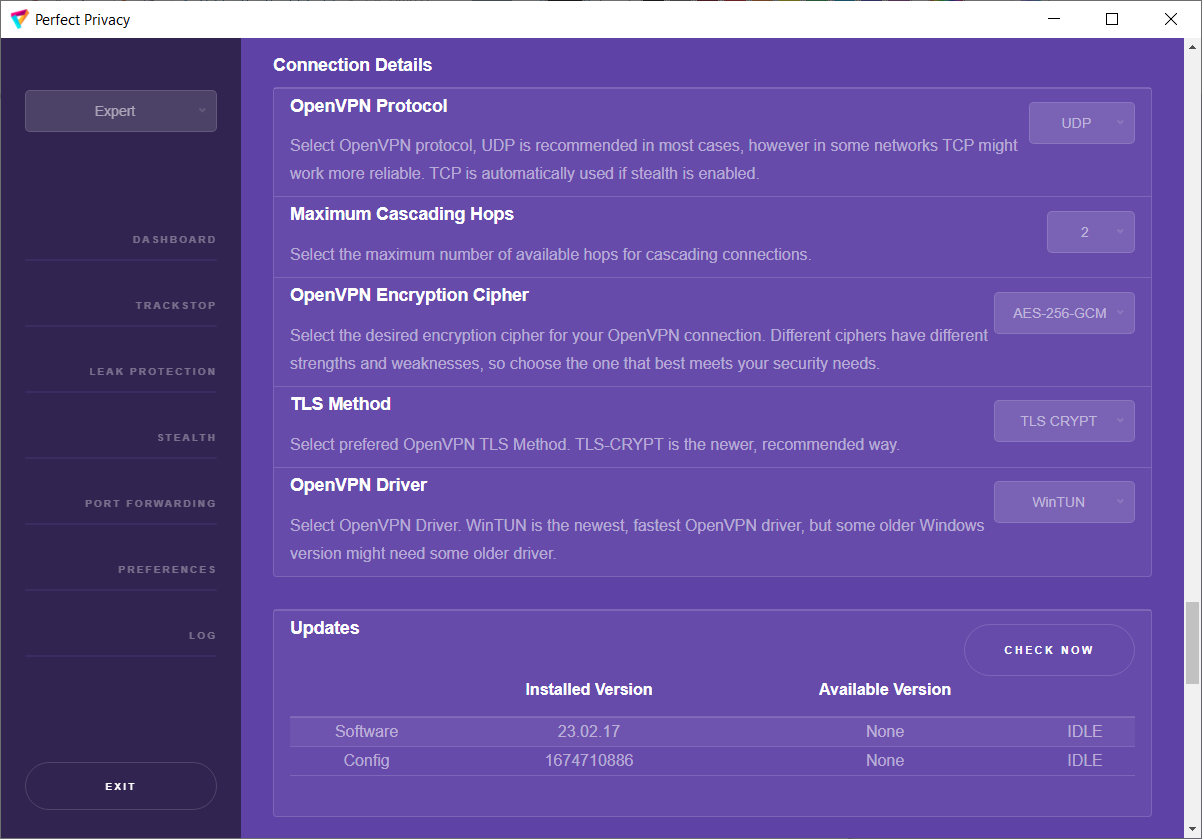
Under 'Connection Details' you can make further useful settings. By default, the OpenVPN protocol UDP is selected. In some networks, however, TCP can ensure that the connections run more reliably. If you use Stealth VPN, TCP is automatically selected.
As already mentioned, you can install additional network adapters under 'Maximum Cascading Hops'. We support up to 4 hops here. By default, 2 hops are pre-installed. Select the desired number of hops. Then you can add more VPN servers under 'Dashboard' by clicking on 'ADD Server'.
The encryption cipher can be set under 'OpenVPN Encryption Cipher'. For example, you can switch to the weaker cipher AES-128 if strong encryption is not important (streaming, downloads, etc.) and the VPN client runs on a computer with a weak CPU. You can choose between AES-256-GCM (default), AES-128-GCM, AES-128-CBC and AES-256-CBC.
Under 'TLS Method' you can change the encryption protocol as already mentioned under 'Stealth'. We recommend the preset newer 'TLS Crypt'. However, you can also select 'TLS AUTH'.
Under 'OpenVPN Driver' you can select the OpenVPN drivers. The default setting is the newer and faster WinTUN driver. If you are using an older version of Windows, it may not work and you can choose from 'TAB 9.24.6.601', TAB 9.0.0.9 or TAB 9.0.0.21.
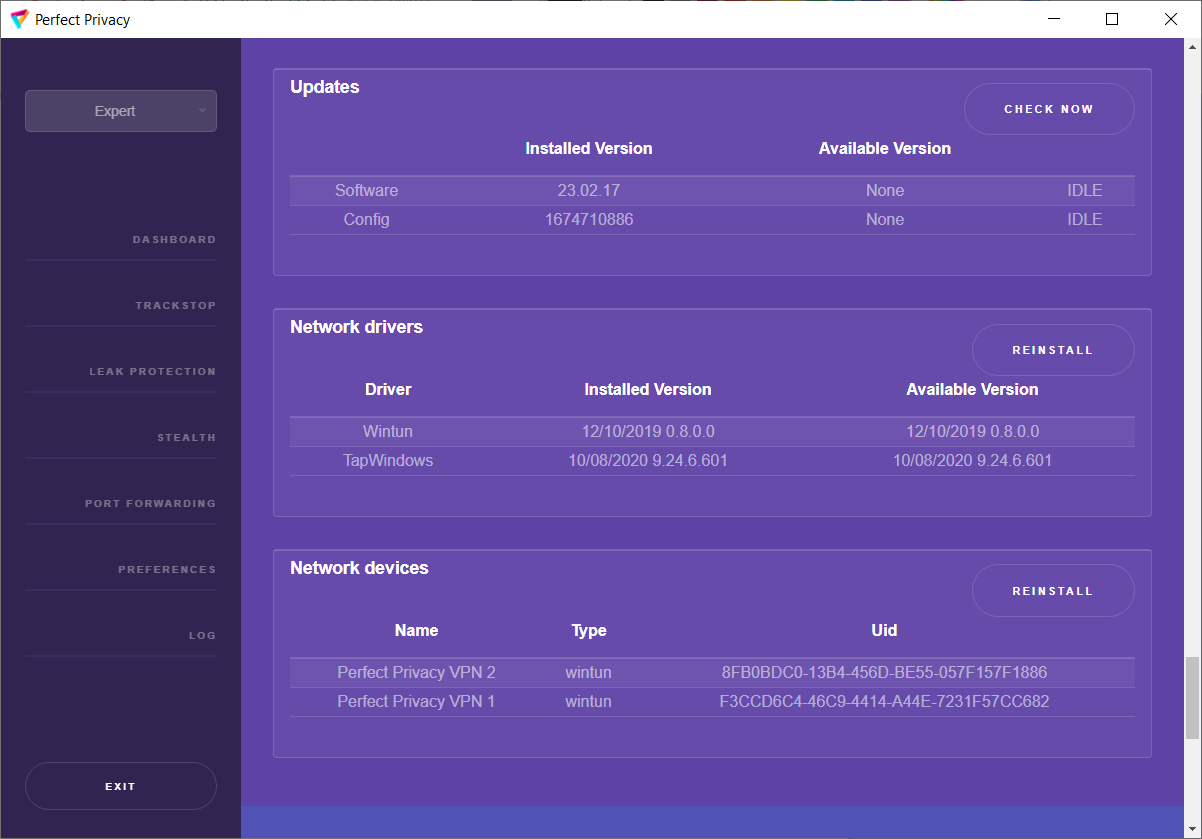
Under 'Updates' you can click on 'Check Now' to see if you are using the latest software version and the latest configurations of the VPN Manager.
Under 'Network drivers' you can reinstall your network drivers by clicking on 'Reinstall'.
Under 'Network devices' you can reinstall your network adapters by clicking on 'Reinstall'.
LOG
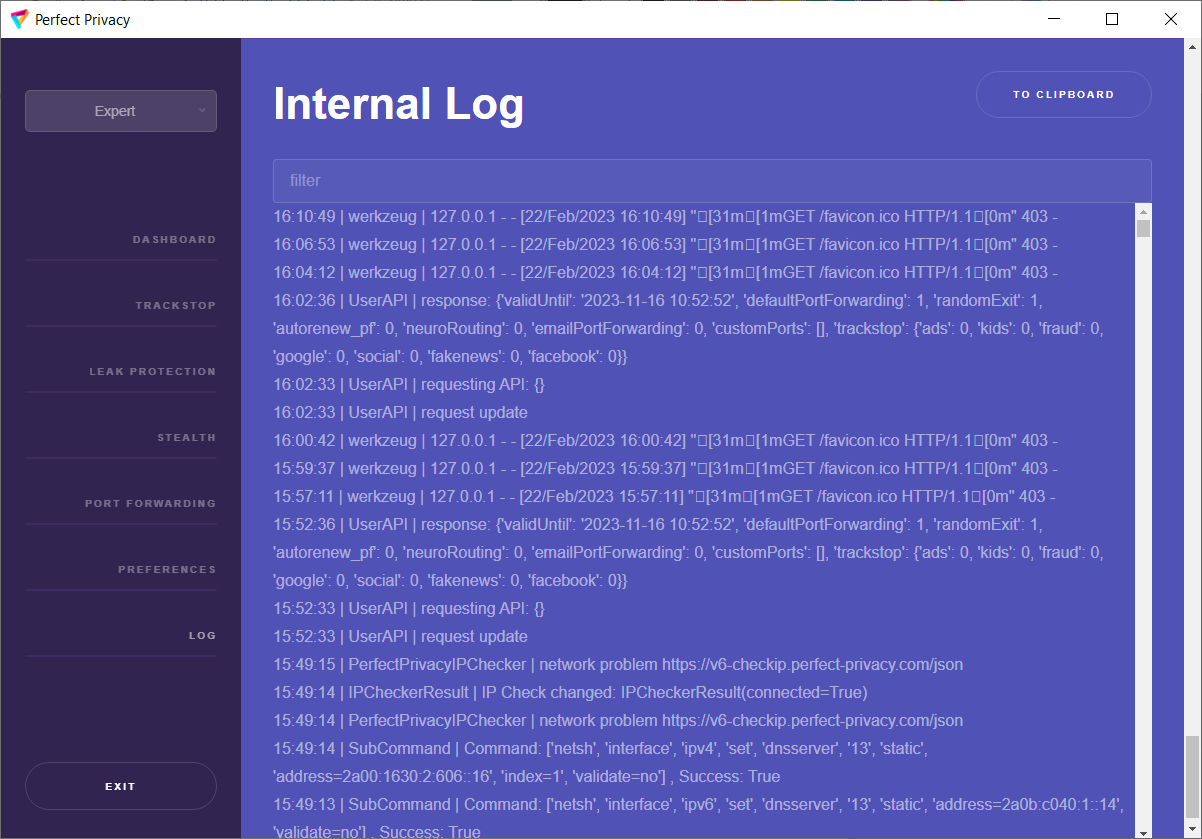
In the section 'LOG' you can view information about the connection setup of the VPN Manager. If there are any problems, one of our technicians may ask you to submit this LOG in order to determine any problems. Click on 'TO CLIPBOARD' to copy the content and paste it into the dialogue with the technician.
You can exit the VPN Manager by clicking on 'Exit' at the bottom left. Note: If you have selected 'Permanent' under 'Leak Protection Scope', you can no longer connect to the Internet while the VPN Manager is inactive.


Questions?
If you have any questions, comments or other feedback regarding this tutorial, please use the corresponding thread in our community forums.