Please note:
The firmware Tomato by Shibby is no longer actively maintained. Therefore we recommend to use the FreshTomato firmware instead if your router model is supported. Follow this link to our guide for that.
Downloading the OpenVPN configuration files
Download the archive with OpenVPN configuration files and unpack it.
Download View alternate downloads
- Router model
- Tomato version
- Build type
- Uptime
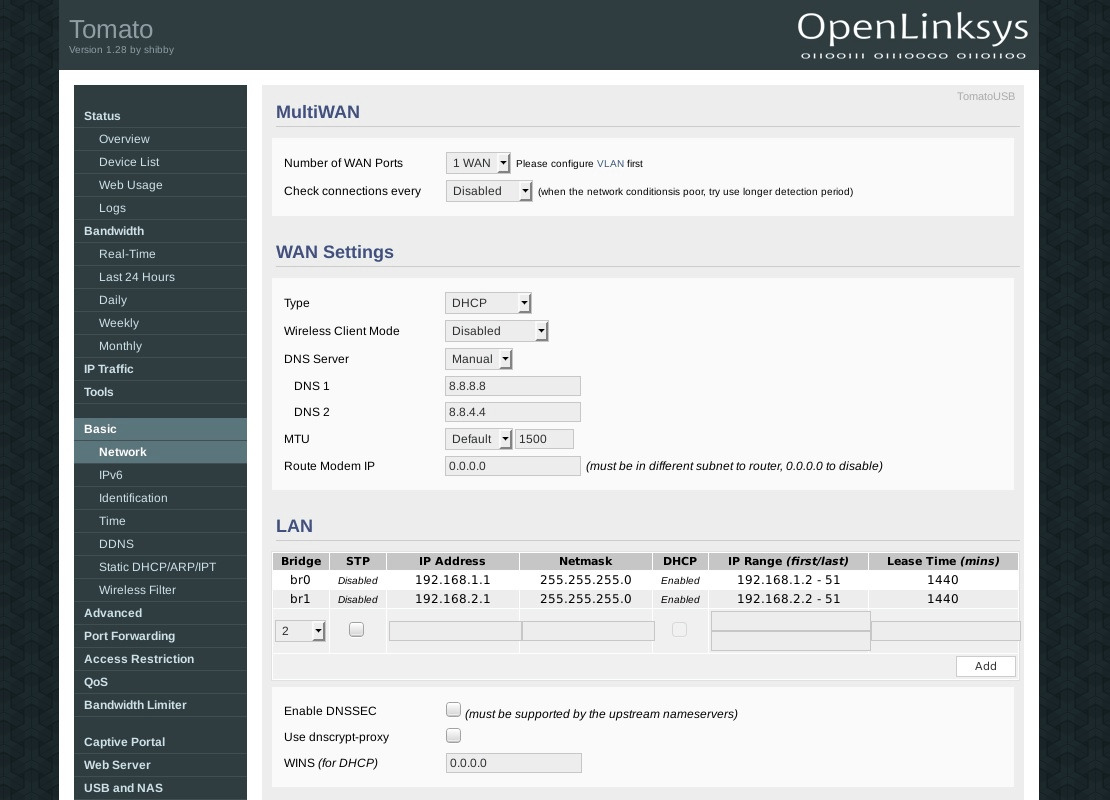
To configure DNS go to Basic -> Networking. You have two choices: If you only wanted to use the Internet while the router is connected to VPN, you can use Perfect Privacy name servers. You can find the DNS IP addresses on the DNS nameserver page in the download section.
If you want to have Internet connectivity without VPN you should use publicly available name servers. You can use either Google’s DNS or any servers from the OpenNIC project. When connected to VPN all DNS requests will go through the VPN tunnel so they are anonymized.
Enter the name servers as shown in the screenshot on the left, in this example we are using Google’s name servers 8.8.8.8 and 8.8.4.4.
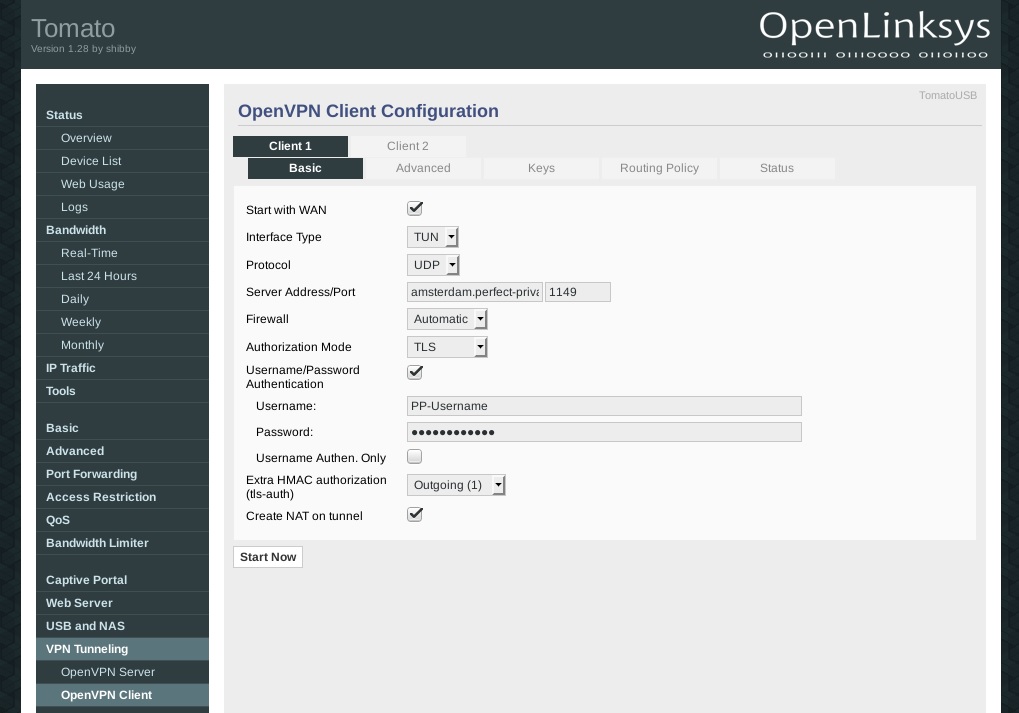
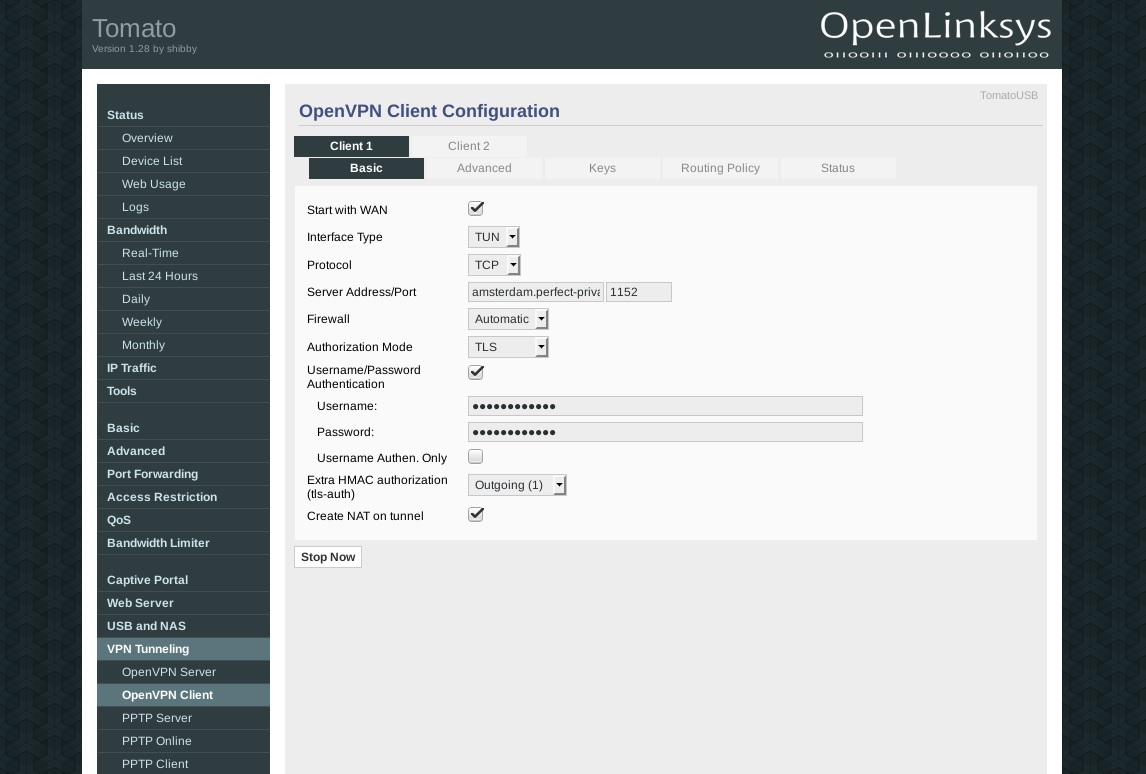
To configure the VPN connection, go to VPN Tunneling > OpenVPN Client. Under the Basic tab set the options as shown in the picture on the left. For Username and Password use your Perfect Privacy username and password.
If you activate the checkbox Start with WAN, the router will automatically establish the VPN connection on boot.
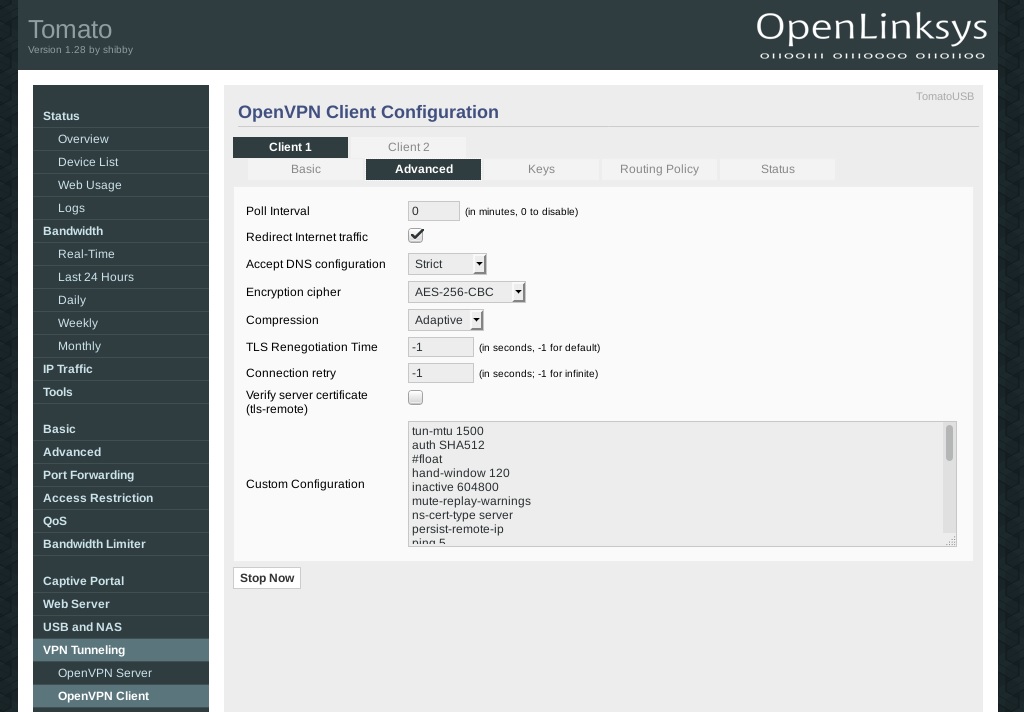
tun-mtu 1500
fragment 1300
mssfix
auth SHA512
#float
hand-window 120
inactive 604800
mute-replay-warnings
ns-cert-type server
persist-remote-ip
ping 5
ping-restart 120
reneg-sec 3600
resolv-retry 60
route-delay 2
route-method exe
tls-cipher TLS_CHACHA20_POLY1305_SHA256:TLS-DHE-RSA-WITH-AES-256-GCM-SHA384:TLS-DHE-RSA-WITH-AES-256-CBC-SHA:TLS-DHE-RSA-WITH-AES-128-GCM-SHA256:TLS-DHE-RSA-WITH-AES-128-CBC-SHA:TLS_AES_256_GCM_SHA384:TLS-RSA-WITH-AES-256-CBC-SHA
tls-timeout 5
verb 4
key-direction 1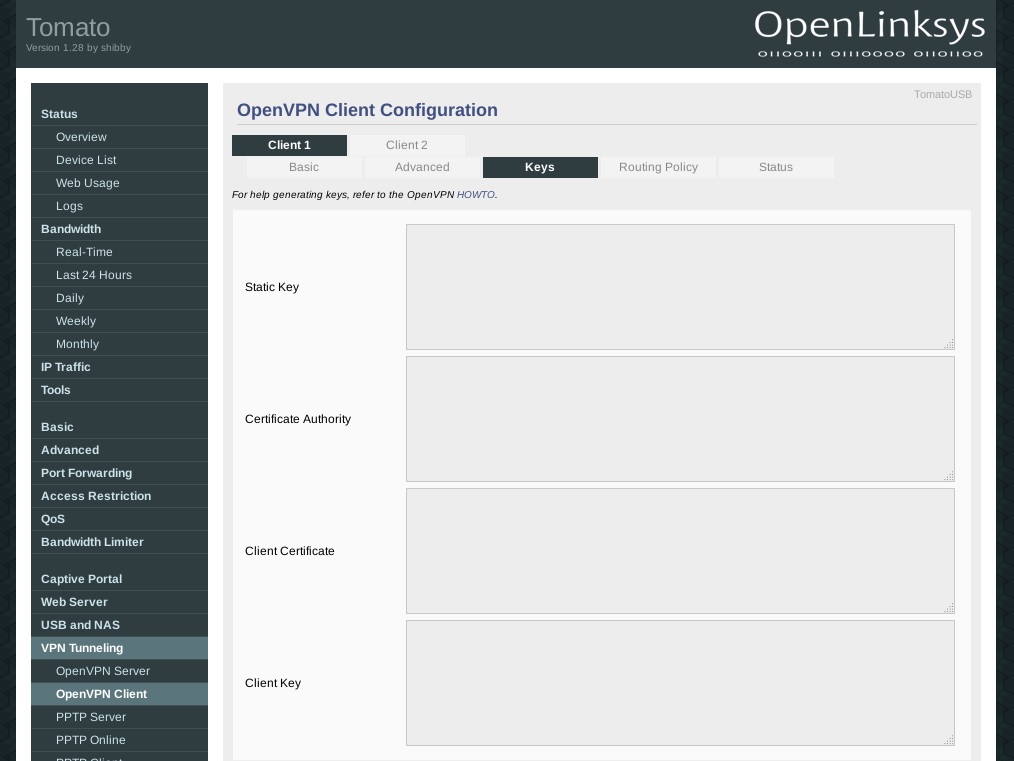
Under the Keys tab you will need to enter the certificates and keys from the OpenVPN configuration file that you downloaded earlier. Open the *.conf file for the server you are using, in this example Amsterdam.conf.
Into Static Key copy and paste the content between the <tls-auth></tls-auth> tags from the ovpn file.
For Certificate Authority use the content between the <ca></ca> tags.
Into Client Certificate copy the content between the <cert></cert> tags and for Client Key use the content between the <key></key> tags.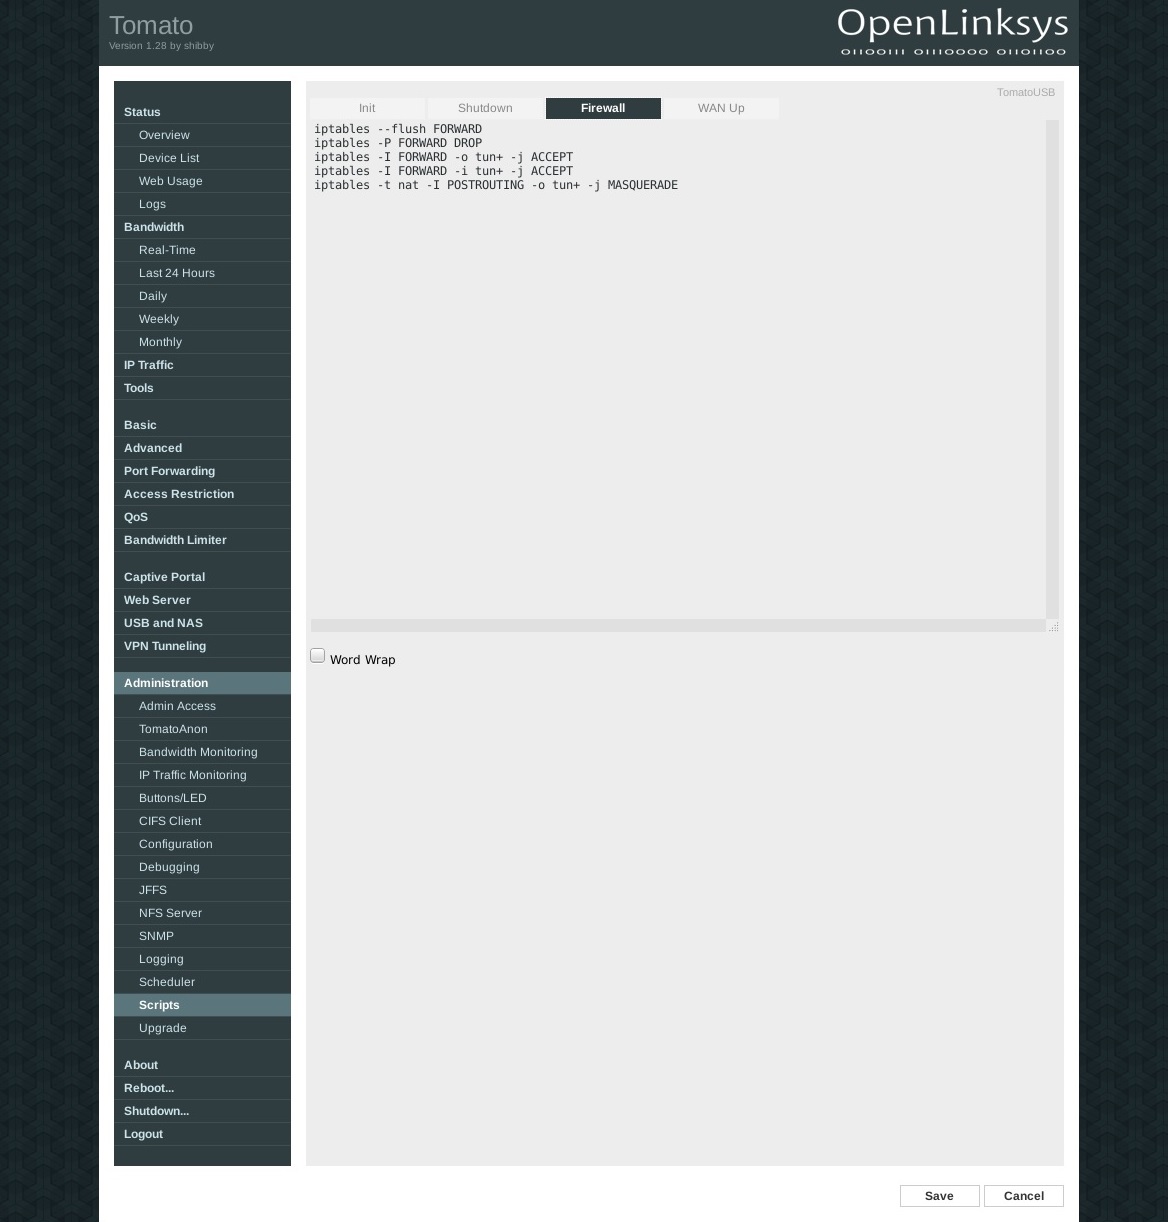
For the firewall configuration (leak protection) go to Administration > Scripts > Firewall. Insert the following lines into the window below:
iptables --flush FORWARD
iptables -P FORWARD DROP
iptables -I FORWARD -o tun+ -j ACCEPT
iptables -I FORWARD -i tun+ -j ACCEPT
iptables -t nat -I POSTROUTING -o tun+ -j MASQUERADE


If you want to use the Internet without VPN go to VPN Tunneling > OpenVPN Client > Basic and deactivate the checkbox Start with WAN.
Remember that you may need to remove the firewall rules for the leak protection if you have added them previously. Also you have to use publicly available name servers instead of the ones from Perfect Privacy.
After saving click on the Stop Now button.


Questions?
If you have any questions, comments or other feedback regarding this tutorial, please use the corresponding thread in our community forums.