Download CA certificate
Then download Perfect Privacy's IPsec CA certificate onto your android device.
Import the CA Certificate
In order for strongSwan to verify the identity of the VPN servers, you must first install the IPsec CA certificate from Perfect Privacy.
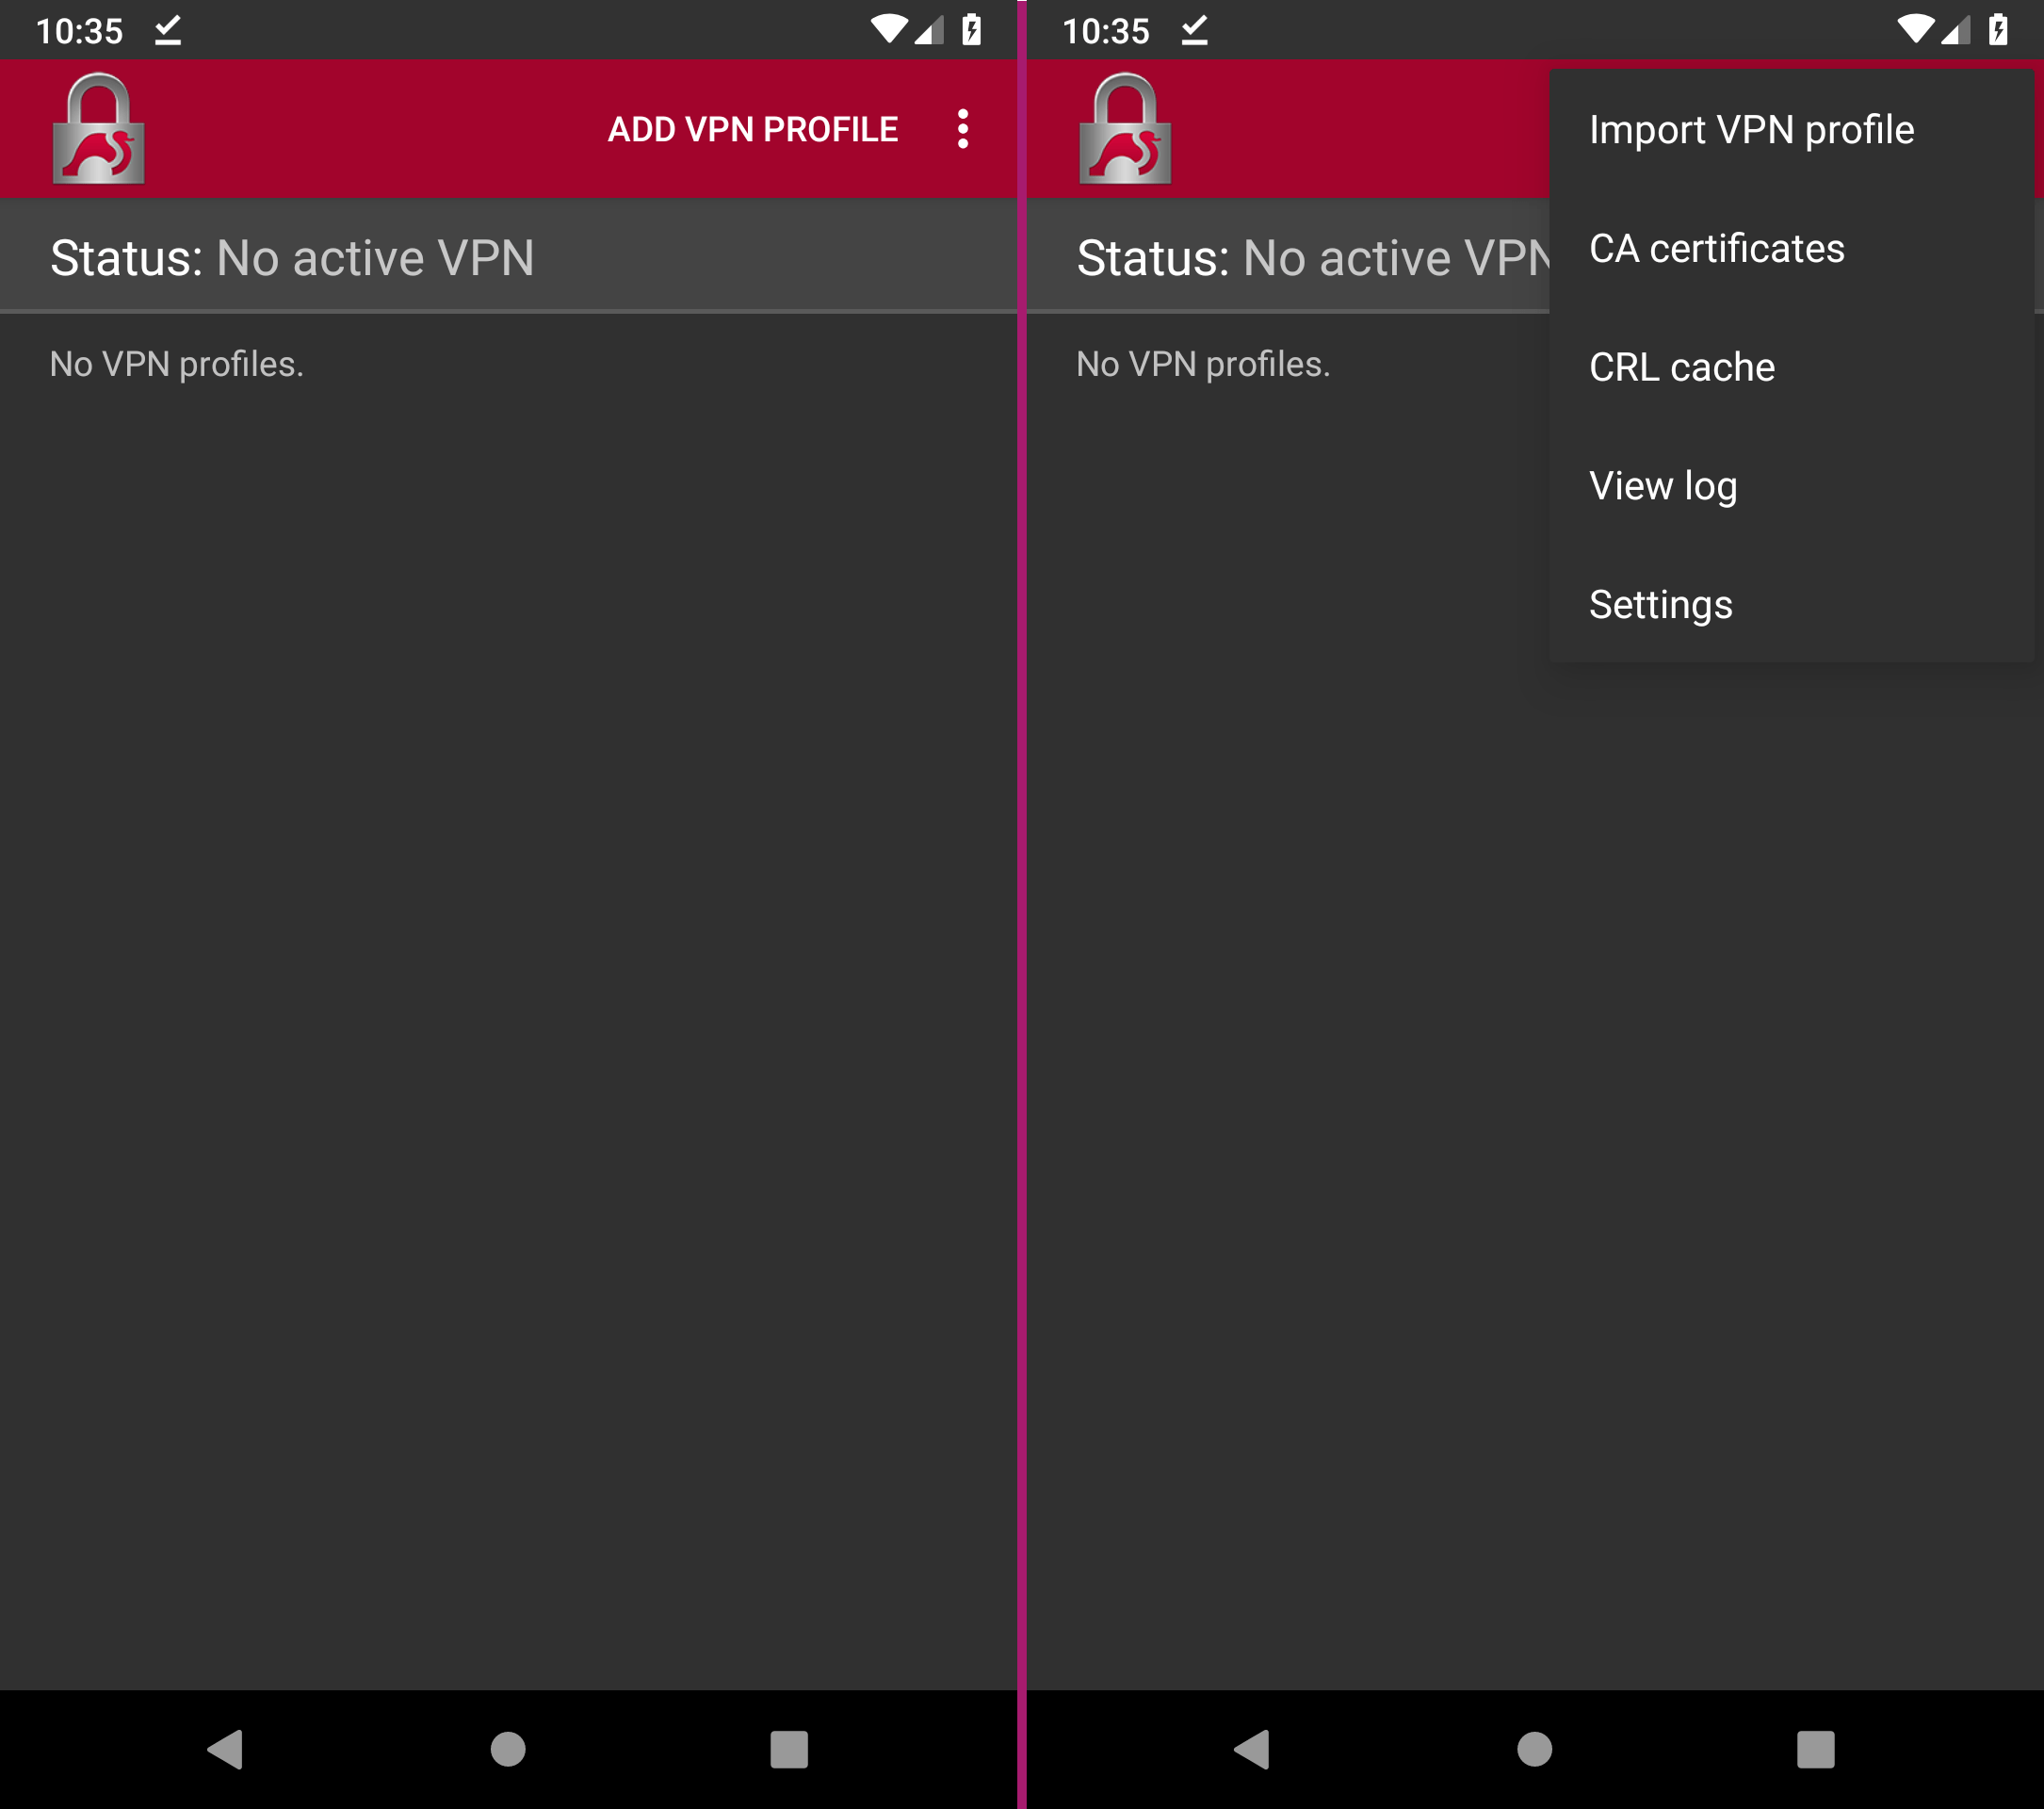
In strongSwan, tap on the kebab menu at the top right (three dots) to expand the menu.
Select CA certificates there.
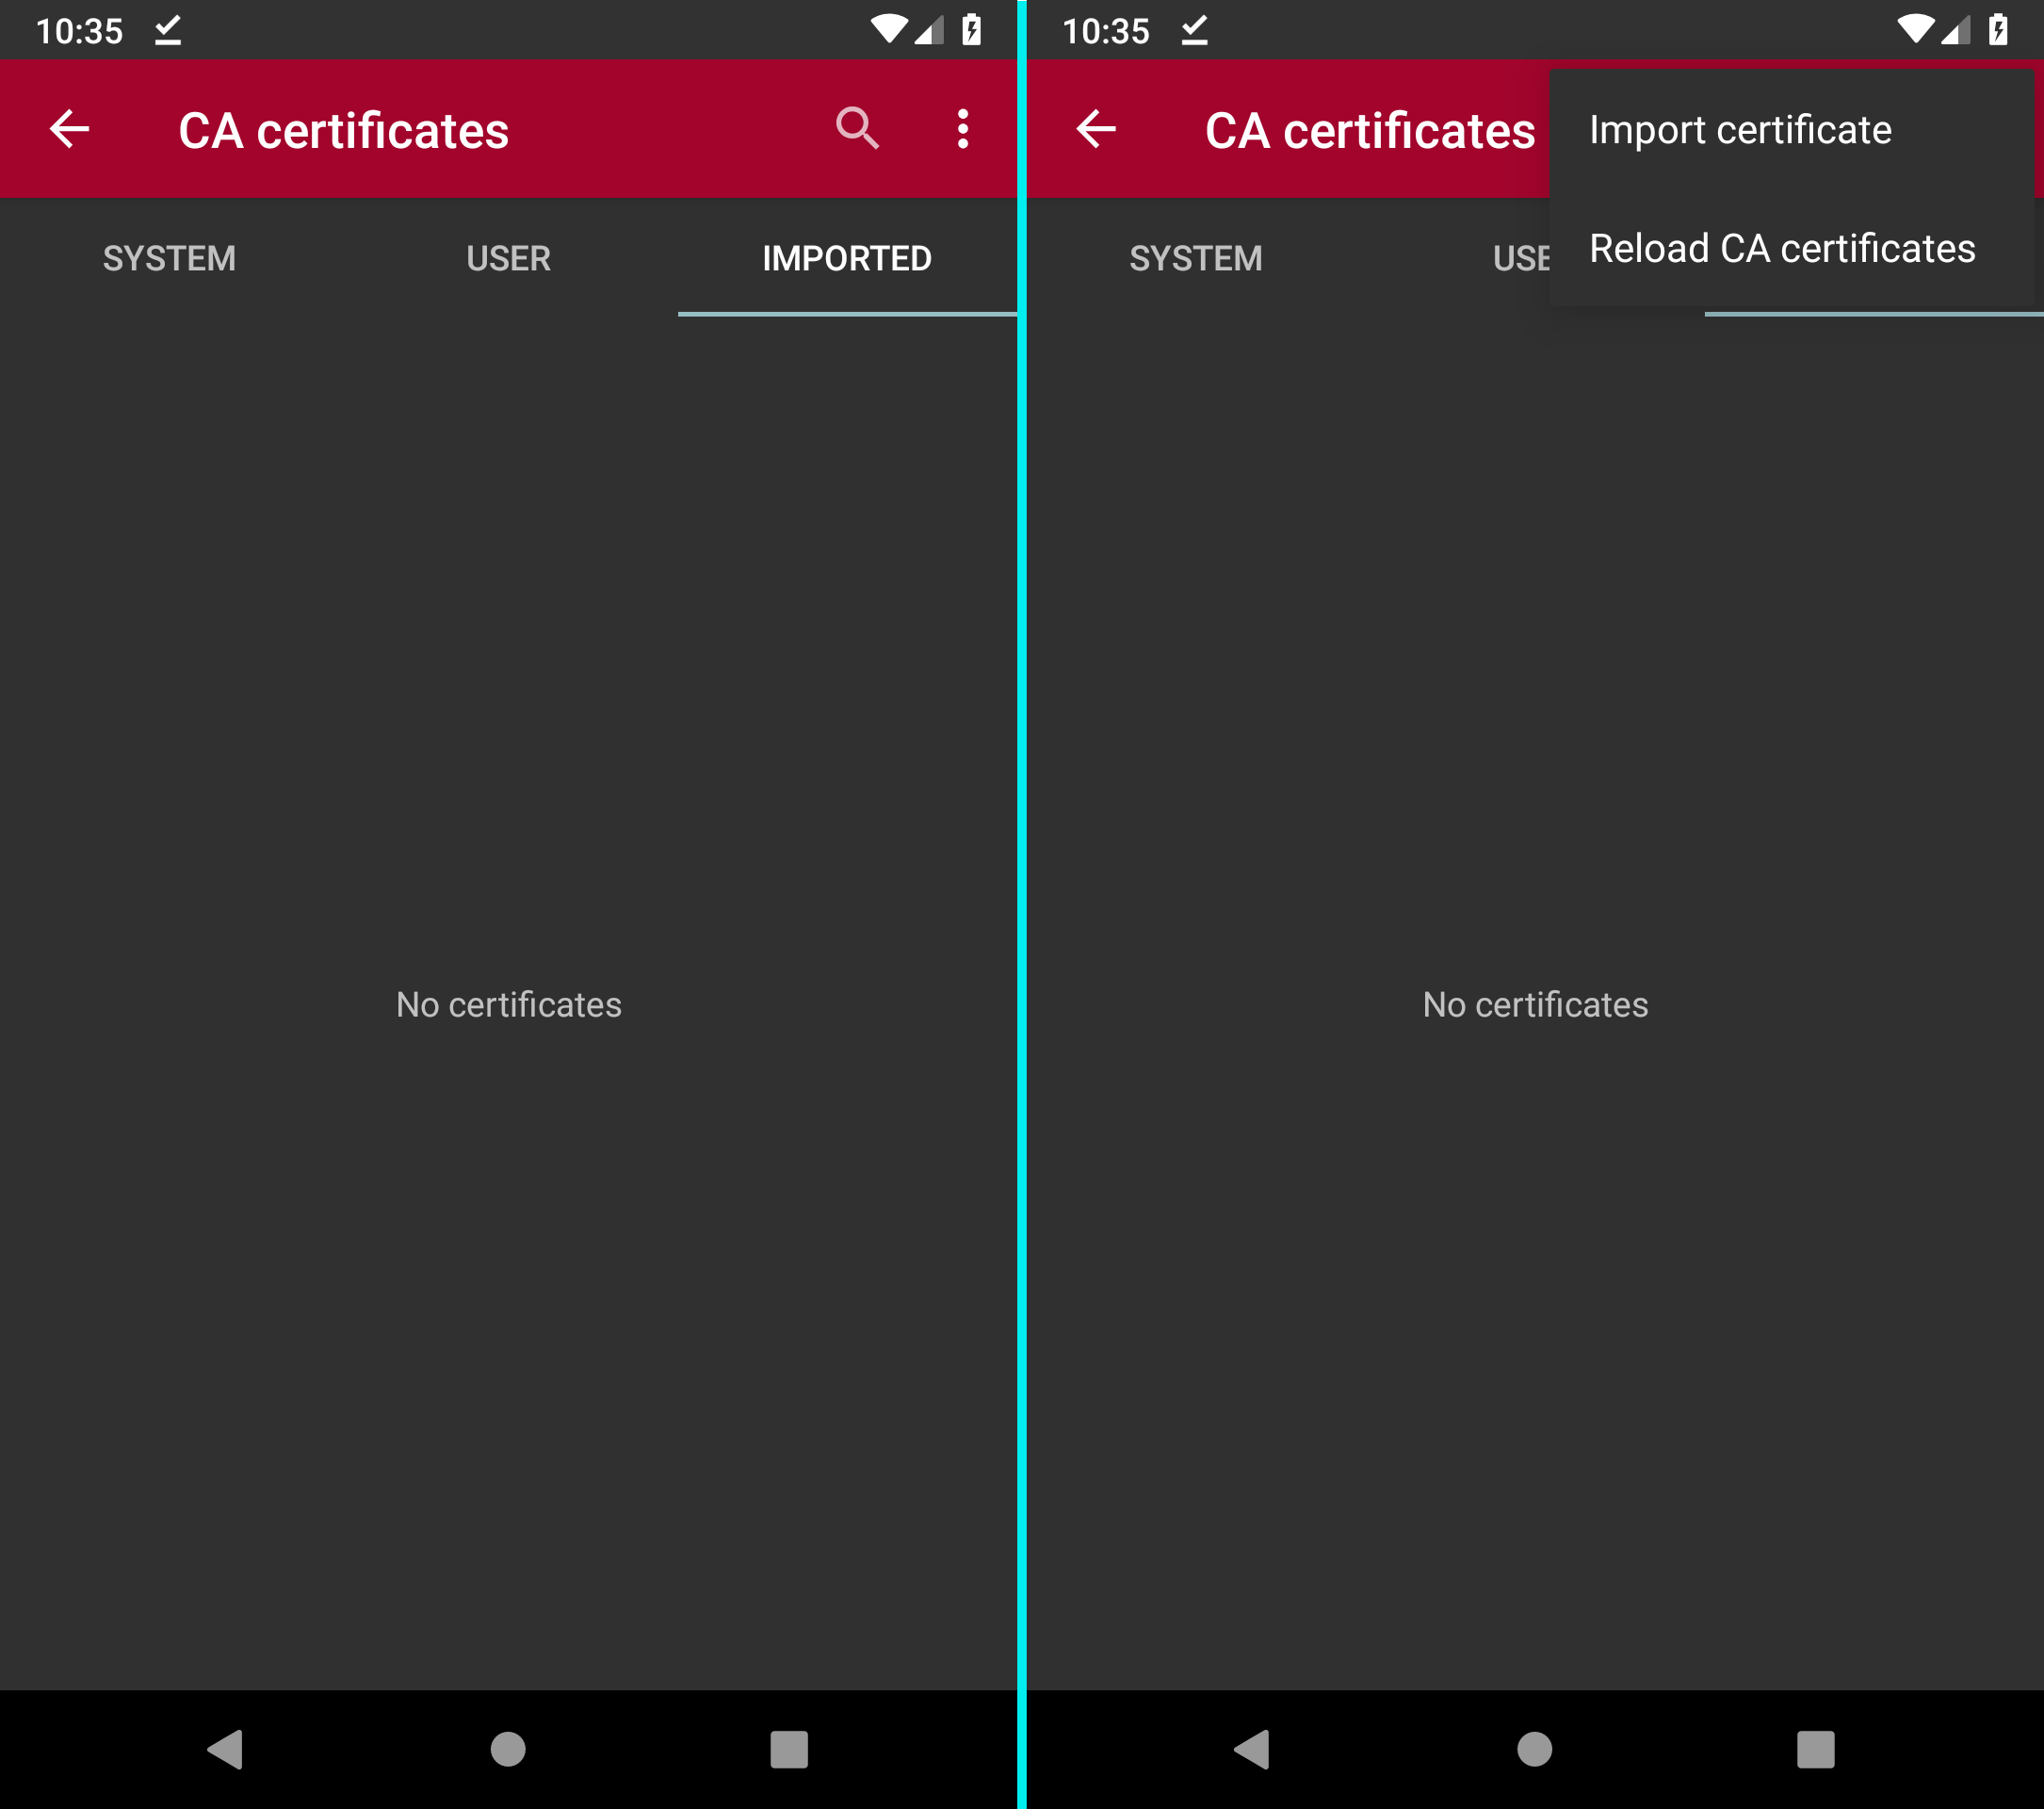
In this view, tap the Kebab menu again and select Import certificate.
A file browser opens.
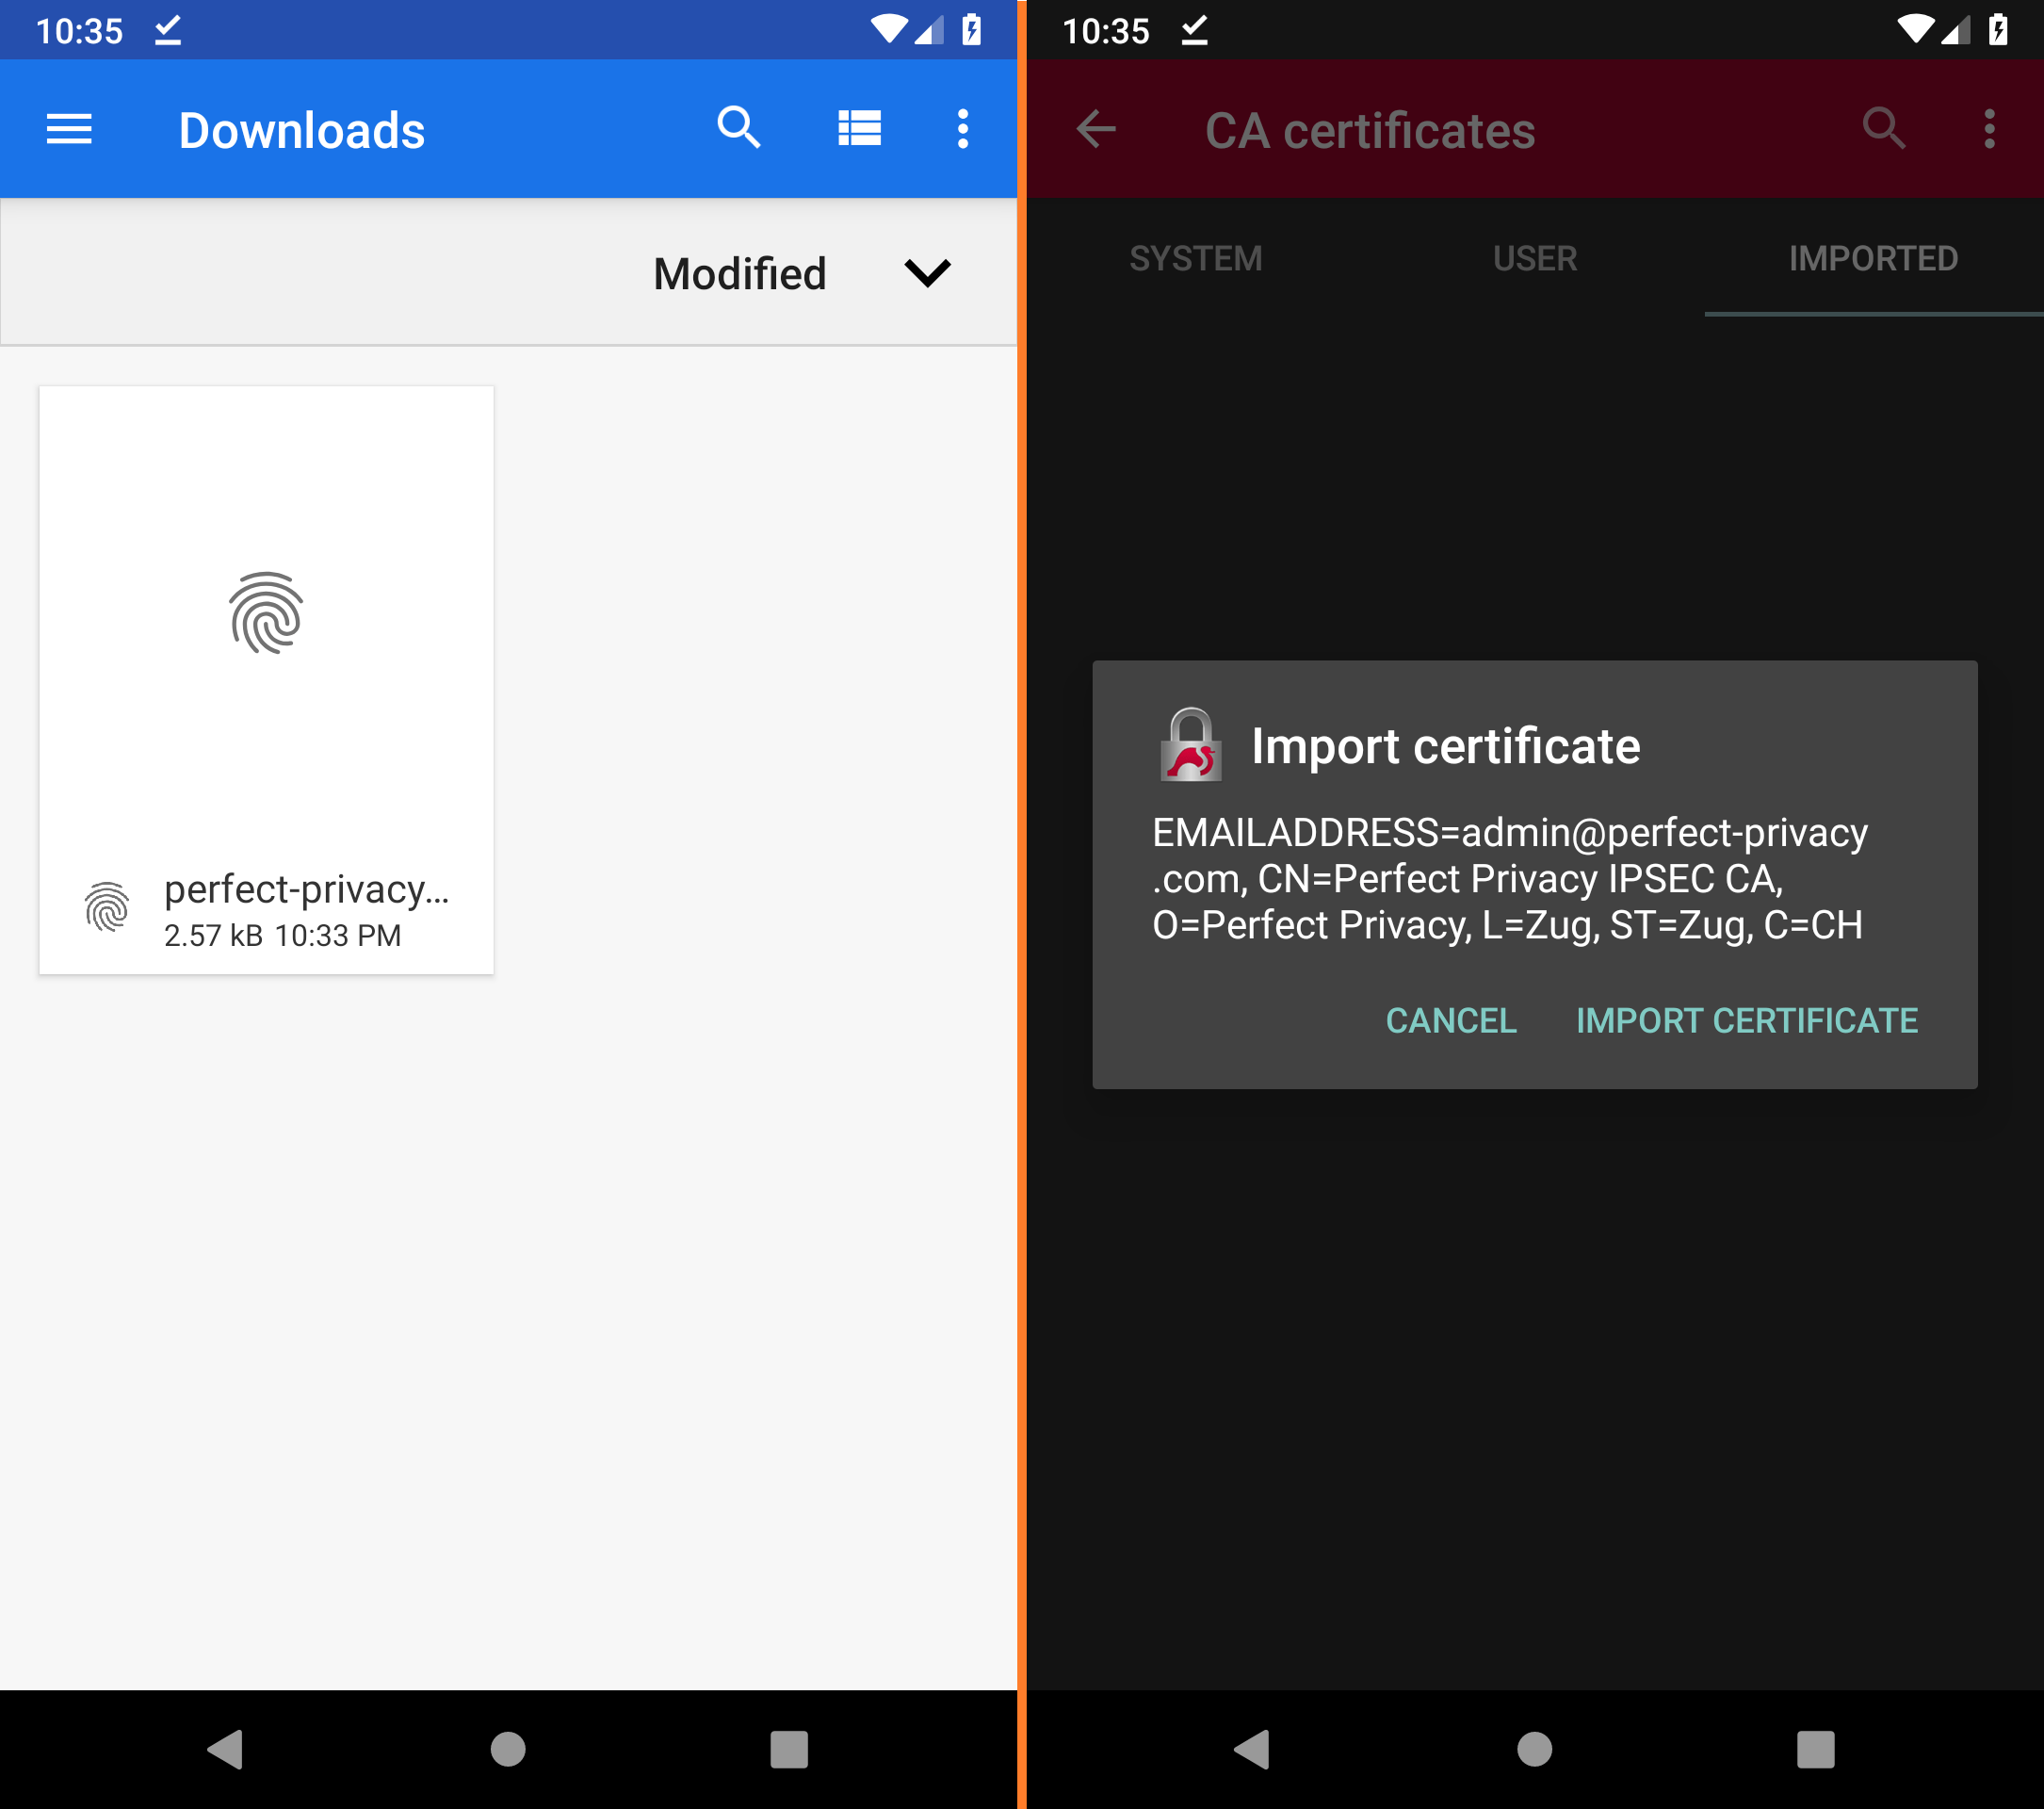
In the Downloads folder, select the perfect-privacy_ipsec_ca.crt file you just downloaded.
If you cannot find the downloads folder immediately, you can also access it via the Burger menu in the upper left corner (three dashes).
You may now have to choose to open the file with strongSwan.
Confirm the import with Import certificate.
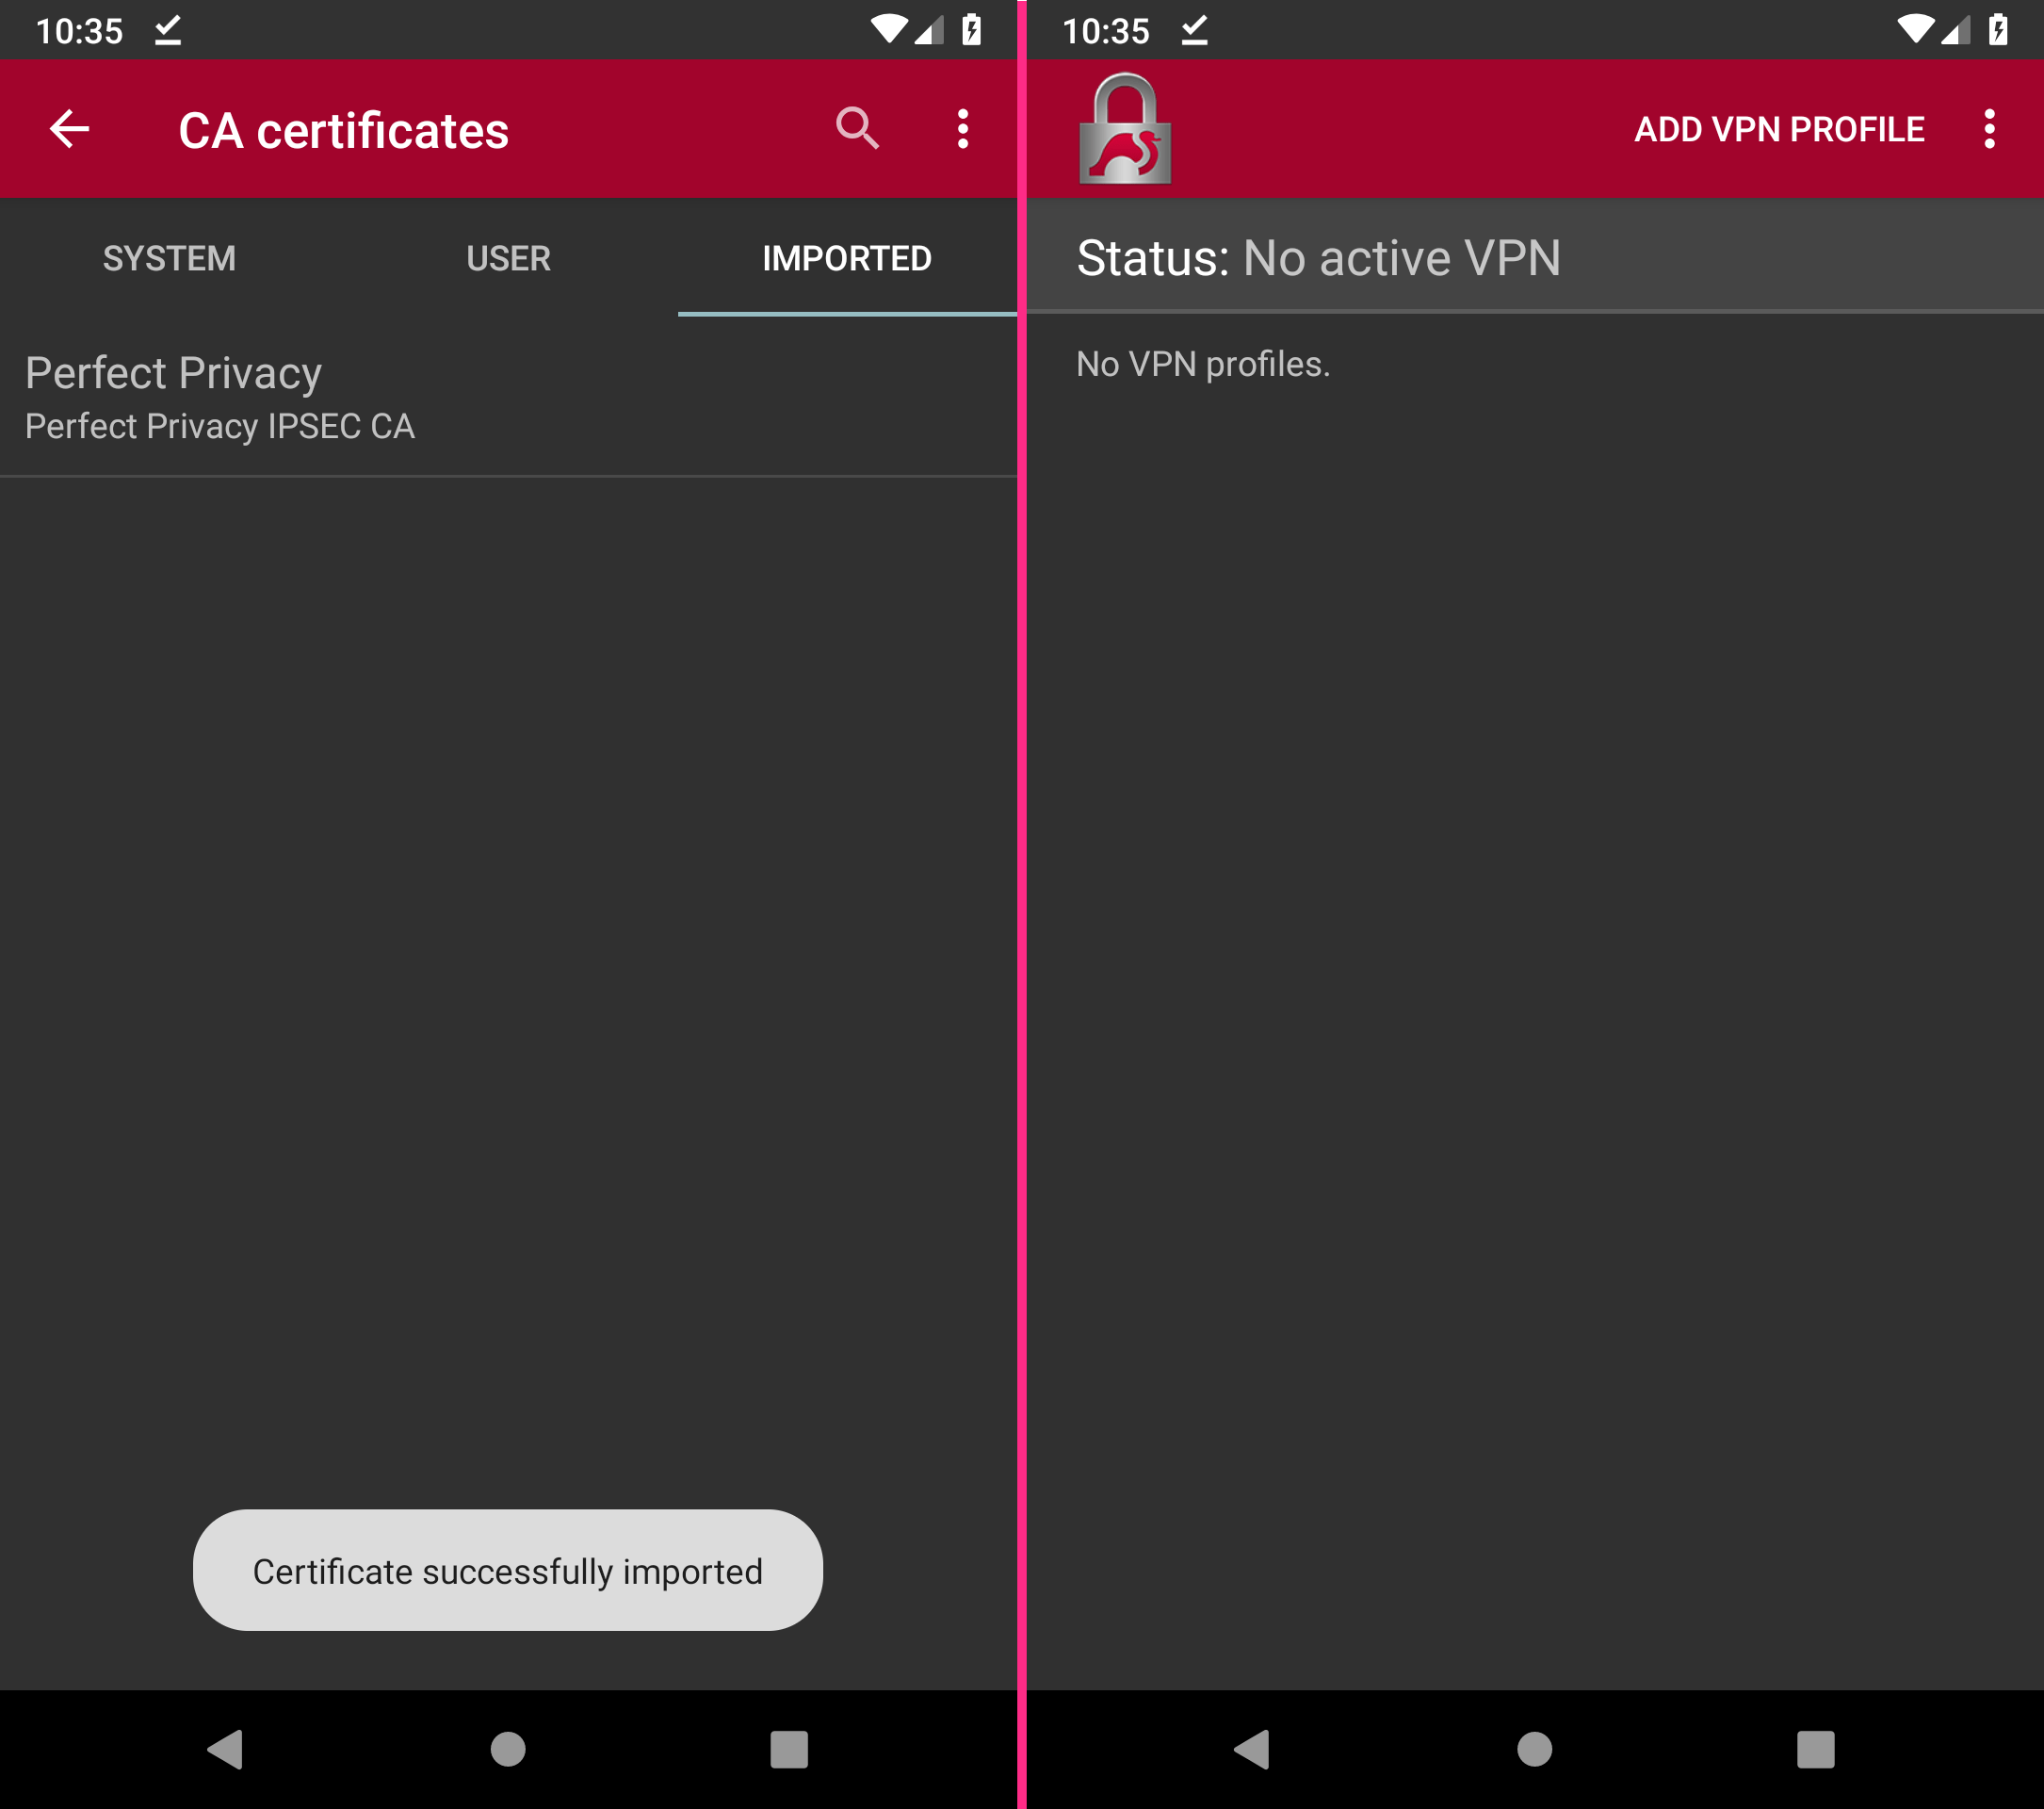
On the Imported tab you can see the imported certificate.
Use the arrow in the upper left corner to return to the main menu.

Create VPN profile
You can now set up any number of VPN profiles.
First select a location to which you want to establish the VPN connection. You will find an overview of the associated URLs on the download page (login required).
Our tip: Choose a location that is geographically as close as possible to achieve the best possible speed.
Once you have selected a location, tap Add VPN Profile at the top.
In the Server text box, enter the URL of the desired location. In the example, this is frankfurt.perfect-privacy.com.
Under Username and Password, enter your Perfect Privacy credentials and save the new profile by tapping Save in the menu at the top.
Establish a VPN connection
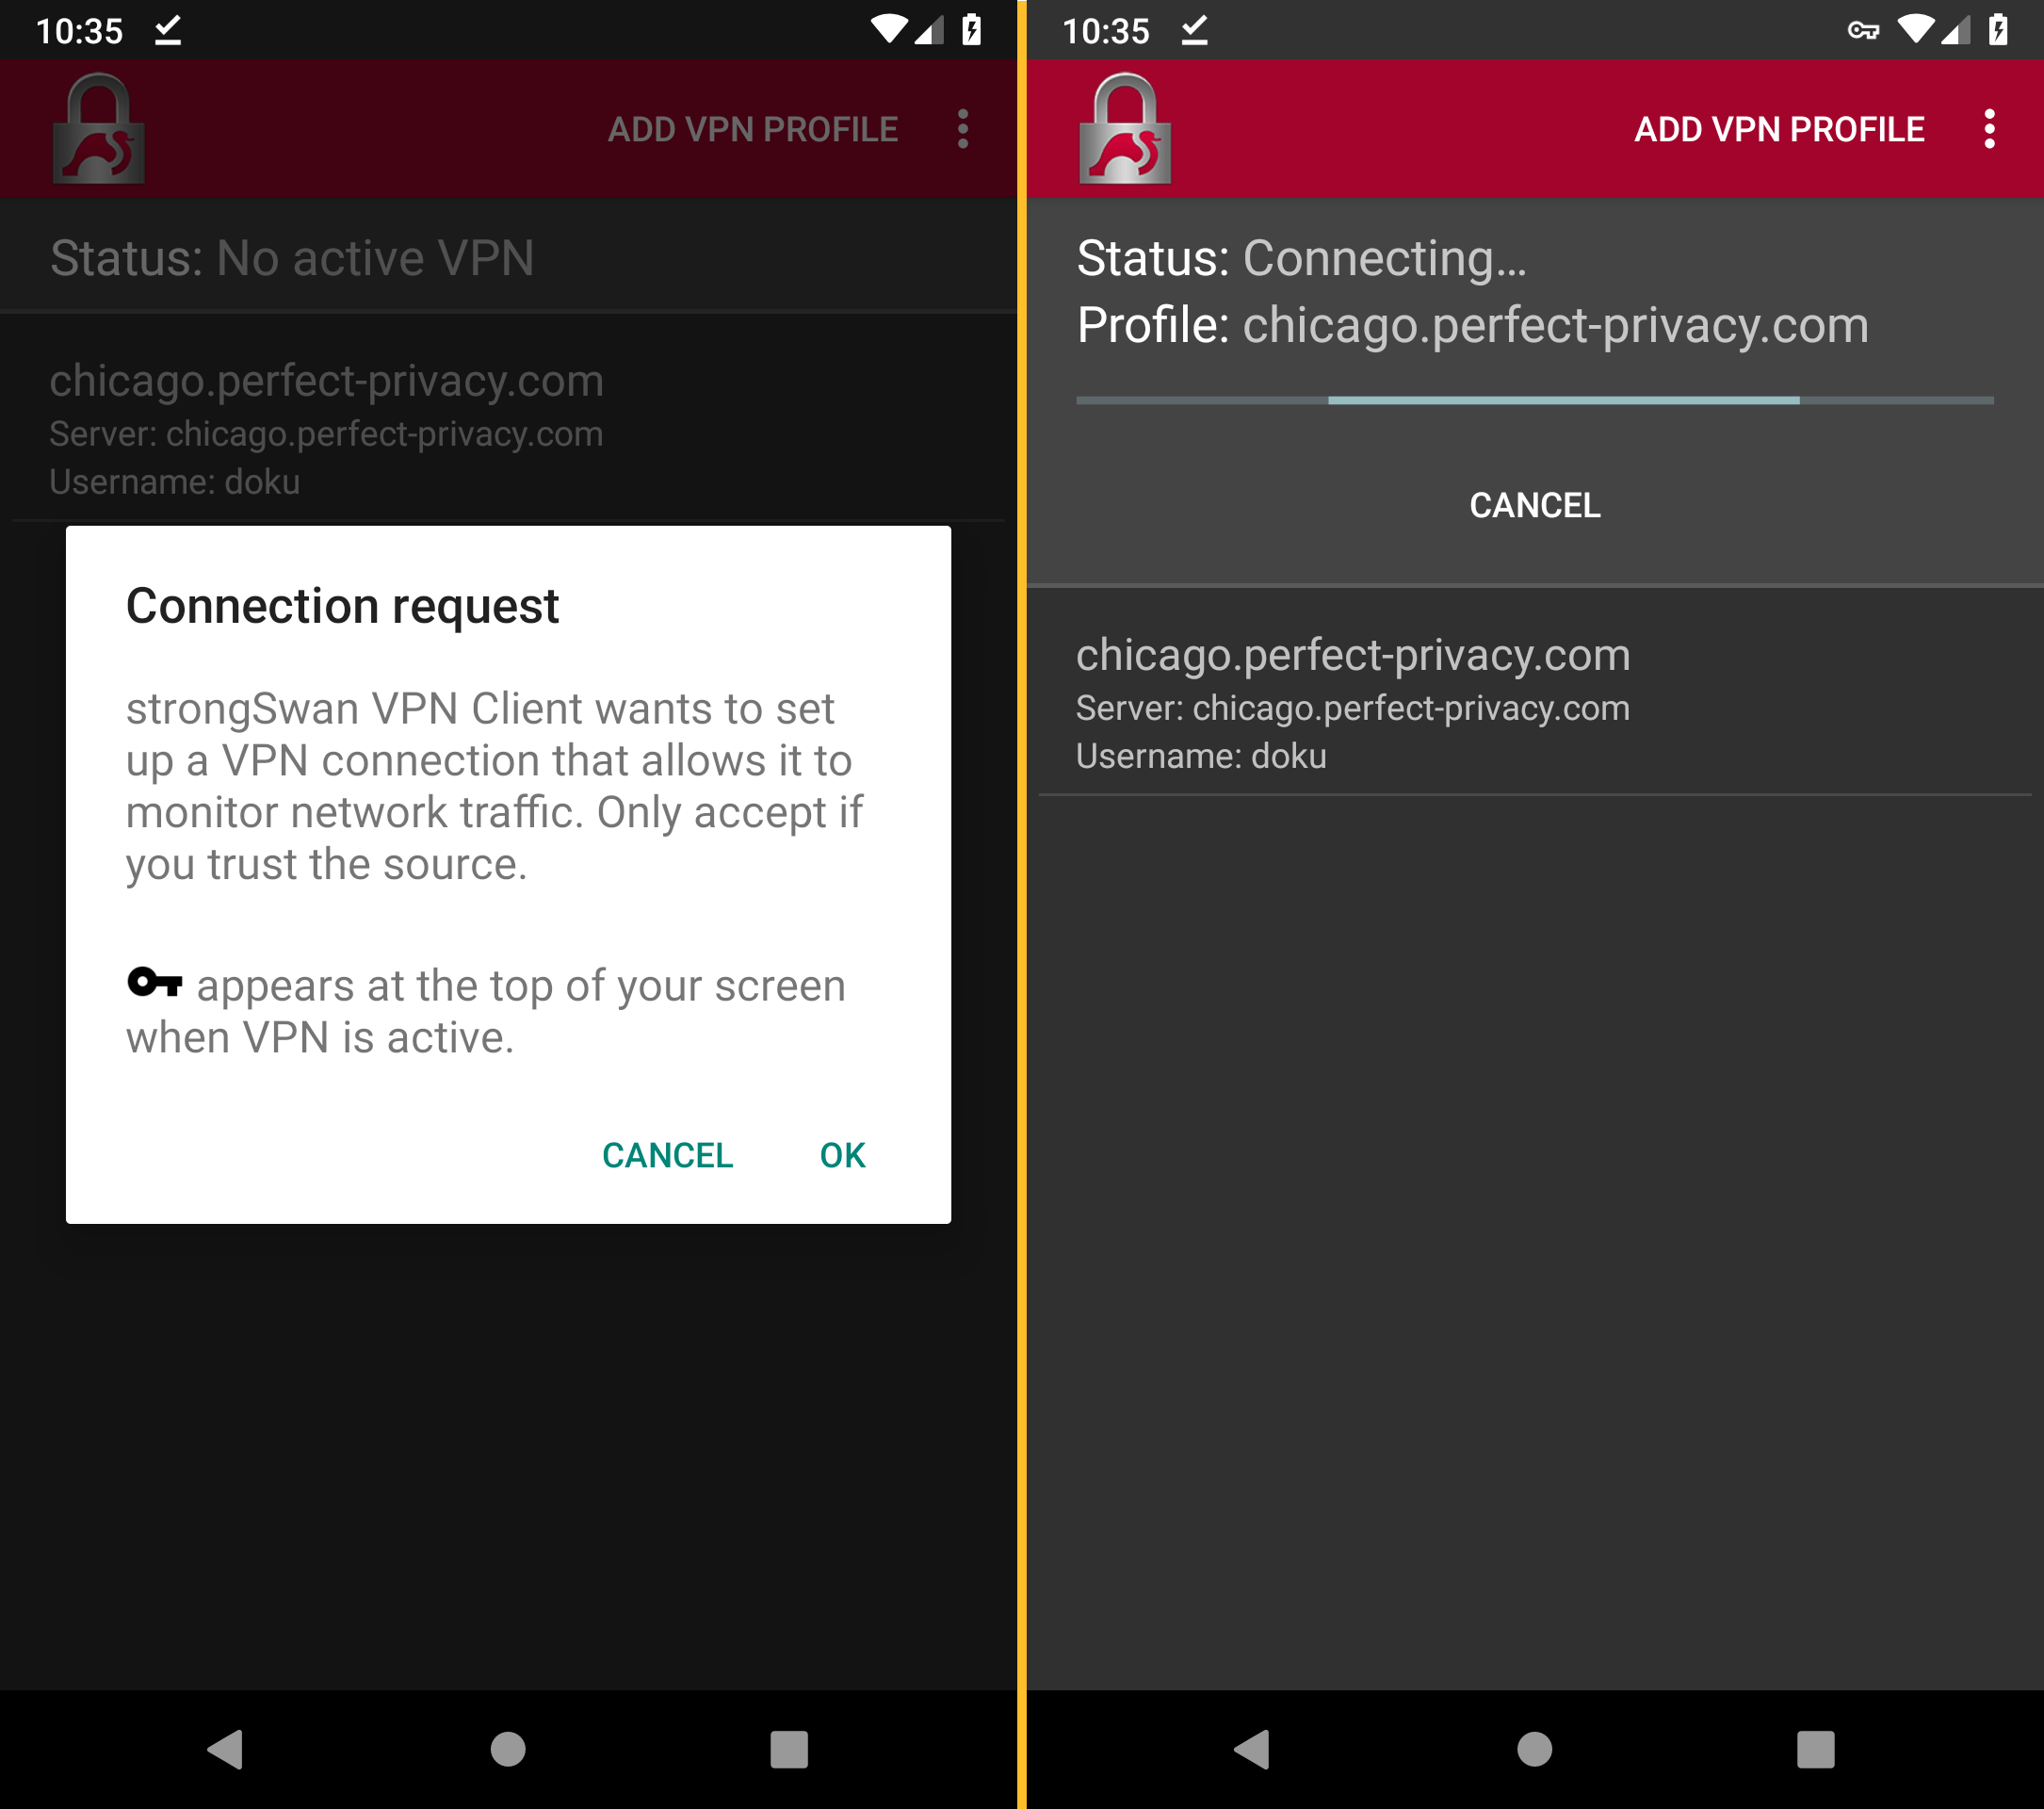
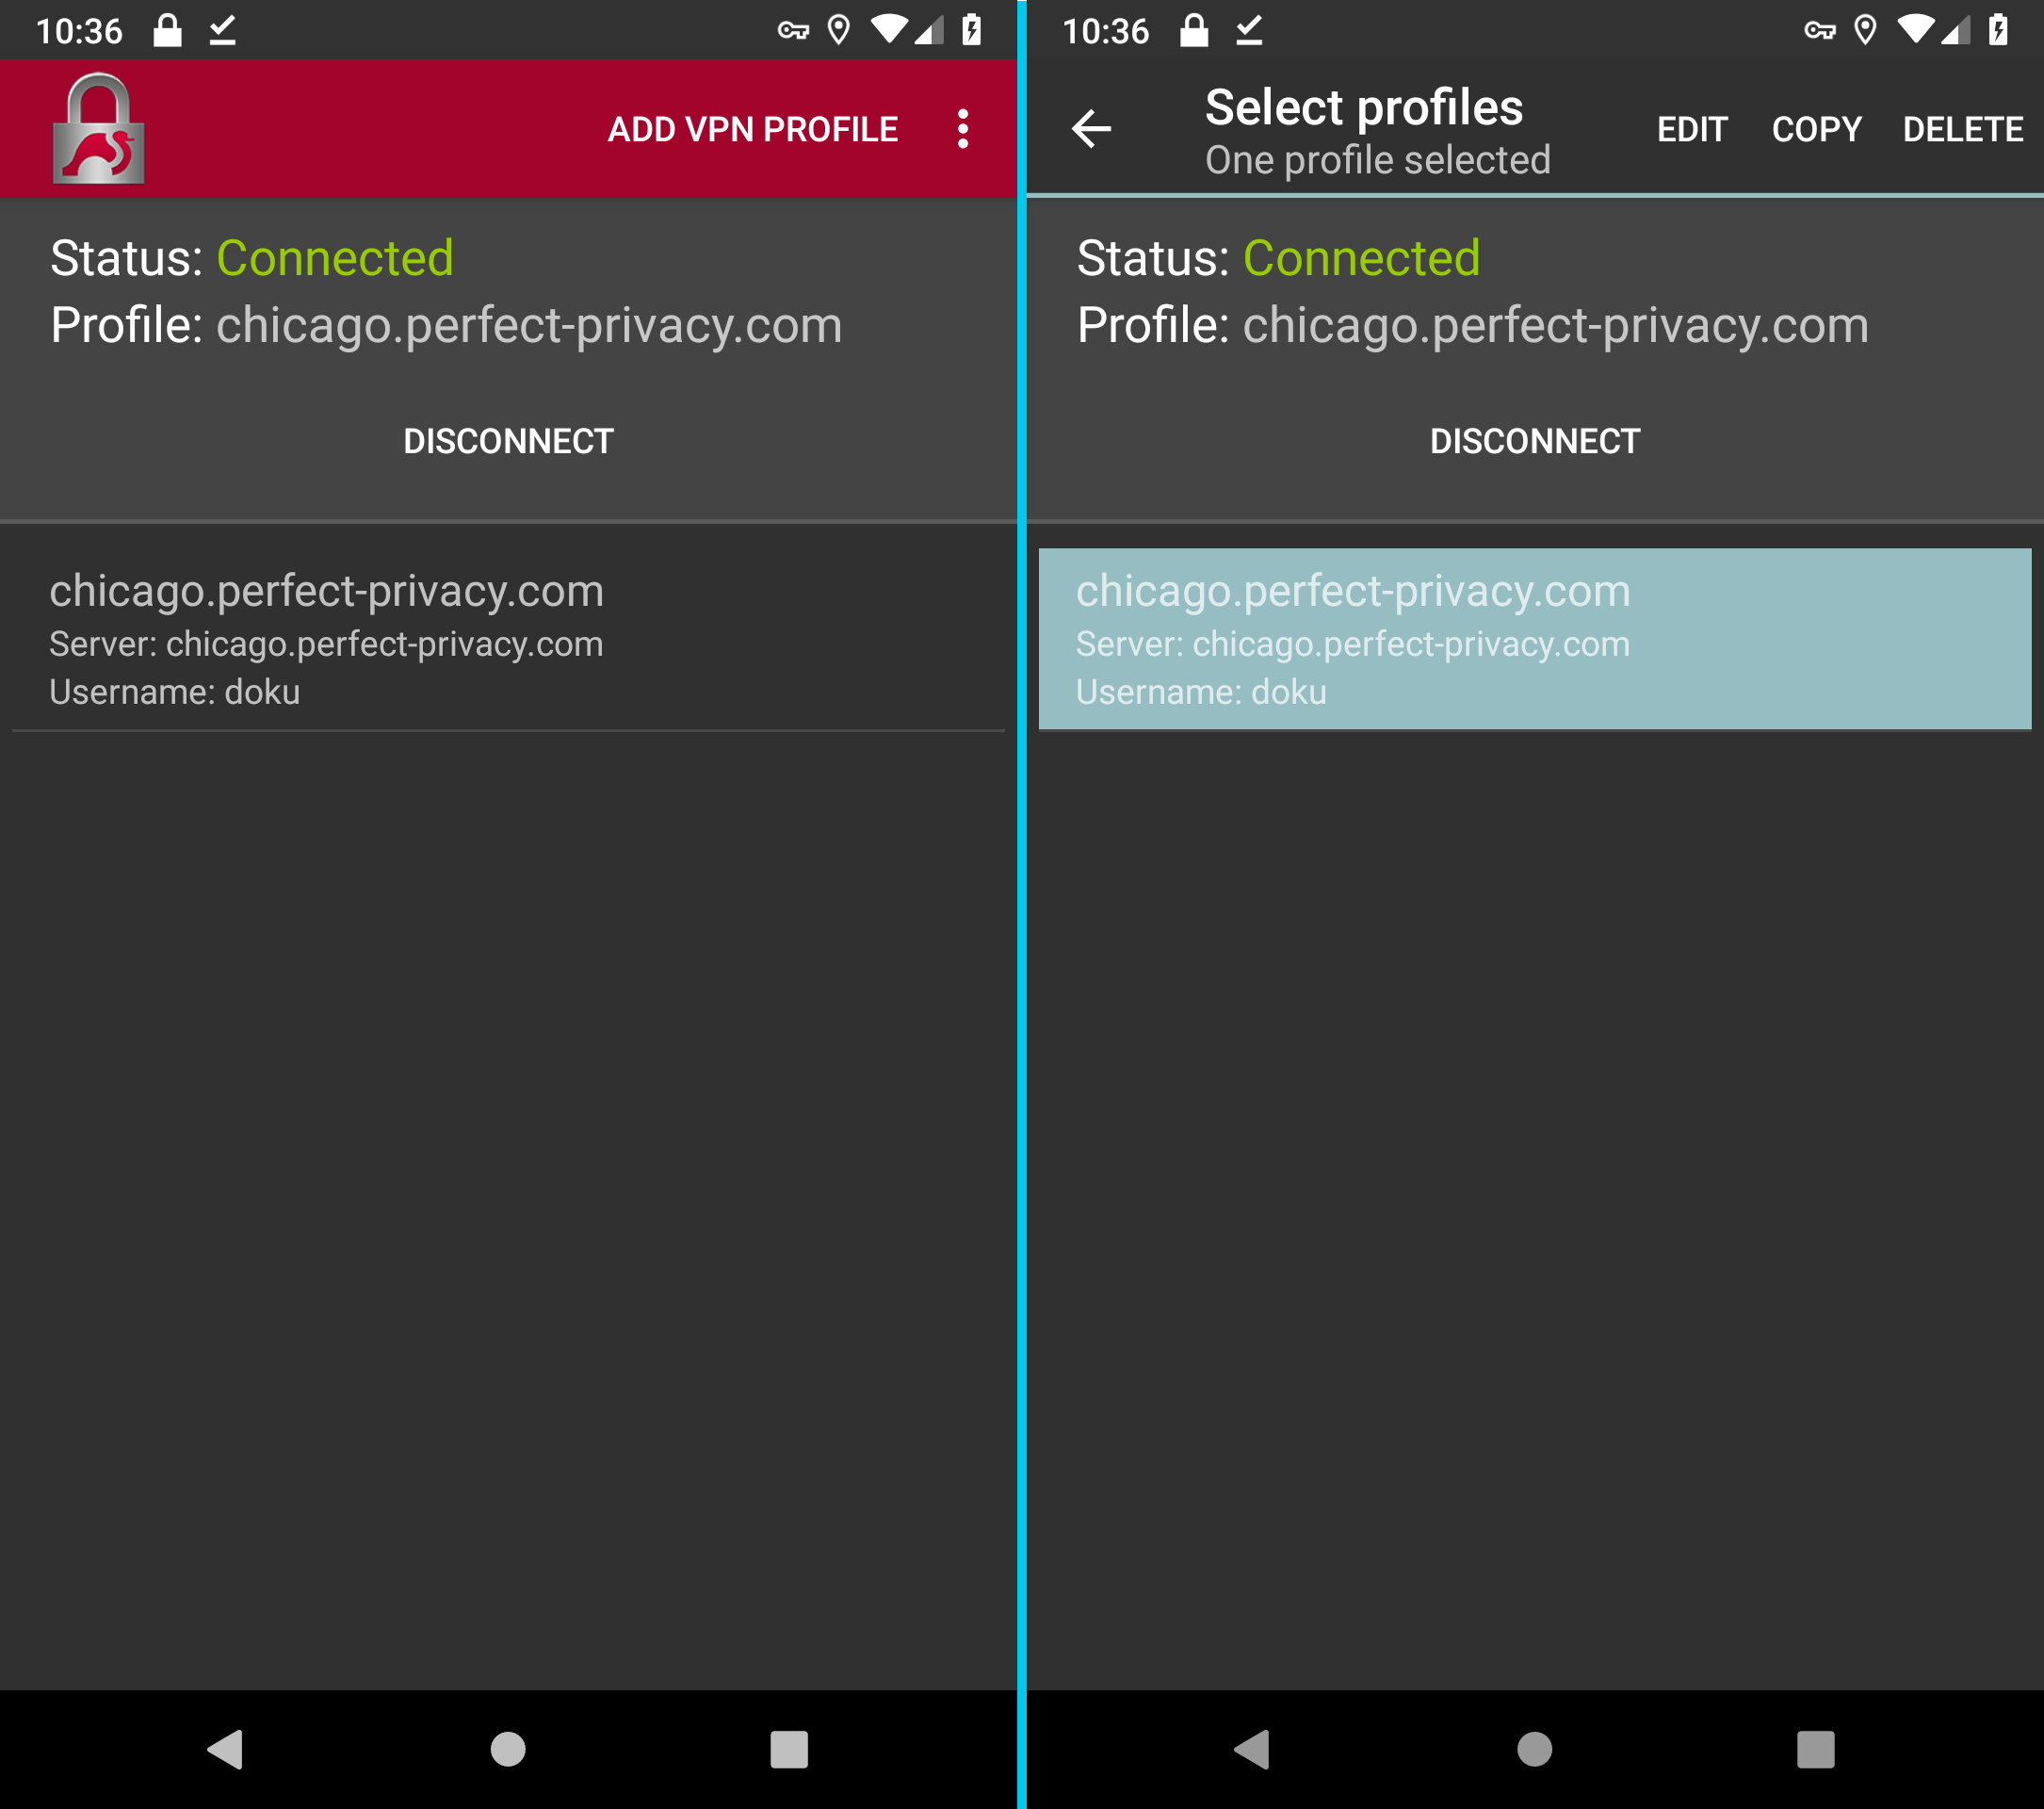
Back in the main menu, select the new VPN profile.
If you establish a VPN connection with strongSwan for the first time, you have to allow this once.
After a short moment the VPN connection will be established.
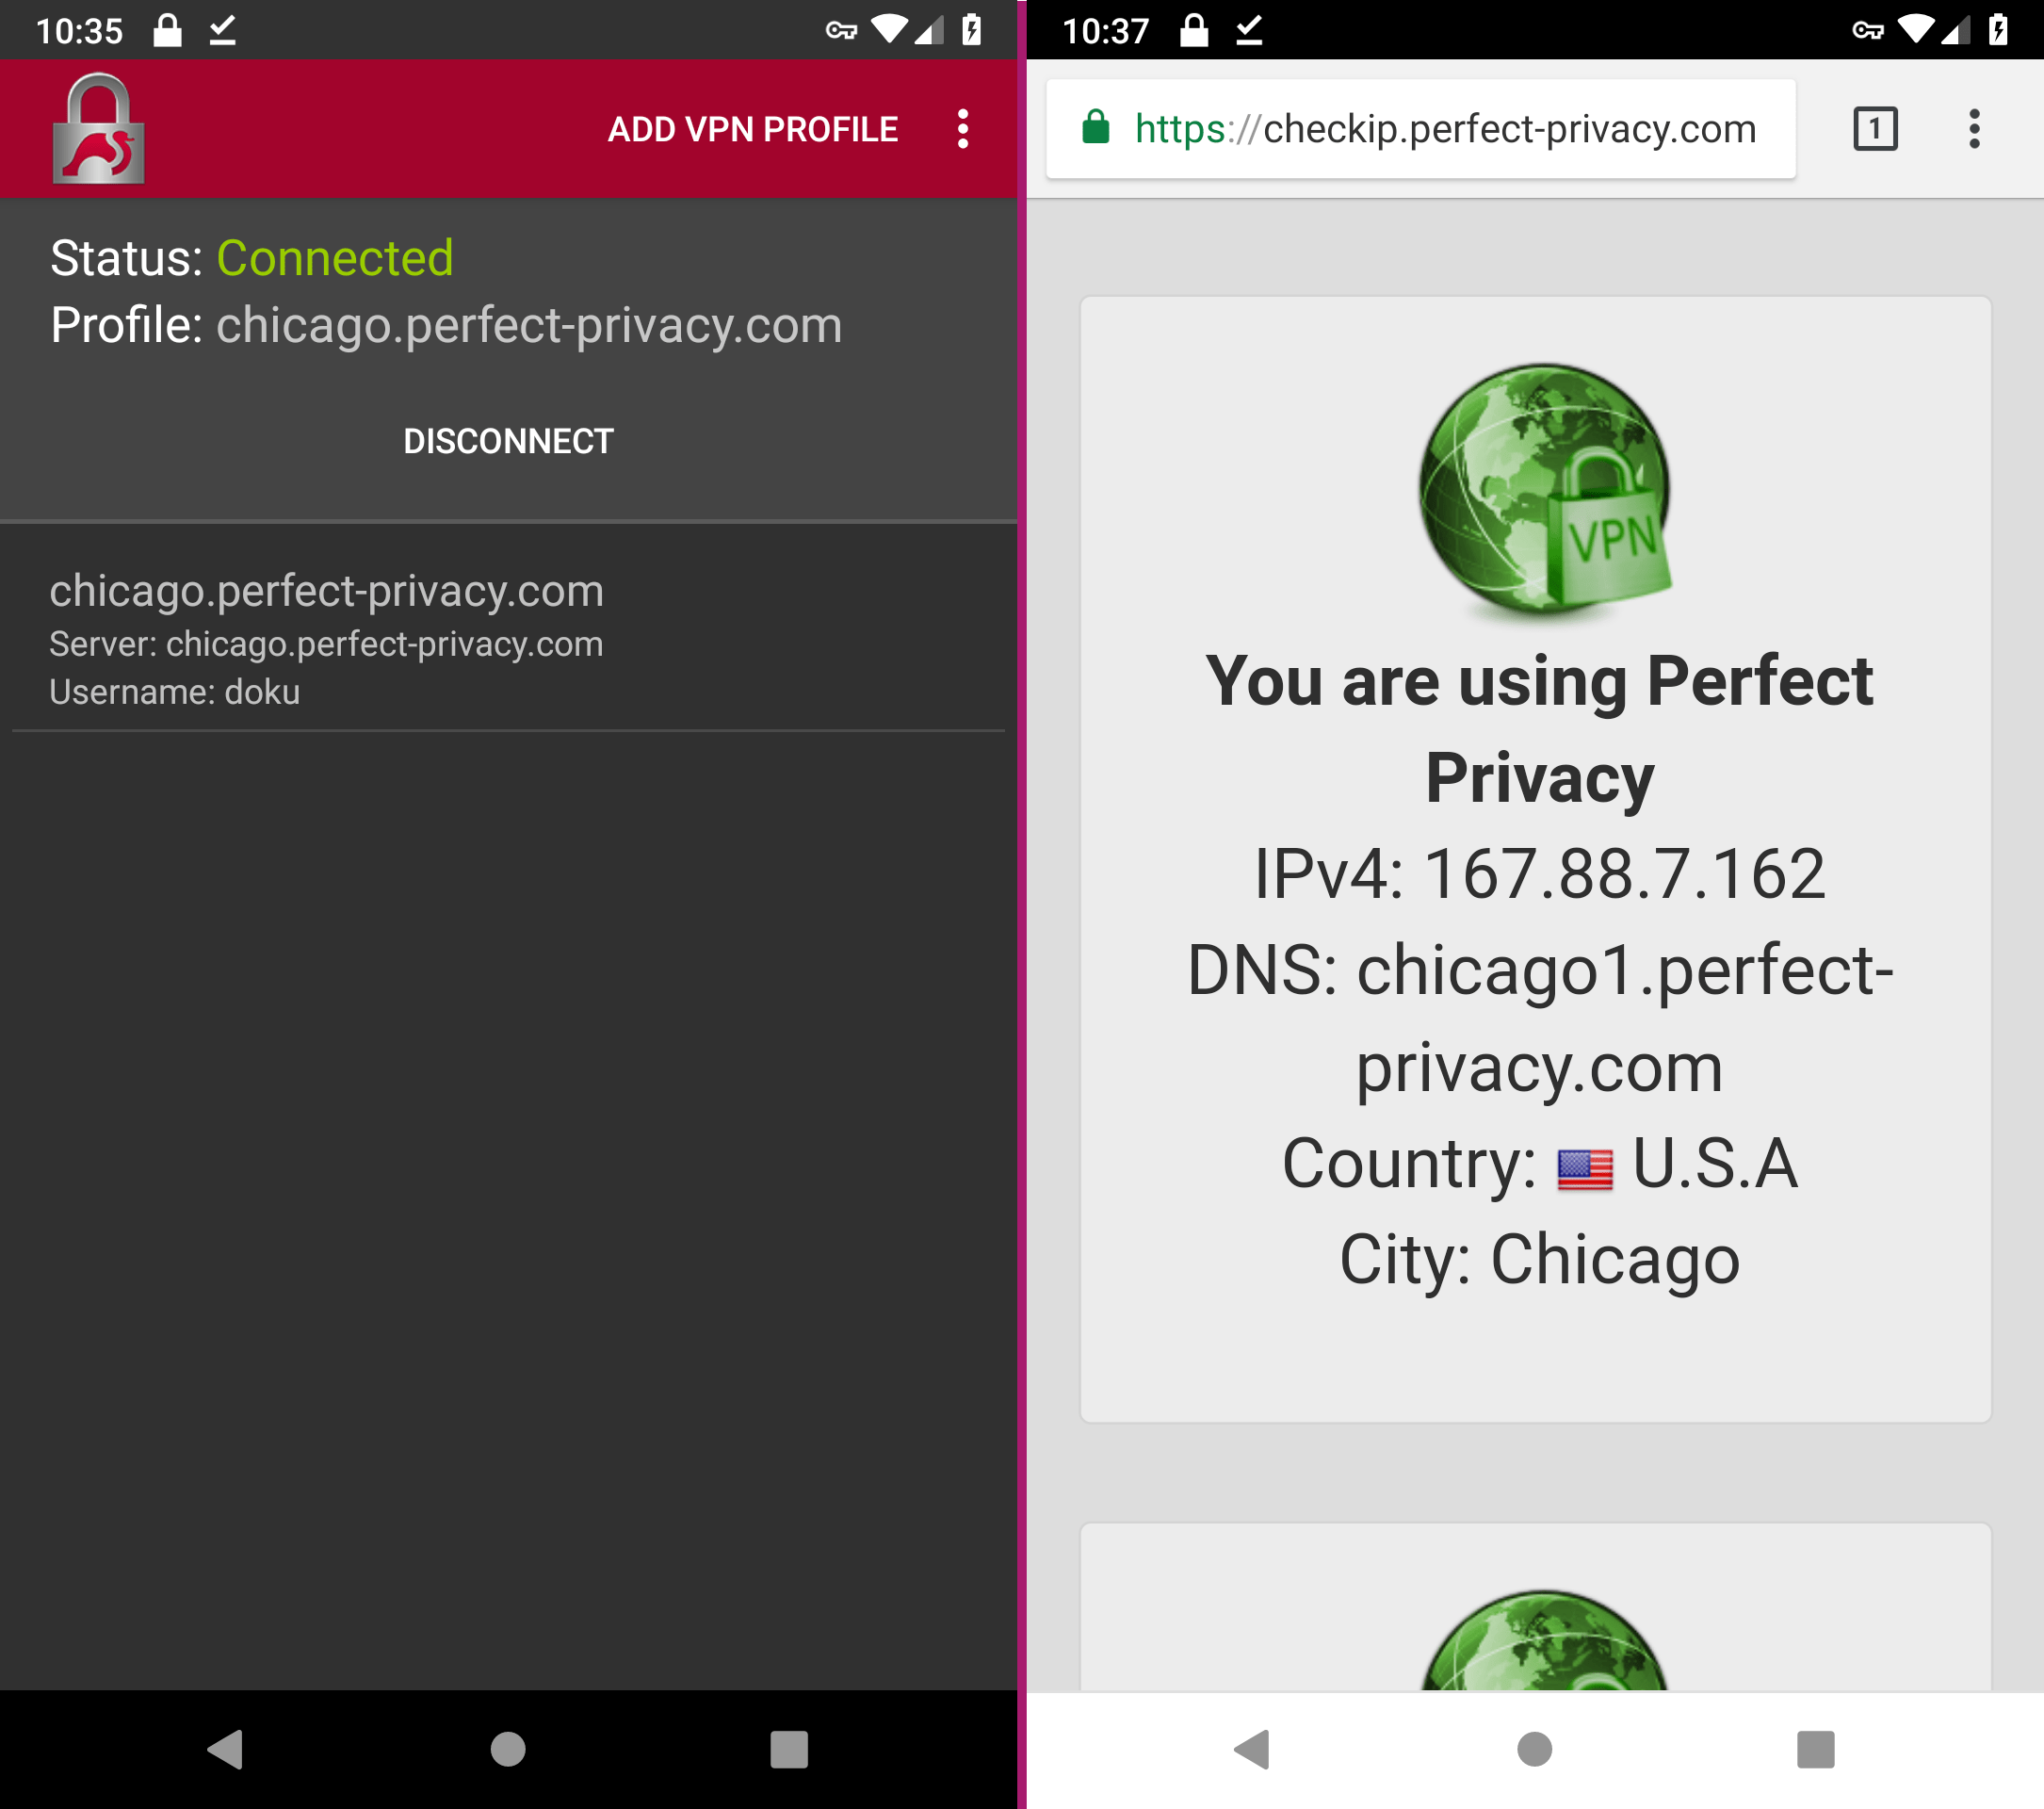
Even if the app is in the background, you can recognize the active VPN connection by the key icon in the status bar.
You can check that the VPN connection is working correctly by going to our Check IP page.
Enable the Kill Switch
If you want to ensure that all of your Internet traffic passes through the VPN tunnel, you can now enable the kill switch.
Please note: With the kill switch activated, the Internet connection is only available if the VPN tunnel is up and running.
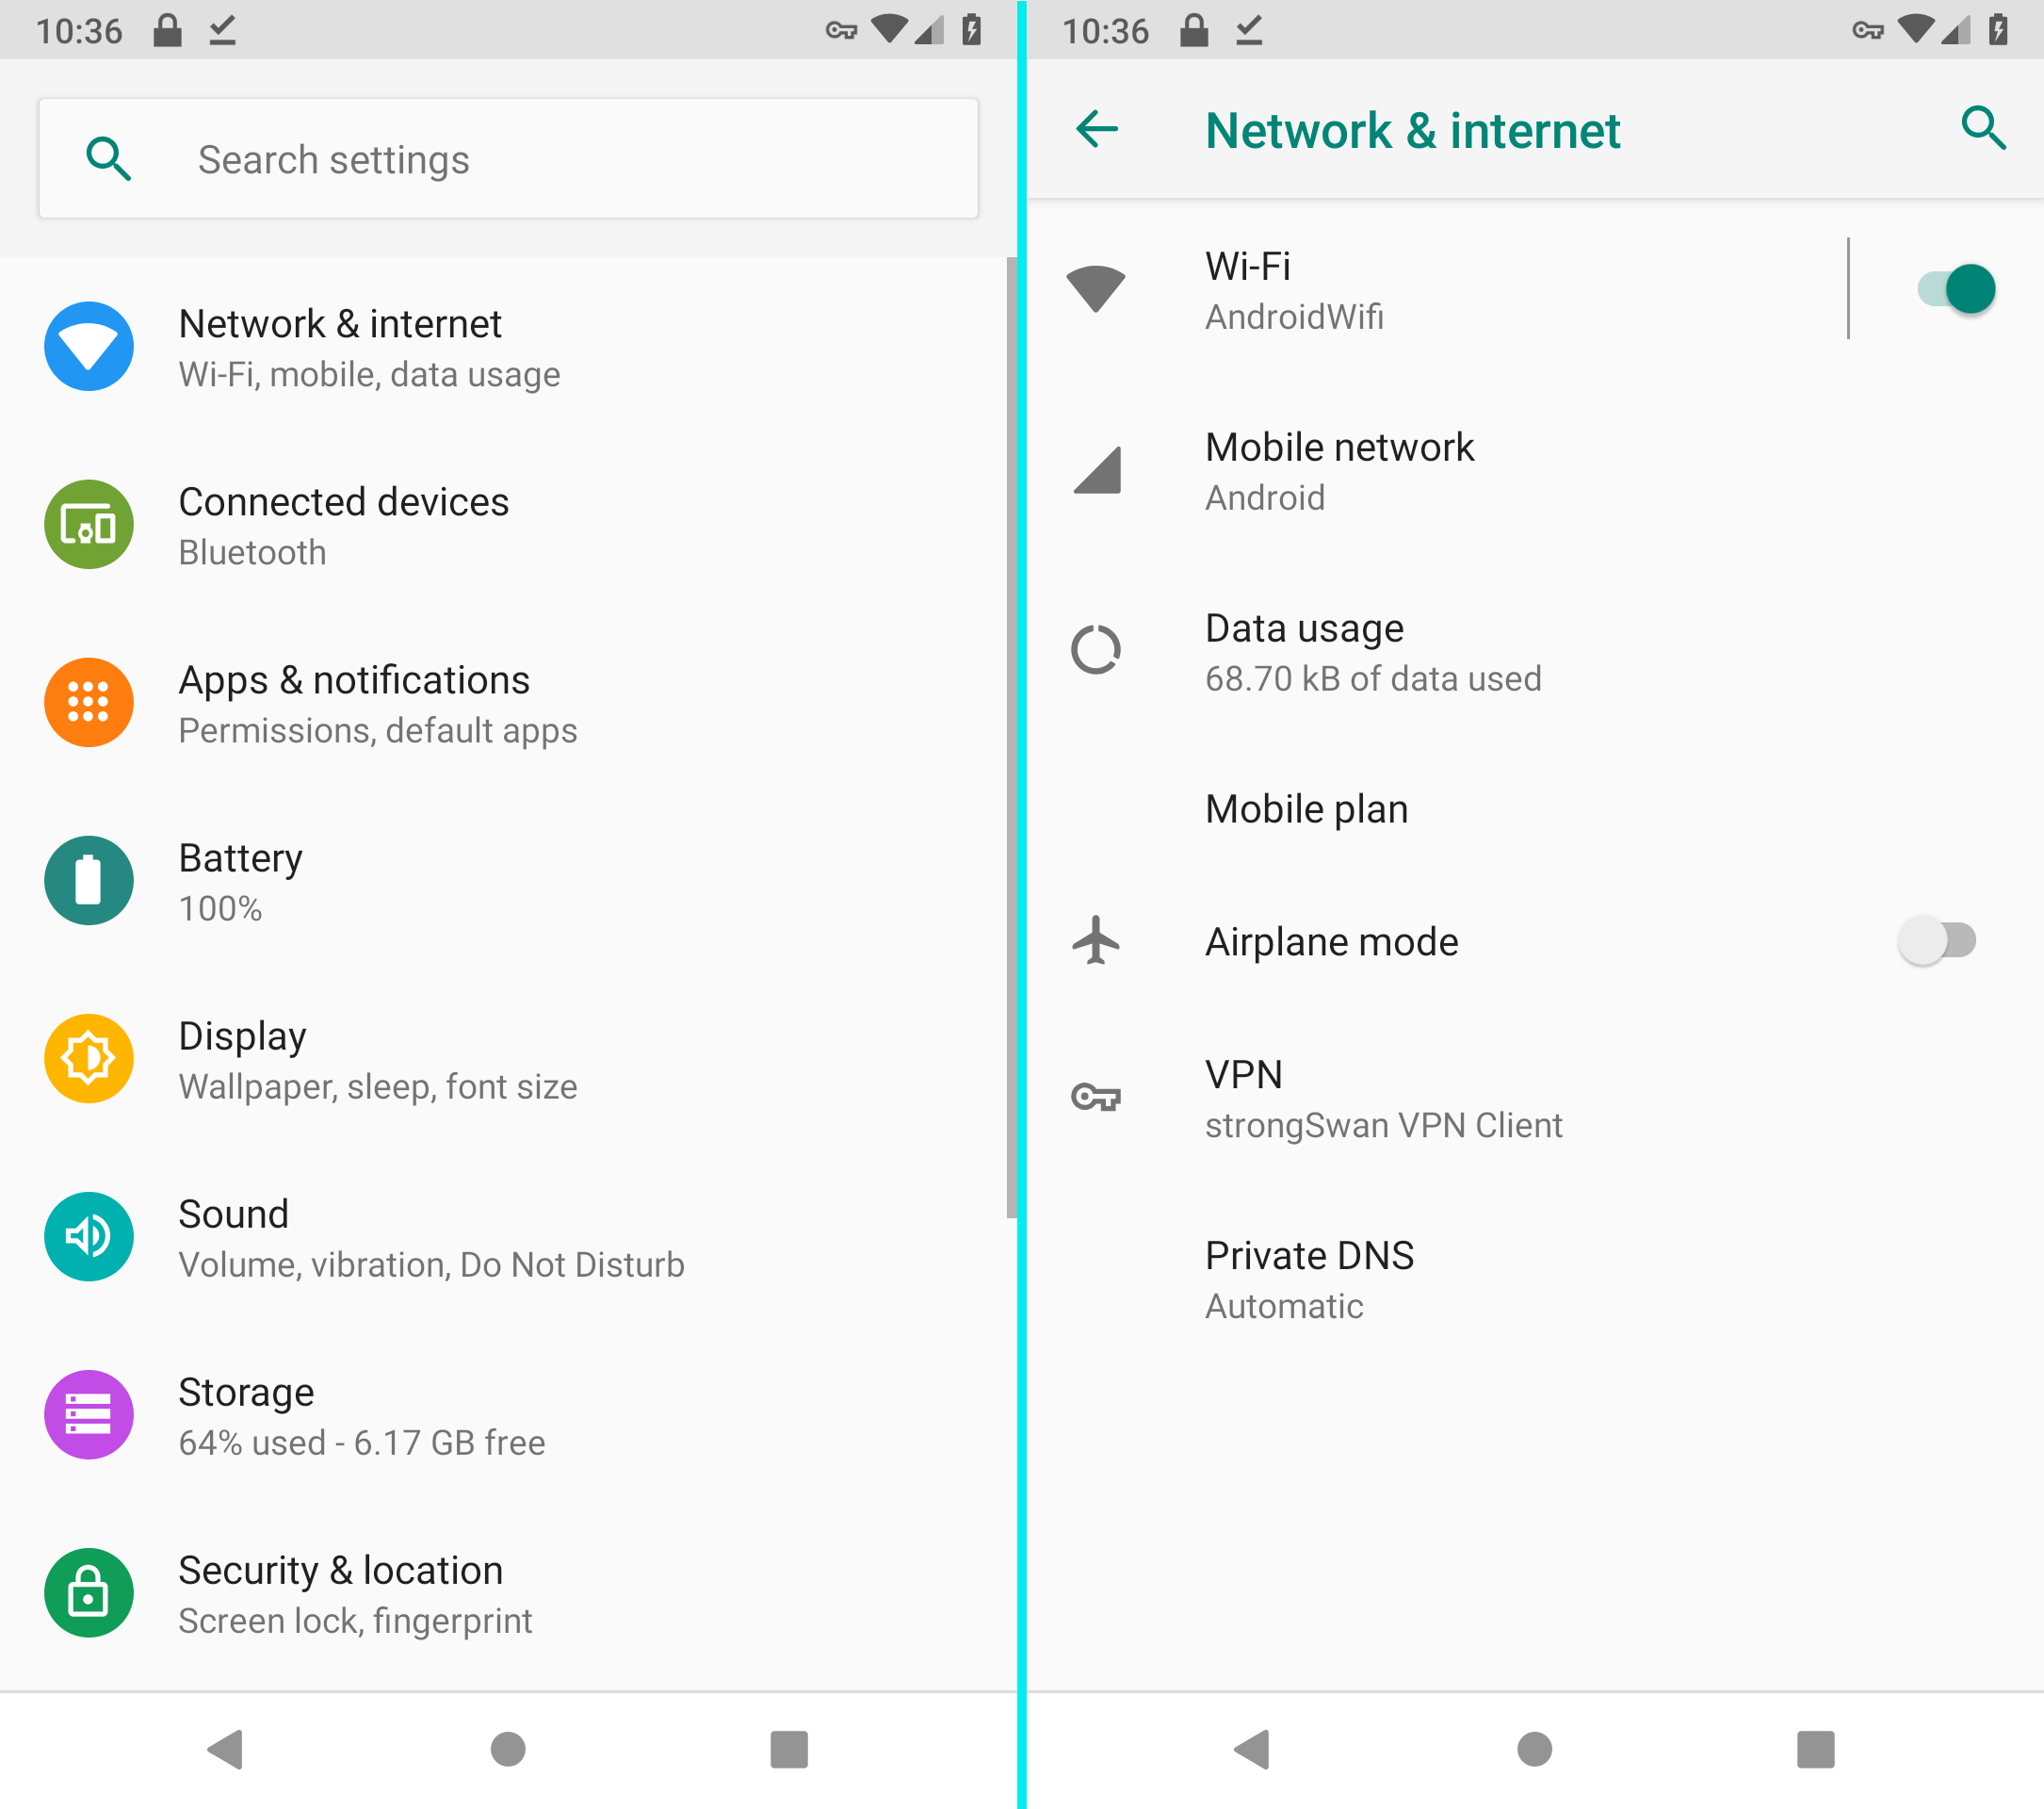
To enable the kill switch, go to the Android settings.
Select Network & internet and unfold the Advanced menu.
Tap on VPN.
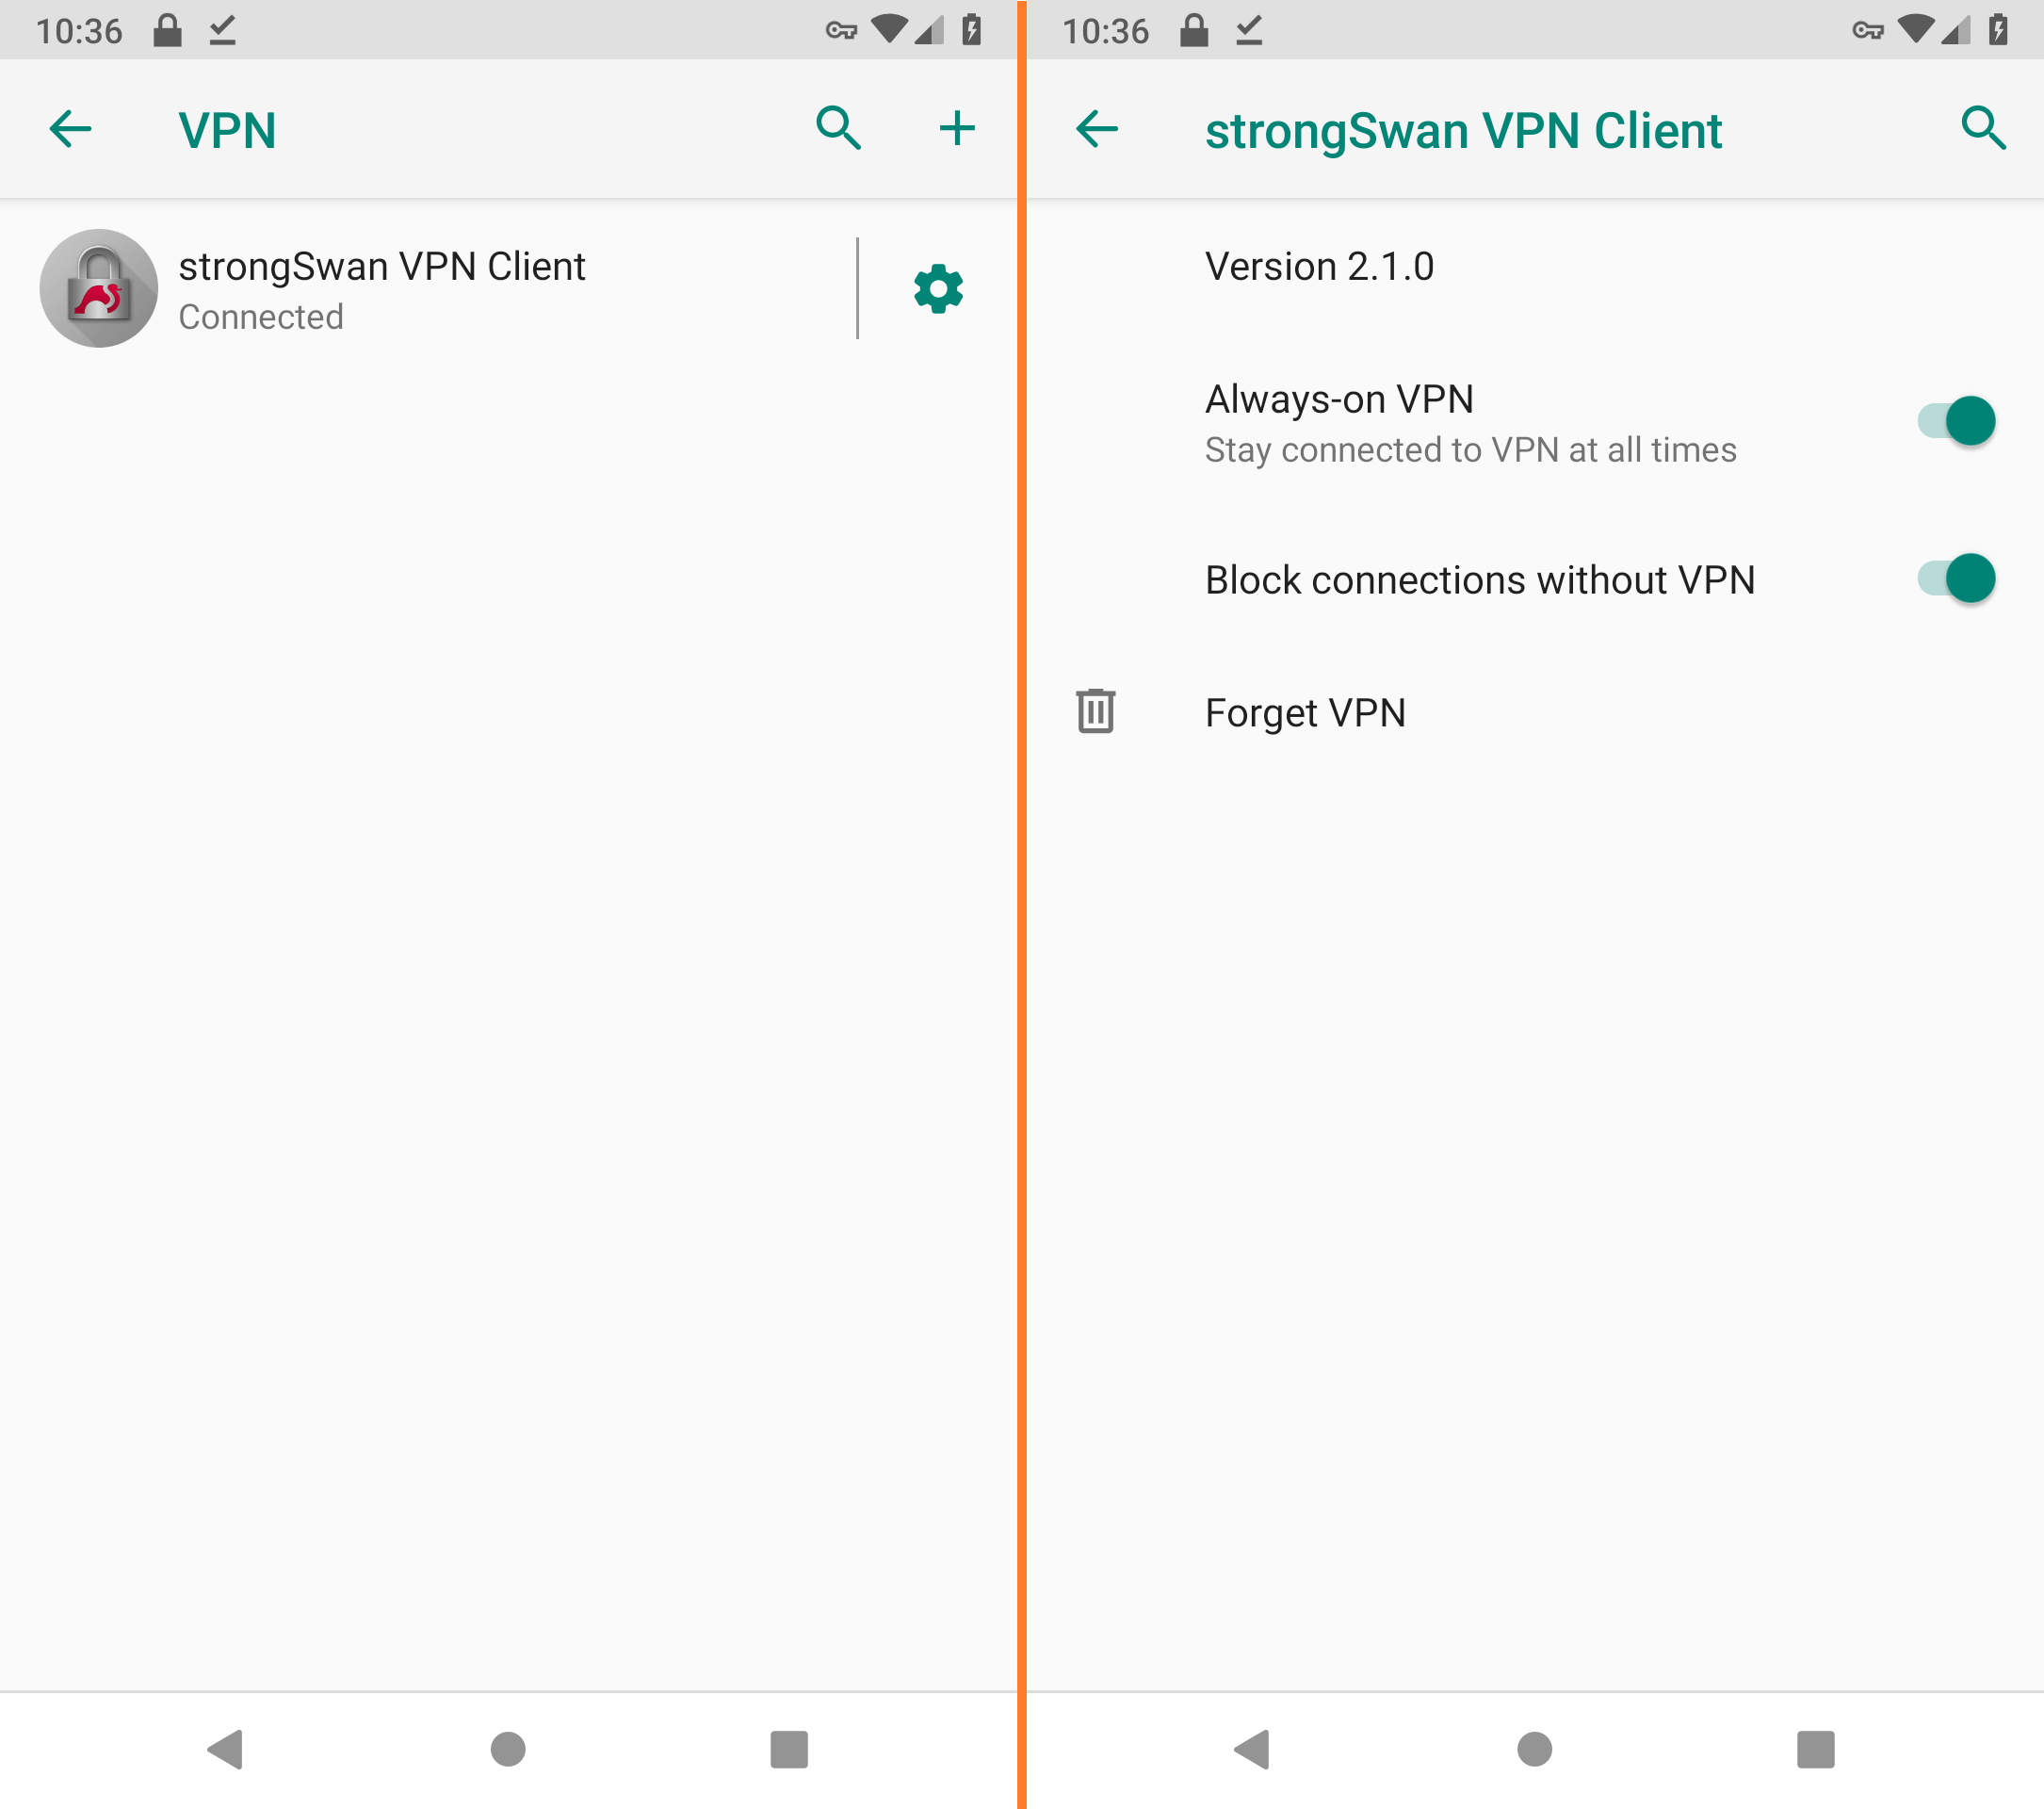
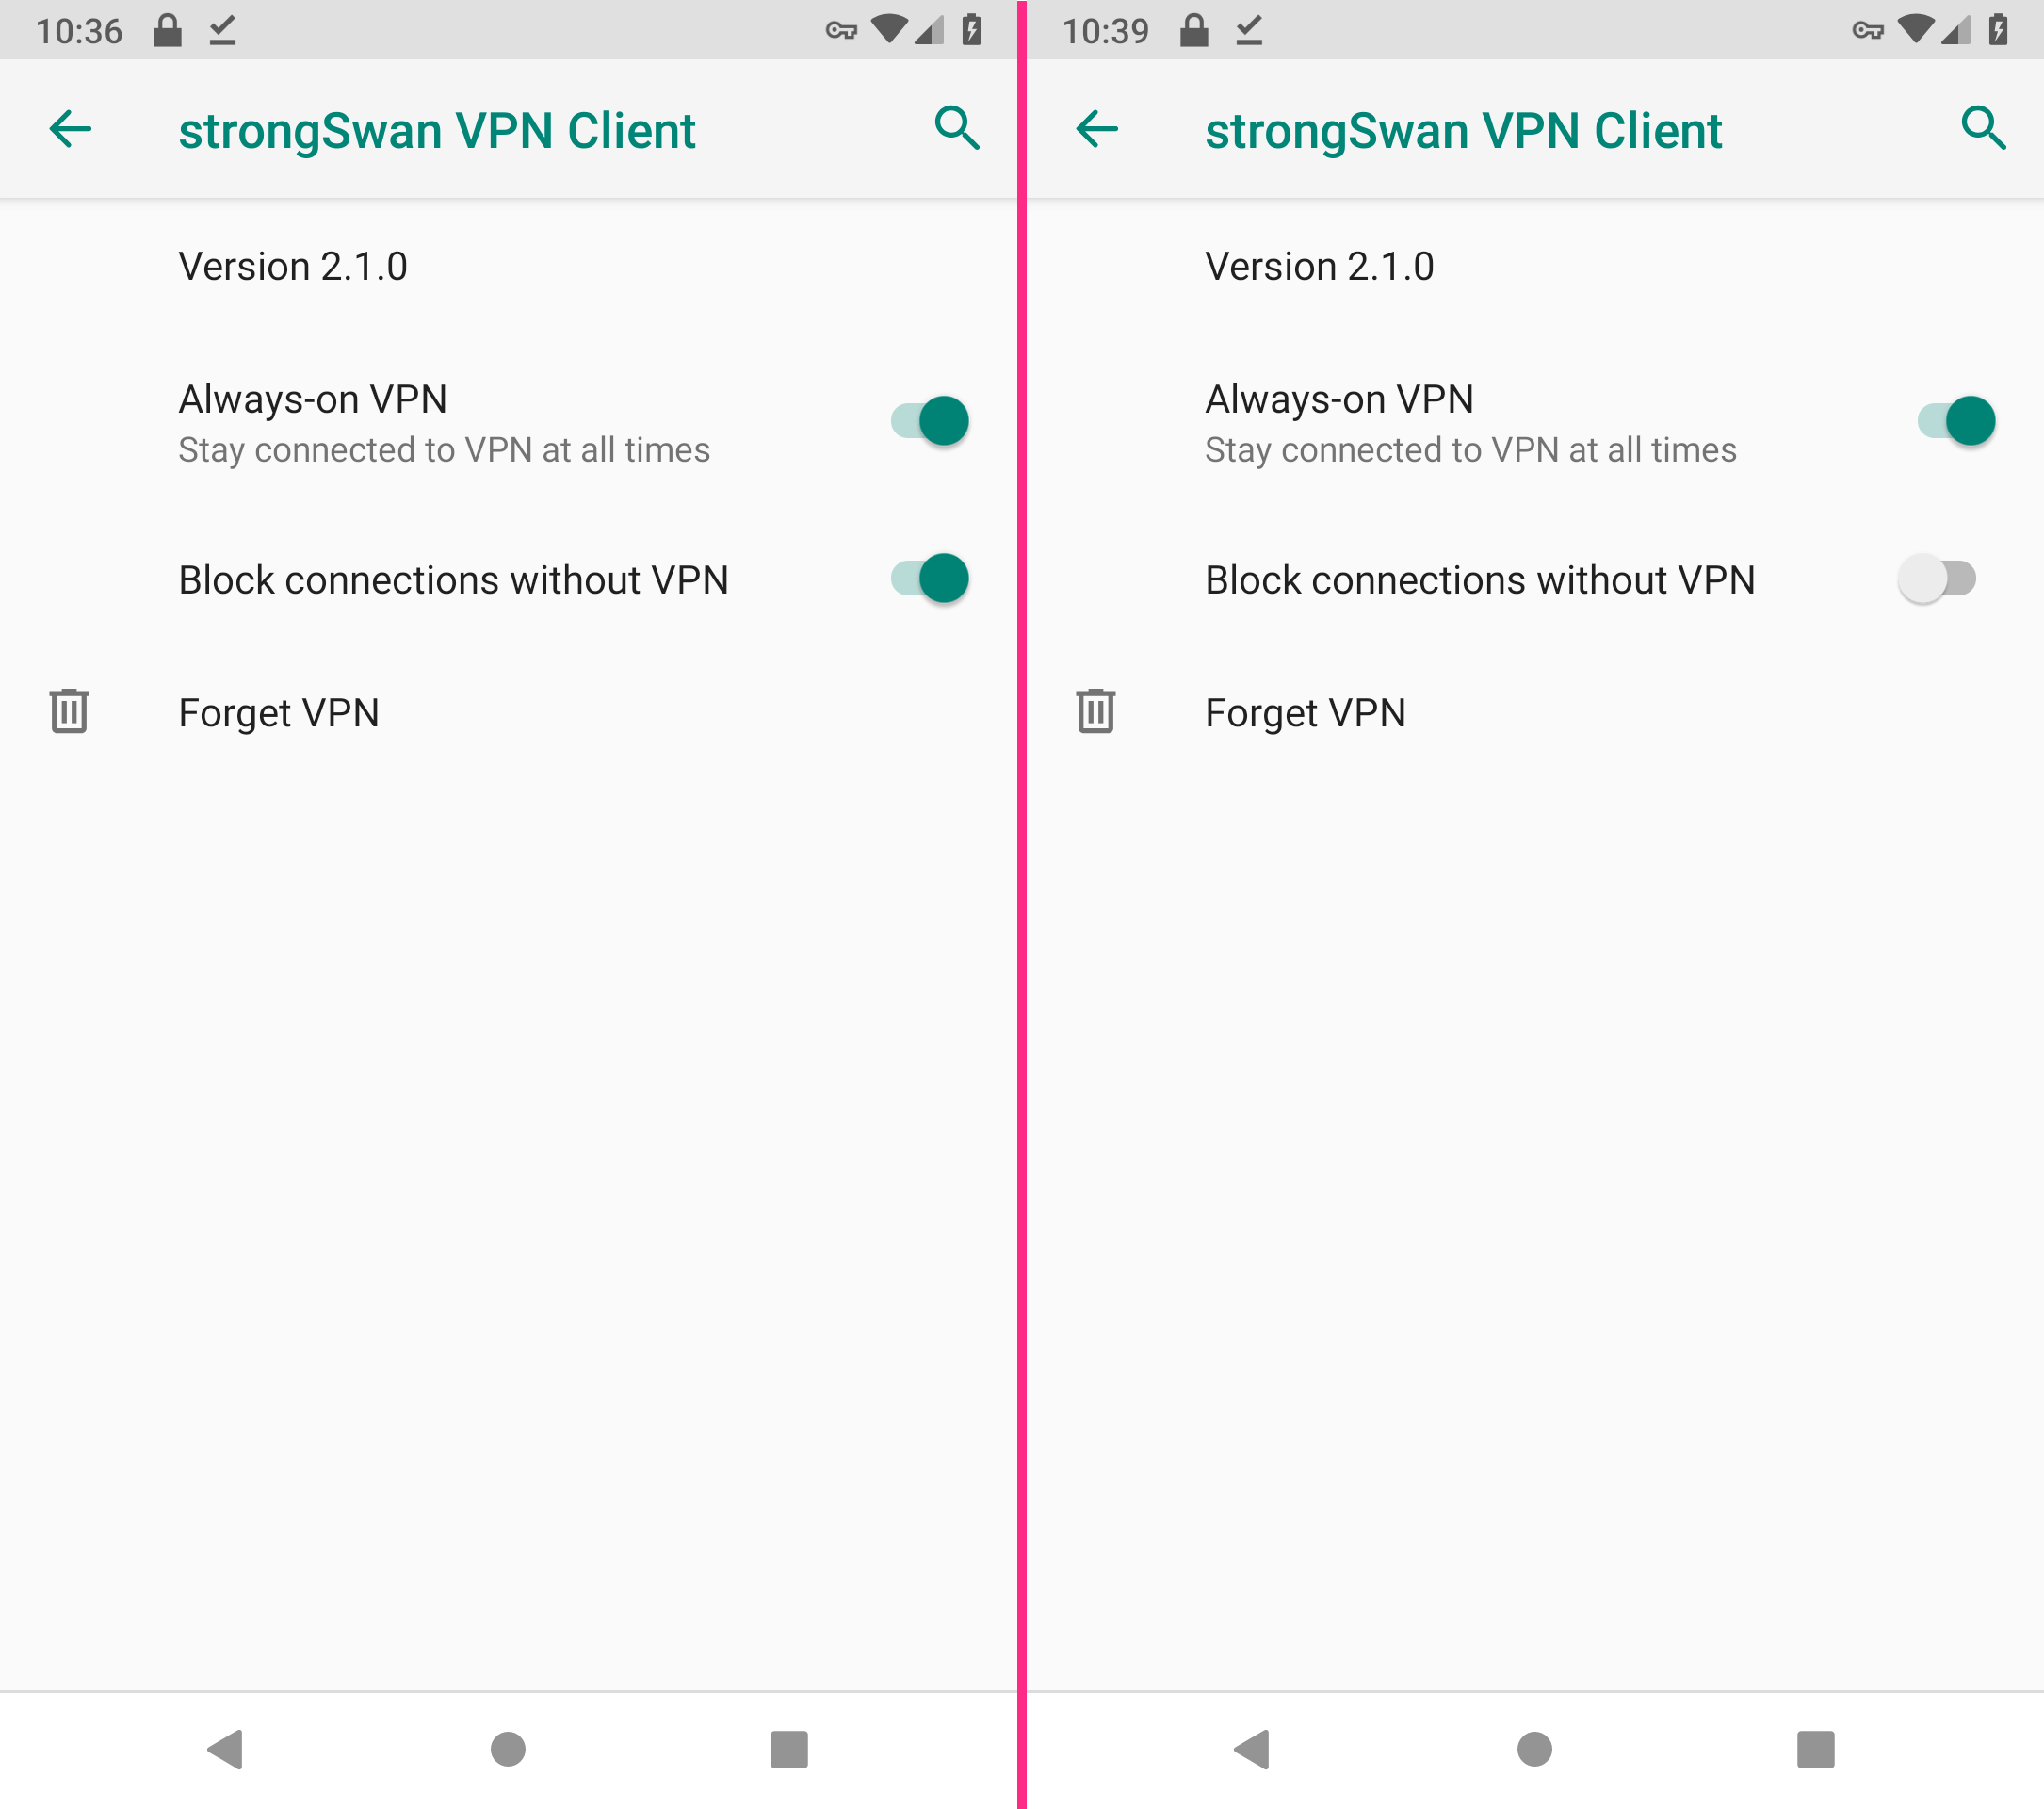
Touch the gear to the right of strongSwan VPN Client.
In this menu you activate both Always-on VPN and Block connections without VPN.
The kill switch is now active and you can safely use the VPN.
Compatibility: Unfortunately, these options are not available on Huawei and Honor devices (EMUI interface) (as of Android 9.0).
Set up split tunneling
If you like, you can exclude certain apps from the VPN. Their Internet traffic is then no longer routed through the VPN tunnel, and is instead routed past it with no additional encryption. For these apps it looks like there is no VPN connection at all.
In this example, you create an exception for the Netflix app to route the connection to the Netflix servers directly through your ISP.
In order for the exception to work, you must first deactivate the Block connections without VPN option in the VPN settings. How to get there is described above in the section "Enable the kill switch".
Now switch to the strongSwan app.
Hold down the desired profile until the menu above changes.
Tap on Edit.
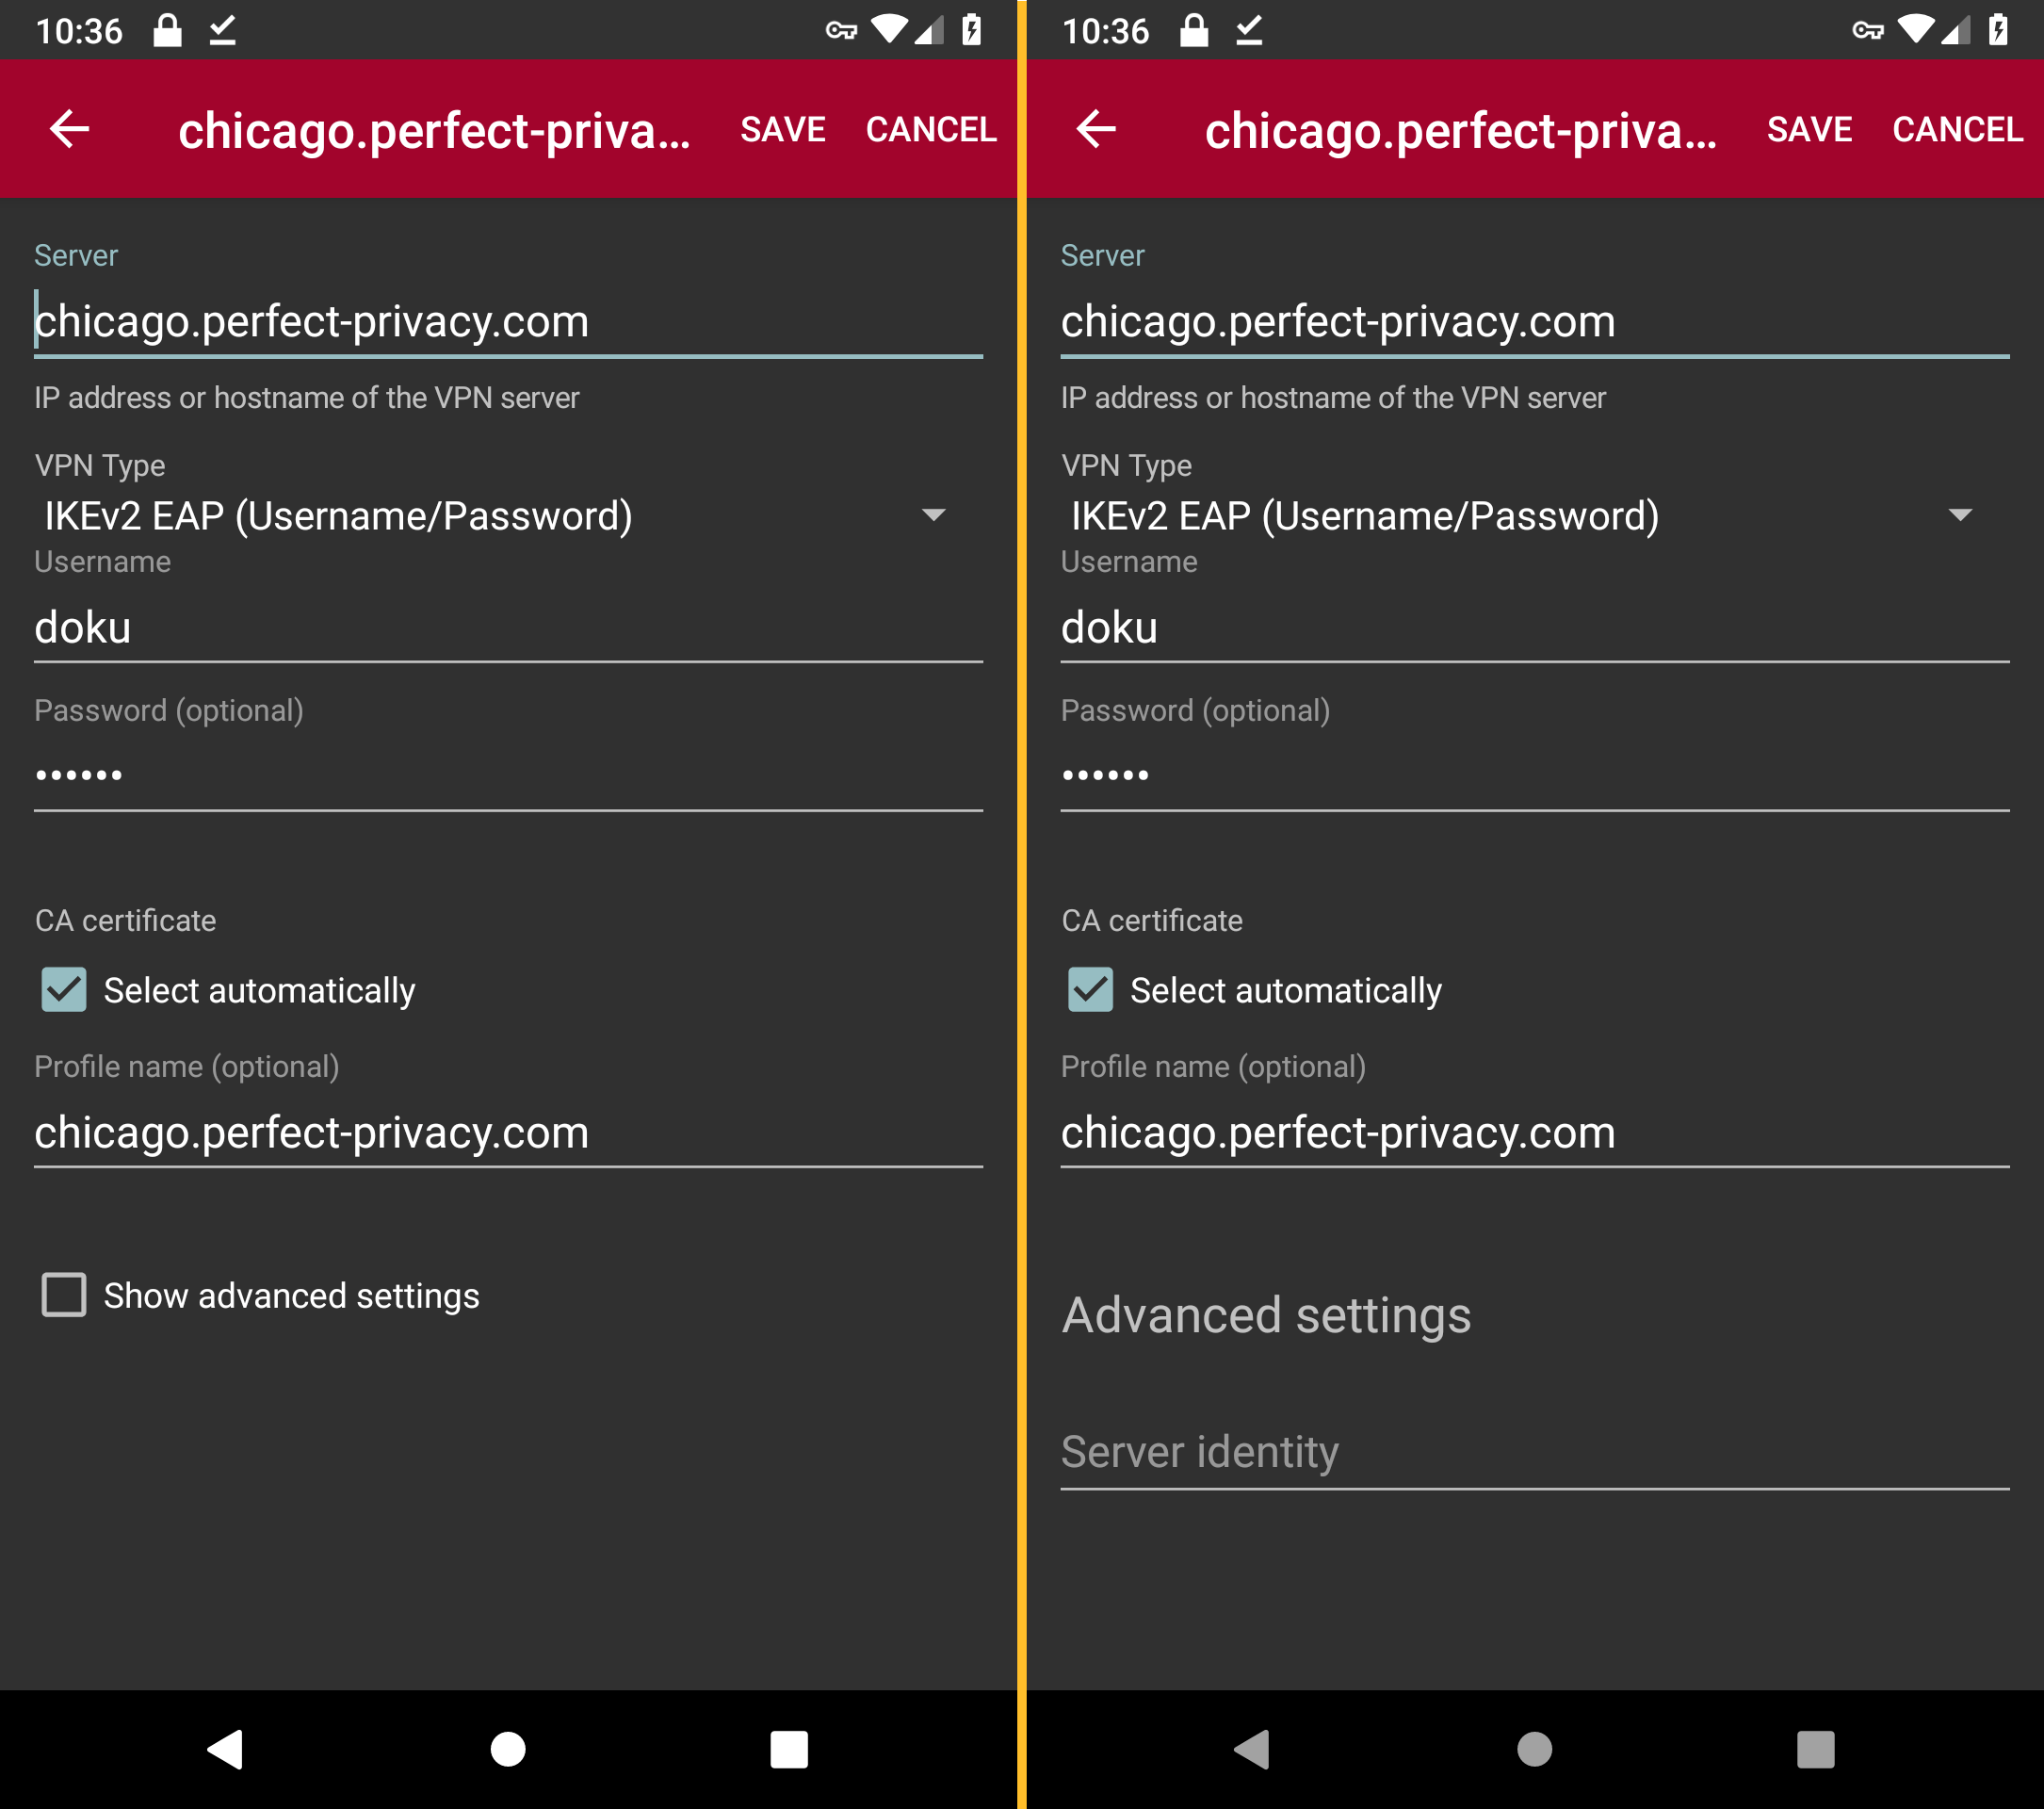
In the settings, enable Show advanced settings.
Scroll down to the Split tunneling section.

Under the item Applications at the moment it says All applications use the VPN.
Tap on it and in the menu select Exclude selected applications from the VPN.
Now, tap on Select applications.
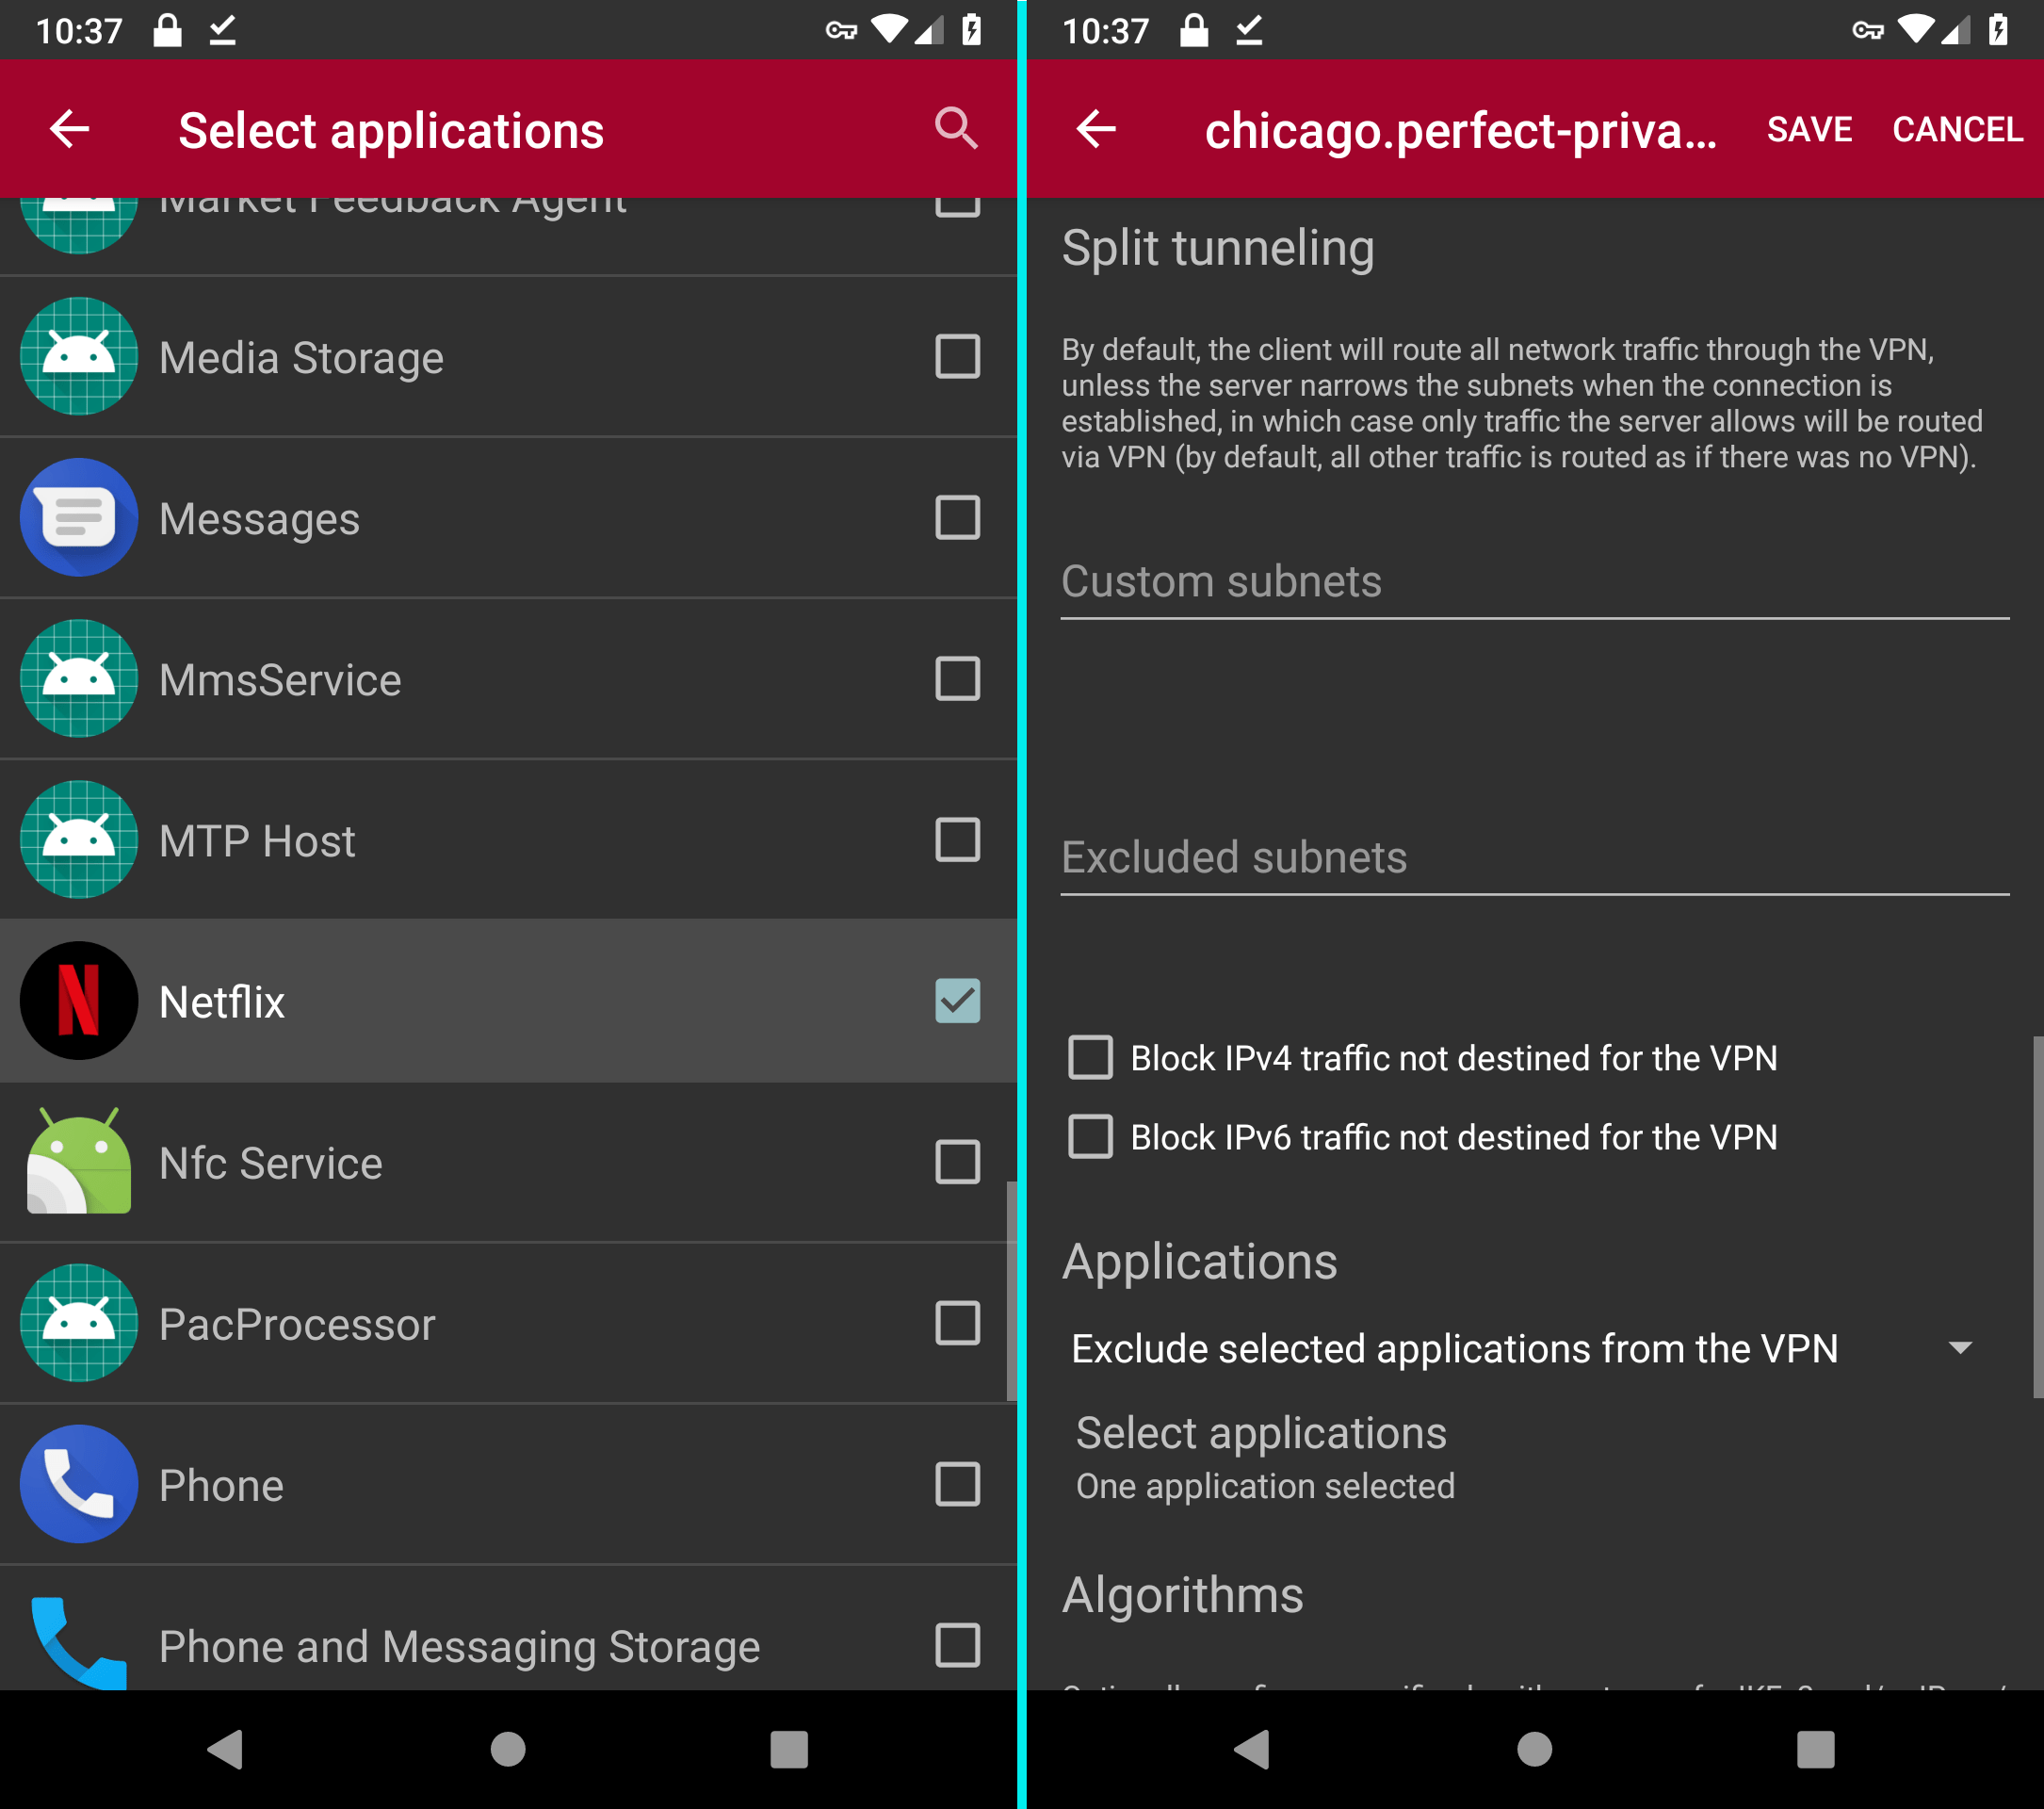
In the menu you can now select all apps you want to exclude from the VPN. In the example, the Netflix app is selected.
Use the back arrow in the top left menu to return to the settings. Under Select Applications it now says One application selected.
The Save menu item at the top saves the settings and takes you back to the main menu.
You have now successfully set up split tunneling.


Questions?
If you have any questions, comments or other feedback regarding this tutorial, please use the corresponding thread in our community forums.