Requirements and preparation
Make sure the following components are installed.
- openvpn - for the VPN connection
- resolvconf - to avoid DNS leaks
- wget - for downloading the OpenVPN profiles and checking the VPN connection
- sudo - for root access
- unzip - to extract the OpenVPN profiles
- nano - or another text editor of your choice
In the example we use Ubuntu. If you use another distribution please use the respective package manager instead of apt. On Ubuntu the necessary packages have to be installed as follows:
sudo apt update && sudo apt install openvpn resolvconf
On many distributions the resolvconf program maintains the system information regarding the available DNS nameservers stored in the resolv.conf file. Thus it helps preventing a DNS leak when establishing an OpenVPN connection by using the Perfect Privacy DNS servers announced by the VPN server.
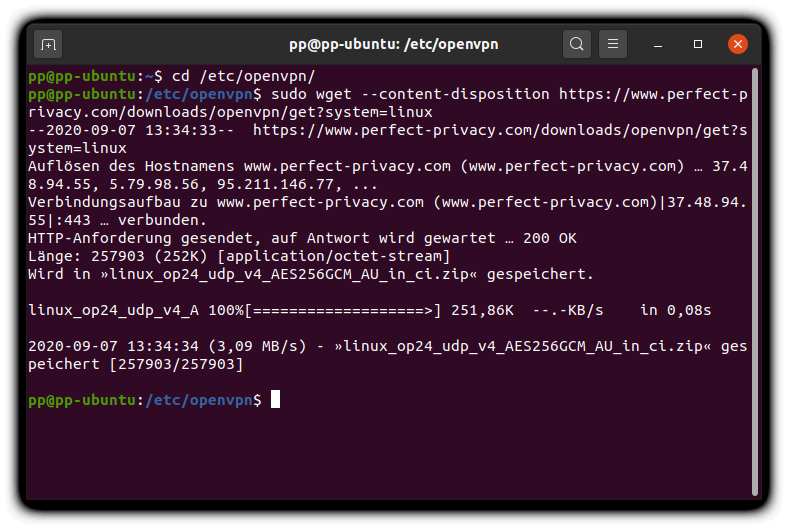
Change into the OpenVPN directory:
cd /etc/openvpn/
and download the Perfect Privacy configuration with the following command:
sudo wget --content-disposition https://www.perfect-privacy.com/downloads/openvpn/get?system=linux
If you have special requirements, you can download OpenVPN configurations with alternative options in the download area.
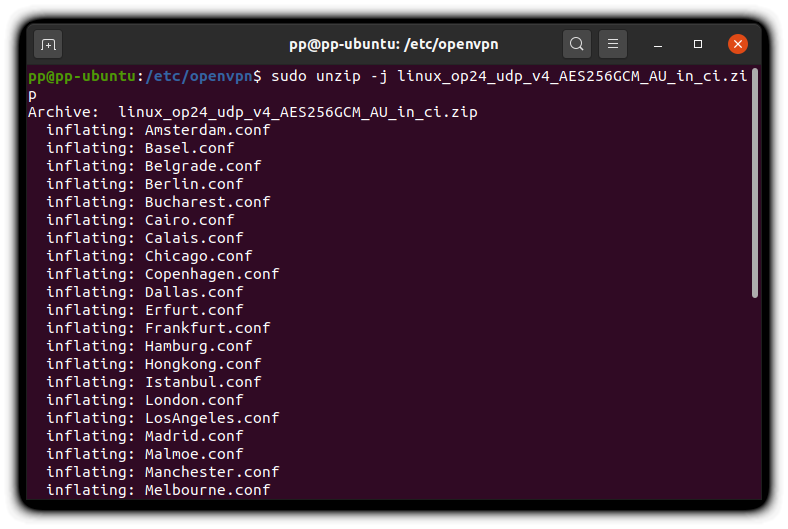
Now unzip the downloaded file. Use -j to to put the content directly into the /etc/openvpn/ directory.
sudo unzip -j linux_op24_udp_v4_AES256GCM_AU_in_ci.zip
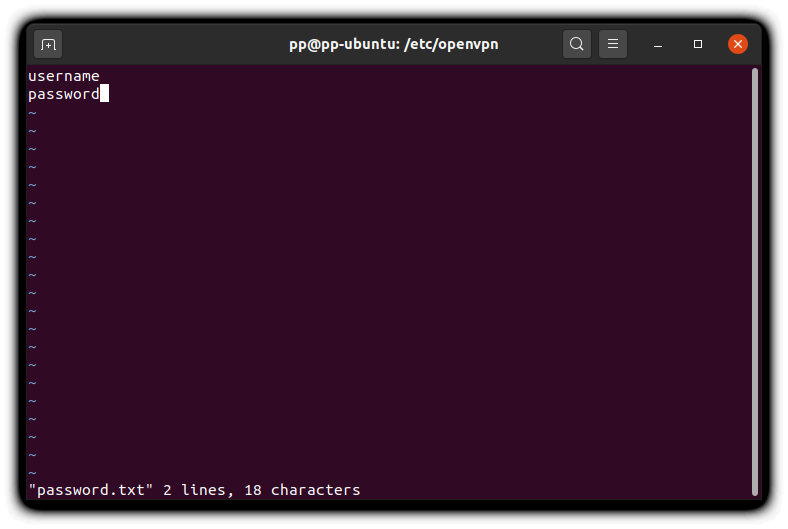
If you do not want to enter your credentials every time you establish a connection, you can create a text file in which your username and password are stored. For this you may use the text editor (e.g. nano, vim) which you like best.
sudo nano password.txt
In the text file, enter your username and password, each in a single line, like shown on the screenshot to the left.
The command sudo chmod o-r password.txt withdraws the right to read the file for other users and thus protects the login credentials from getting read by users without root permission.
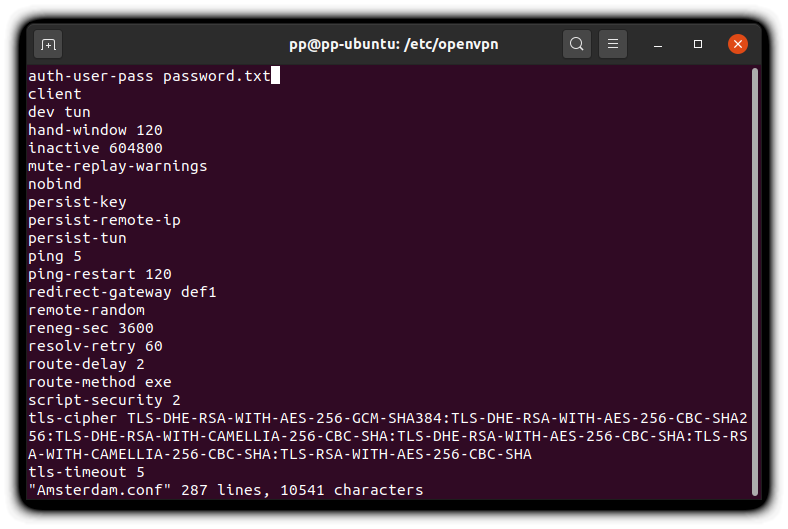
Now you will need to edit the server configuration file so it instructs OpenVPN to use the password.txt file you just created for the credentials. The server configurations always have the extension .conf and are named after the location. If you want to connect to amsterdam.perfect-privacy.com, open Amsterdam.conf in your editor.
sudo nano Amsterdam.conf
In the line auth-user-pass add " password.txt" so the line reads like shown in the screenshot:
auth-user-pass password.txt
Alternatively this can be accomplished for all the configuration files using the following command:
sudo find /etc/openvpn/*.conf -type f -exec sed -i 's/auth-user-pass/auth-user-pass password.txt/g' {} \;
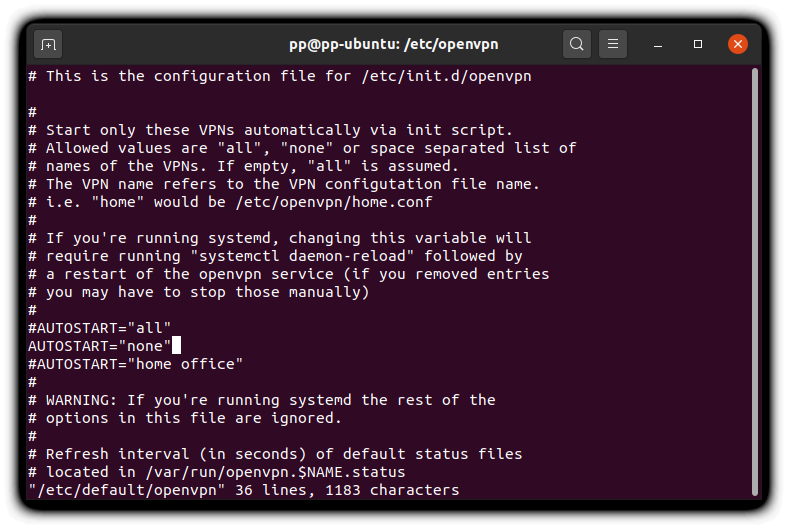
Important: The Ubuntu distribution used in this guide by default starts all OpenVPN configurations located in the /etc/openvpn/ directory! This is not what you want. The autostart behaviour can be adjusted using the /etc/default/openvpn file. Open the file with your text editor:
sudo nano /etc/default/openvpn
To not start any of the configurations it is sufficient to remove the comment sign (#) in front of the AUTOSTART="none" line. Alternatively you can choose one of the OpenVPN configurations, omitting the .conf file extension. For example such an entry for Amsterdam looks like this: AUTOSTART="Amsterdam"
For information how to adjust the autostart behaviour of OpenVPN on your distribution please refer to the respective ducumentation.
OpenVPN is now configured and you can start a connection with the following command:
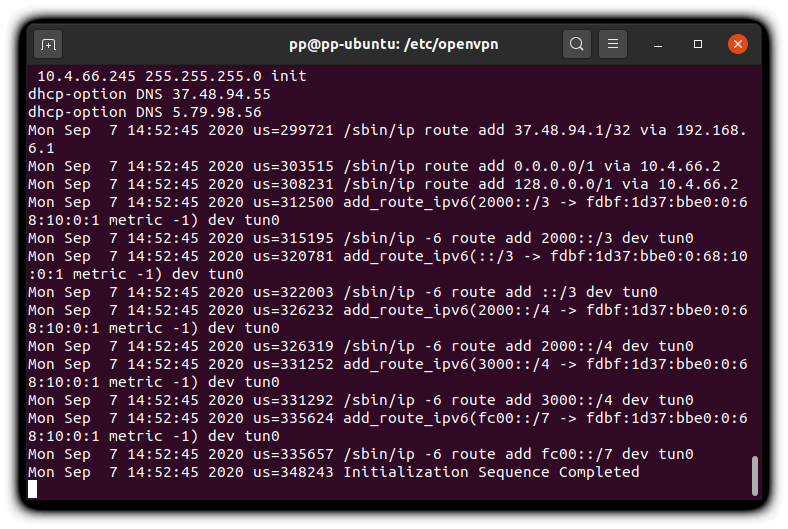
sudo openvpn /etc/openvpn/Amsterdam.conf
If everything went correctly, it should say “Initialization Sequence Completed” at the end. You can terminate the connection by using CTRL-C. For productive usage you will probably want to run this in a screen so you can detach after the connection was established.
You can use our Check IP test also in the terminal to verify that the OpenVPN connection was established and is working correctly:
wget -q -O - https://checkip.perfect-privacy.com/csv

Questions?
If you have any questions, comments or other feedback regarding this tutorial, please use the corresponding thread in our community forums.