Download OpenVPN profiles
Download all OpenVPN profiles as ZIP files and unzip it. Here you can find more download options.
Download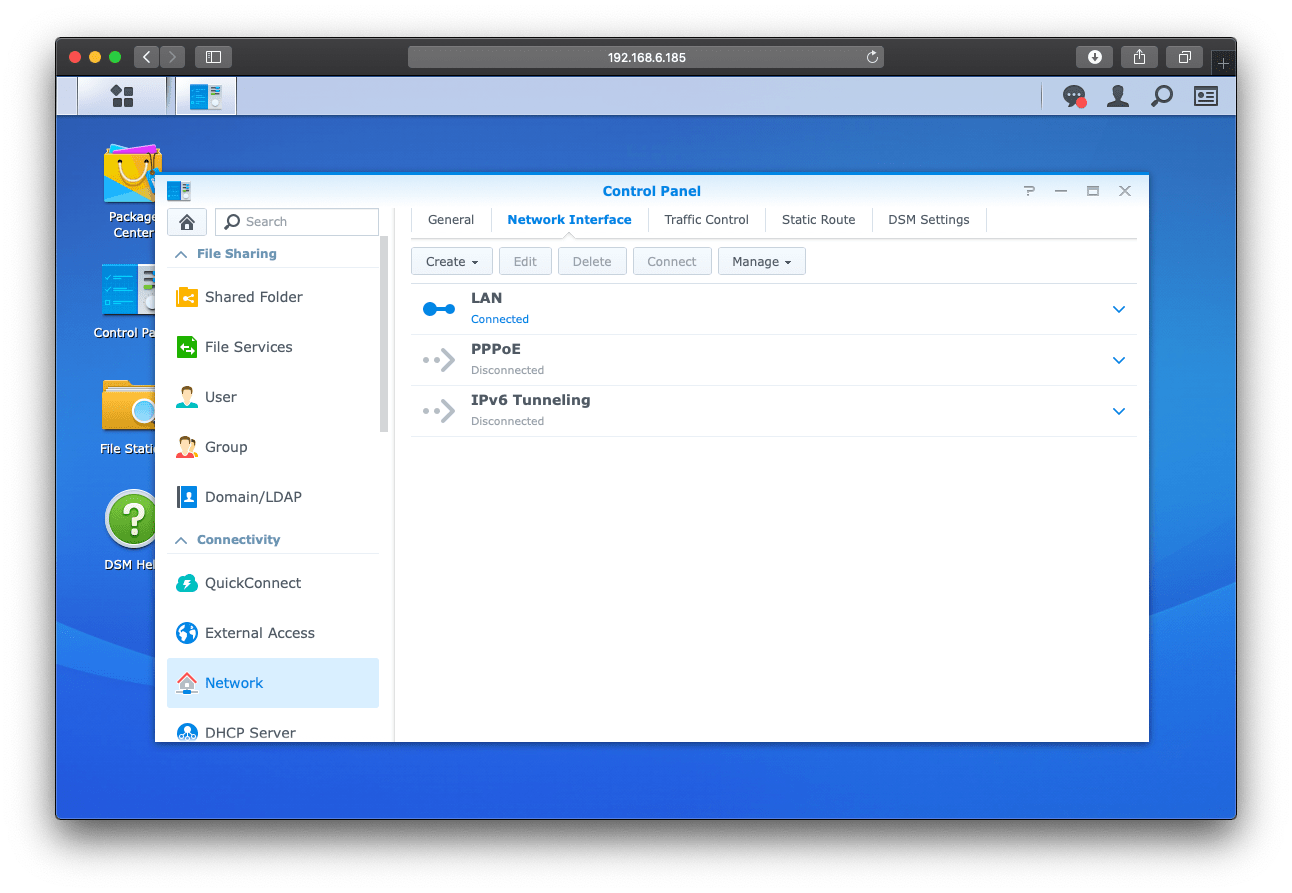
Disable IPv6
Unfortunately, Synology DiskStation Manager (DSM) does not support IPv6 connections over VPN. To prevent IPv6 leaks, first disable IPv6.
To do this, open Synology DSM's Control Panel. There, click Network → Network Interface.
Highlight the LAN interface and click Edit at the top.
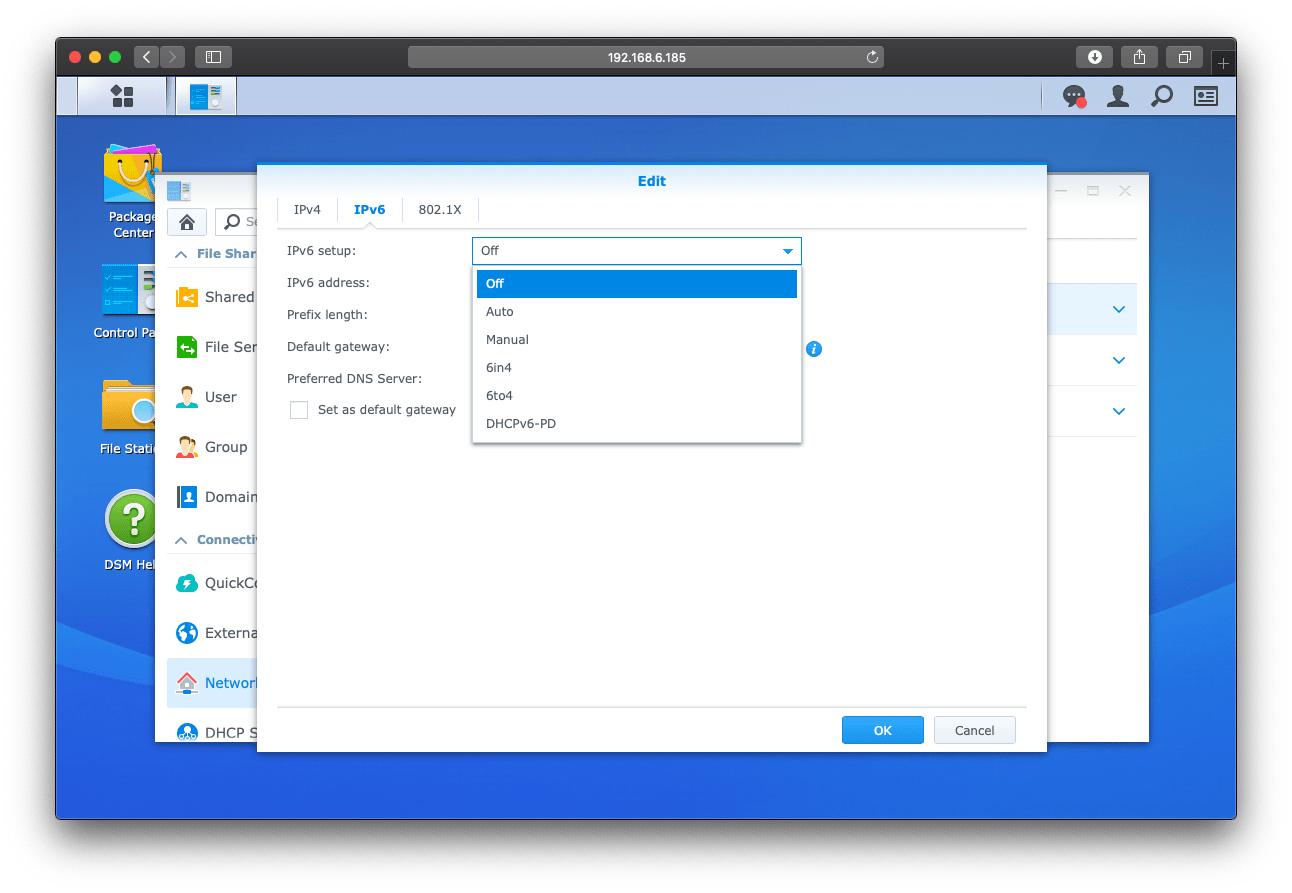
Switch to the IPv6 tab and for IPv6 setup, select Off.
Confirm the new settings with OK.
Set up an OpenVPN connection
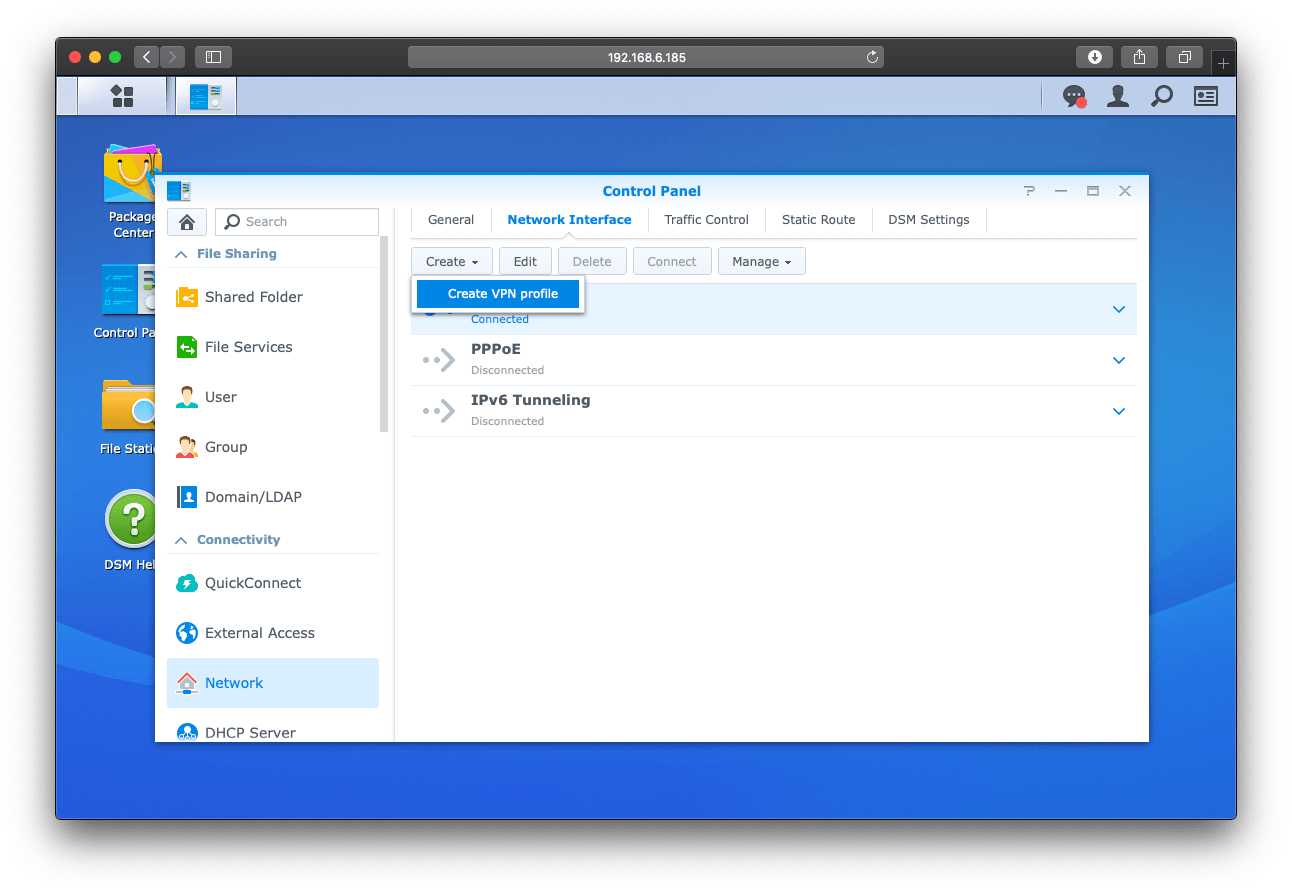
Back in the Control Panel, click on Create → Create VPN profile.

In the setup wizard, select OpenVPN (via importing a .ovpn file).
Continue with Next.
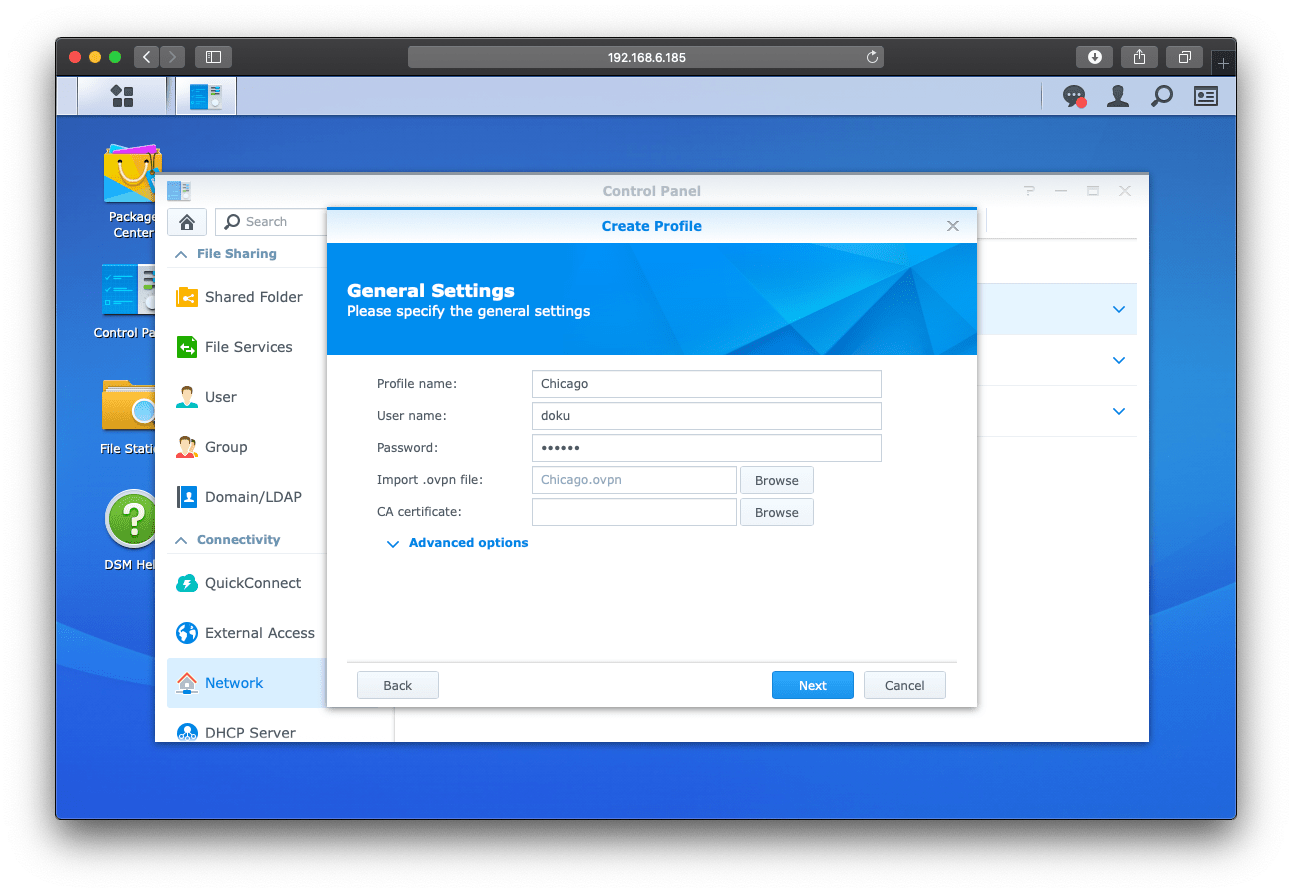
In the General Settings step, first give the VPN profile a meaningful name (in the example Frankfurt).
Enter your Perfect Privacy user name and password.
Next to Import .ovpn file, click Browse and select one of the OpenVPN configuration files you downloaded in the first step.
Our tip: Choose a location that is geographically as close as possible to achieve the best speed.
The CA certificate field must remain empty, as this information is already contained in the .ovpn file.
Click Next.
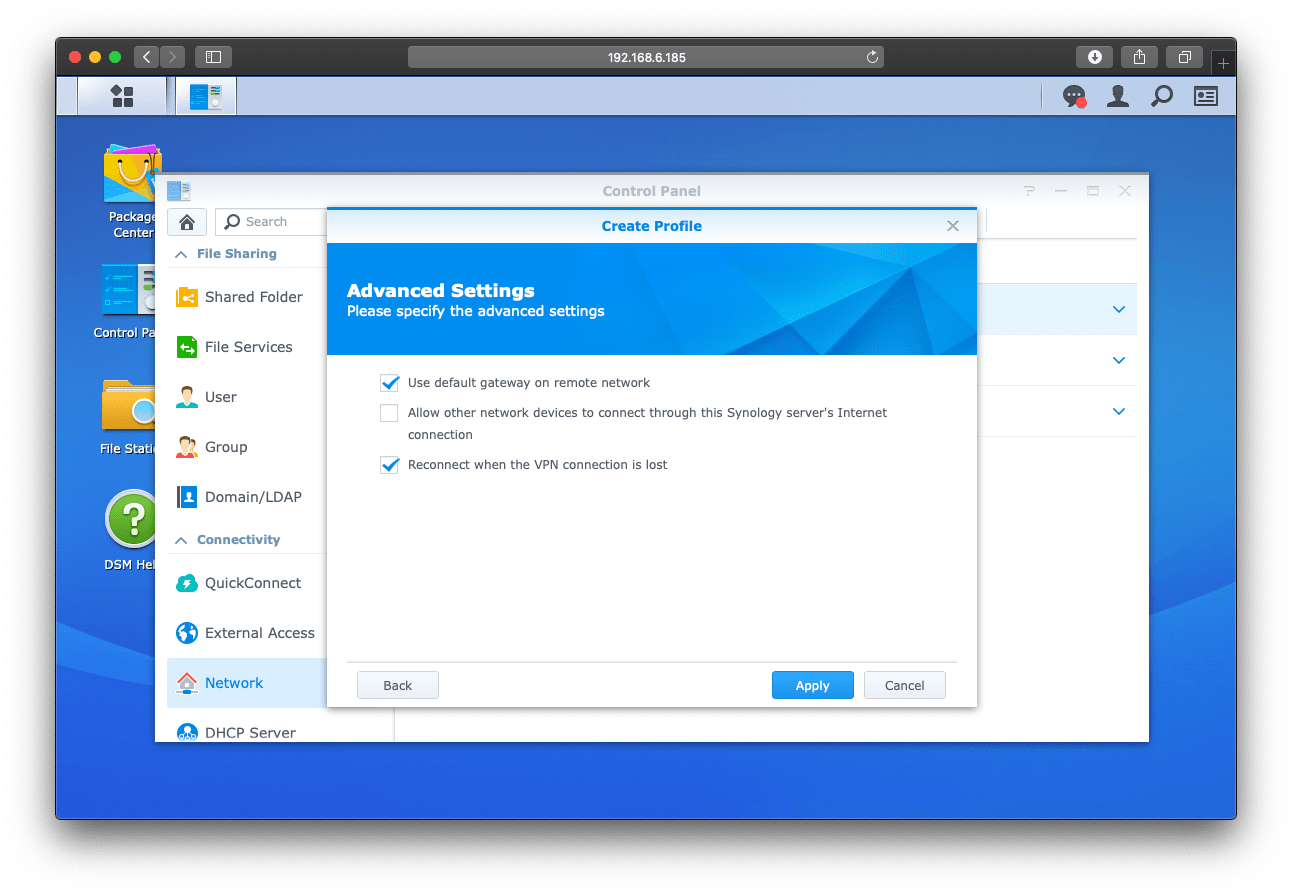
In the step Advanced Settings activate the checkbox Use default gateway on remote network and Reconnect when the VPN connection is lost.
Click Apply to complete the setup and return to the Control Panel.
Establish VPN connection
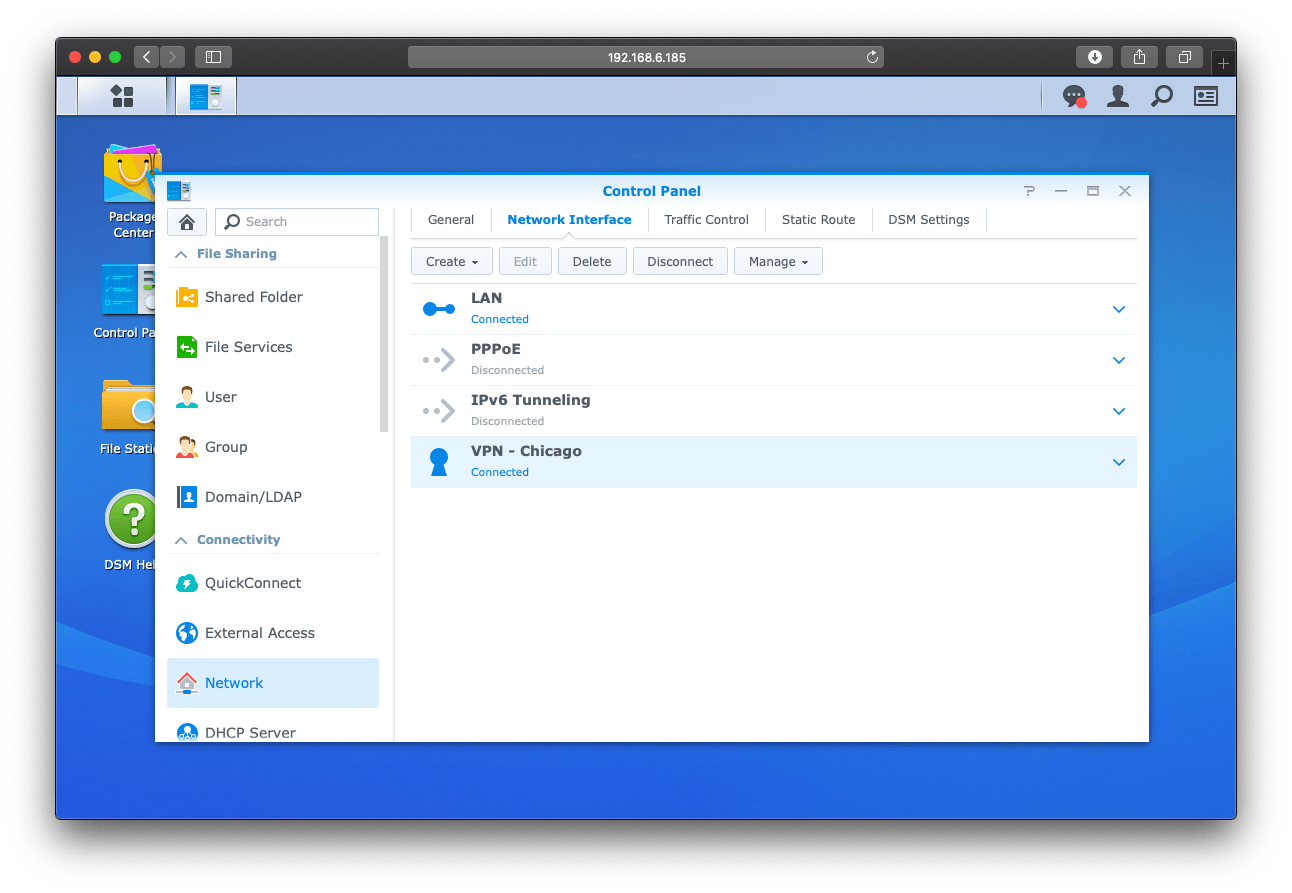
Back in the Control Panel, select the VPN connection you just added and click Connect at the top.
After a few seconds the icon will turn blue and the status will change to Connected.
Check VPN connection
To check if the VPN connection is working correctly, you can download one file each for IPv4 and IPv6 from our CheckIP page.
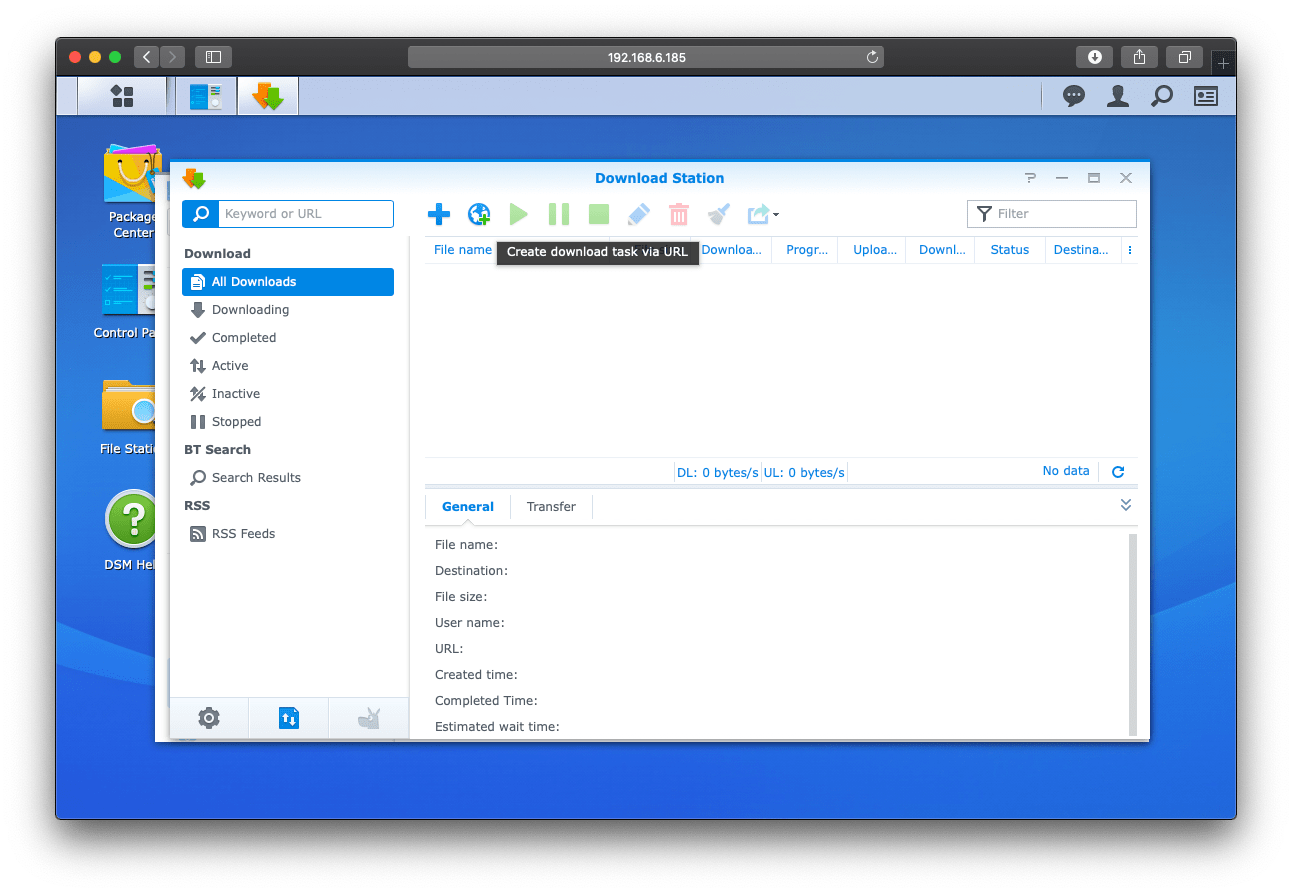
Open the Download Station. You may need to install this program in the Package Center.
Click on the globe icon in the bar at the top (Create download task via URL).
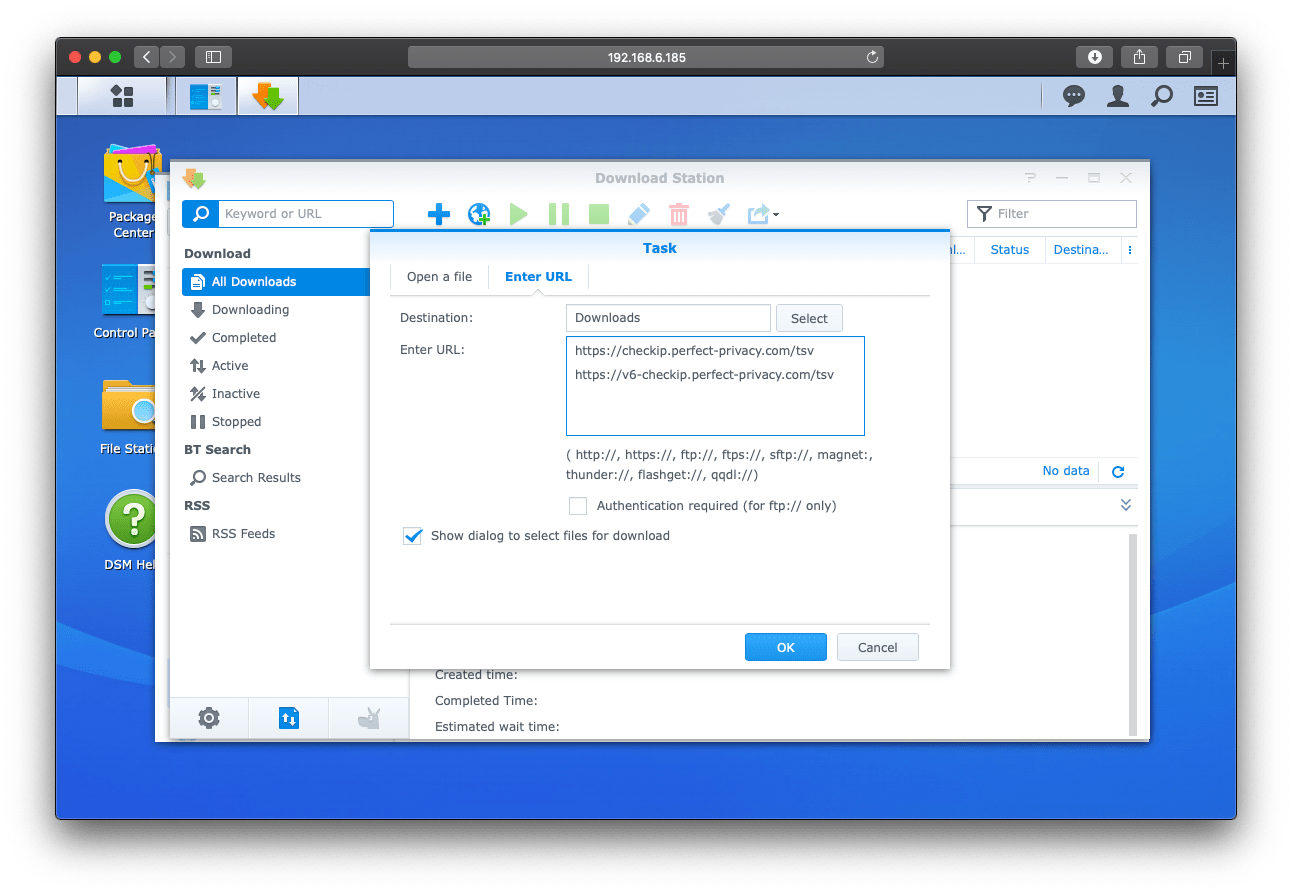
In the Enter URL field, insert the following two URLs:
https://checkip.perfect-privacy.com/tsv
https://v6-checkip.perfect-privacy.com/tsv
Then click OK to start the downloads.
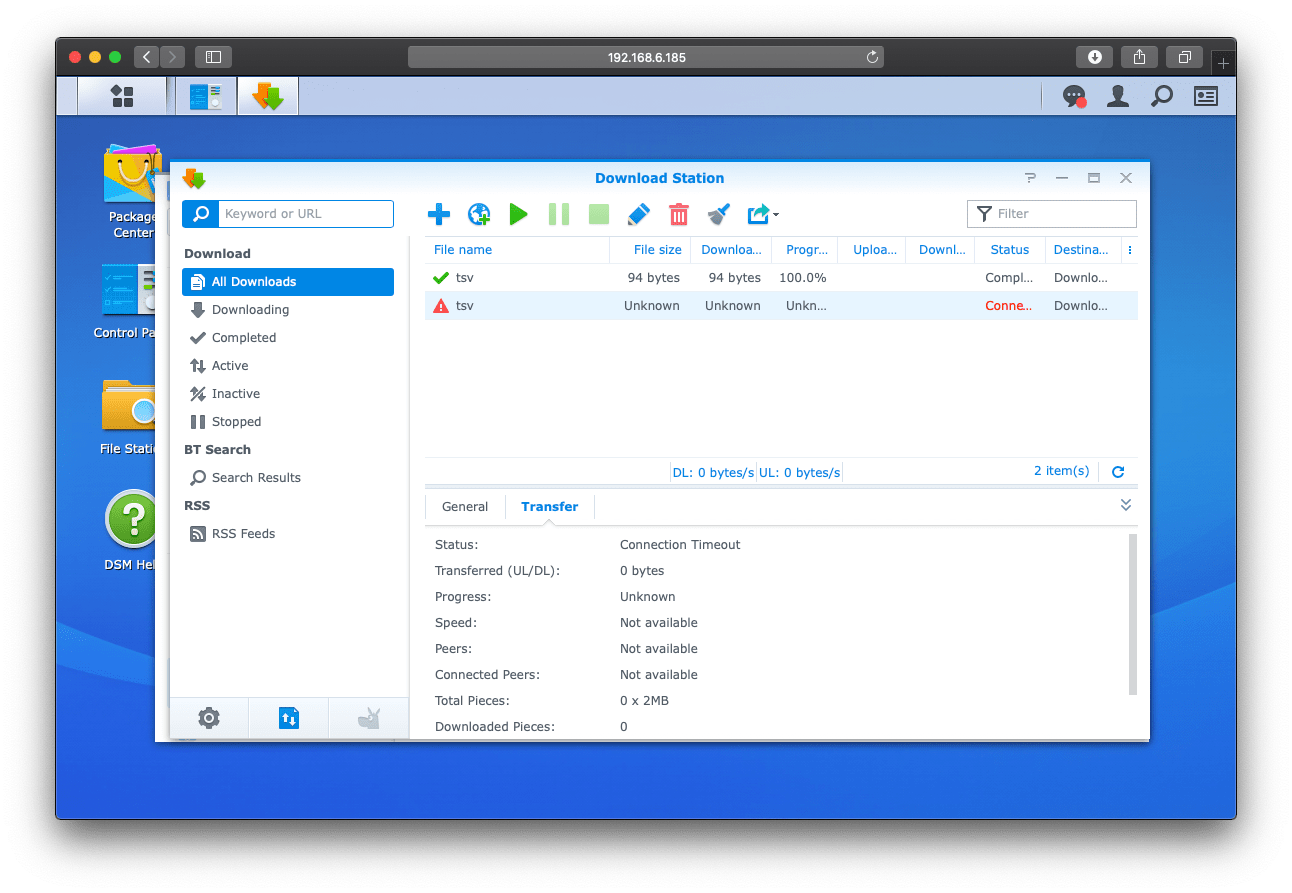
Now two new download tasks are added. One file (IPv4) is downloaded after a few seconds.
The other file cannot be downloaded because Synology does not support IPv6 in the VPN and you have disabled IPv6 above. This job will fail after a few minutes with a Connection Timeout error. This tells you that there is no IPv6 leak.
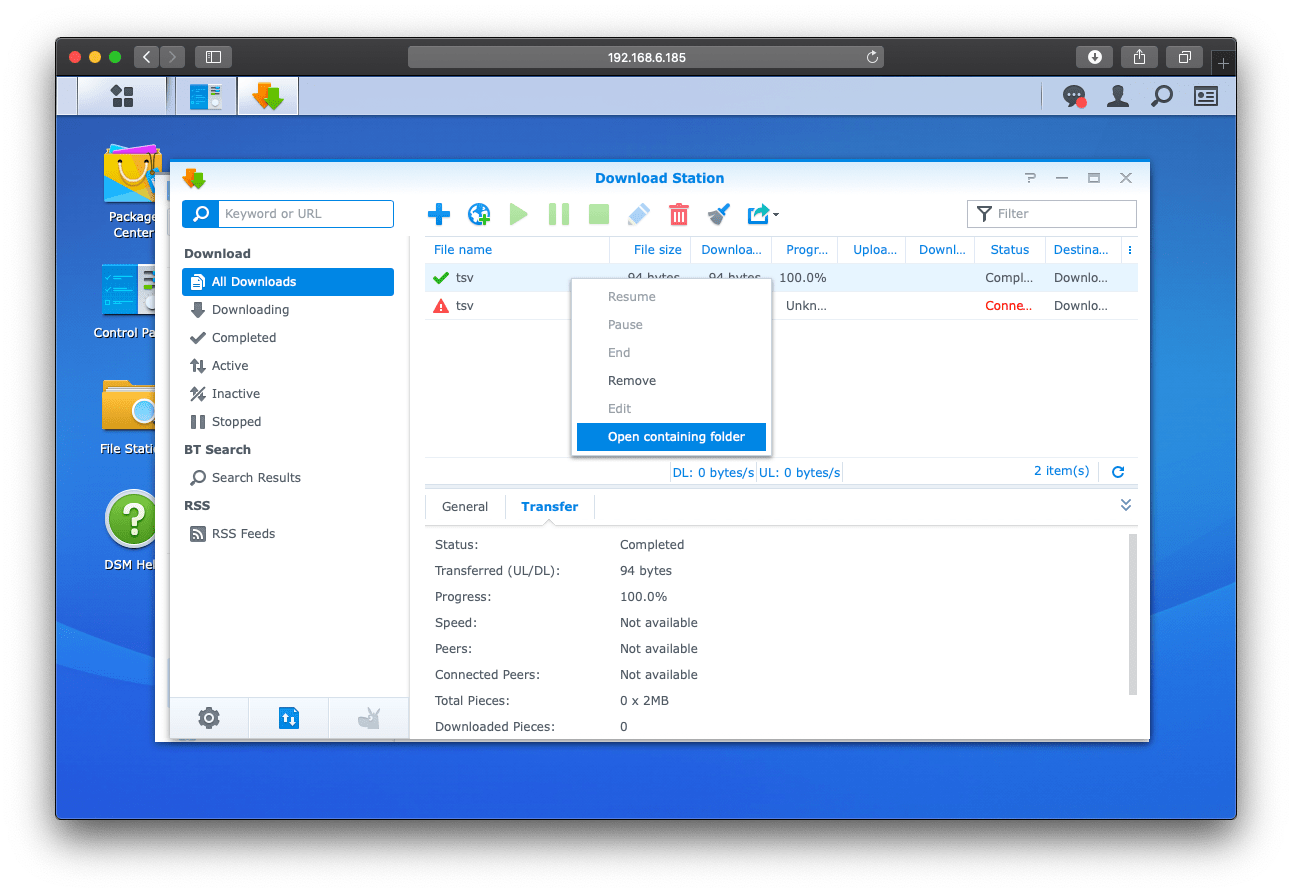
Now right-click on the first file and select the menu item Open containing folder.
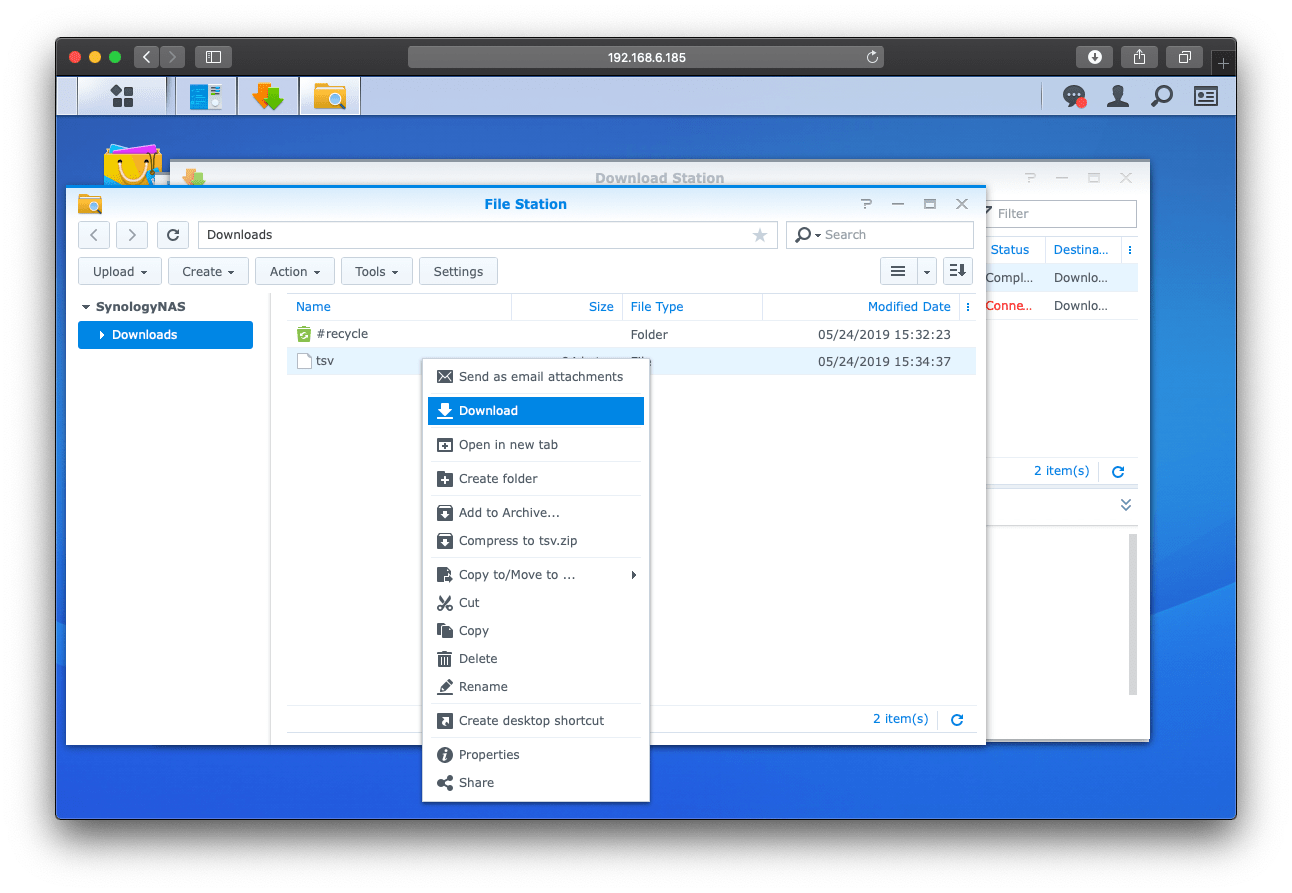
The file is now displayed in the File Station. Right-click the file and select Download to save it to your computer.
Open the file in a text editor or in a spreadsheet. For that, you can rename the file and add the .txt or .tsv extension. The text file contains the CheckIP information tab-separated.
In our example, the file looks like this:
IP	DNS	VPN	TOR	COUNTRY	CITY
104.237.193.28	chicago1.perfect-privacy.com	true	false	U.S.A	Chicago
The first column contains your public IP address, the second column the reverse DNS name (which should end in .perfect-privacy.com). And the third column indicates whether you are connected to the VPN (true: yes / false: no).


Questions?
If you have any questions, comments or other feedback regarding this tutorial, please use the corresponding thread in our community forums.