If you cannot connect with OpenVPN, you are probably on a network that blocks VPN connections. With Stealth VPN, you still can break out of such networks.
Using this guide, you create an OpenVPN connection that is obfuscated by stunnel.
You will need the following software:
- openvpn - for the VPN connection
- stunnel - to obfuscate the OpenVPN connection
- resolvconf - to avoid DNS leaks
- wget - to download VPN profiles and check the connection
- unzip - to unzip the VPN profiles
- nano - to change configuration files
In the example we use Ubuntu 18.04, where the necessary packages have to be installed as follows:
sudo apt update && sudo apt install openvpn resolvconf stunnel
Download OpenVPN profiles
First download the OpenVPN profiles for using stunnel and extract them. We will create a new directory.
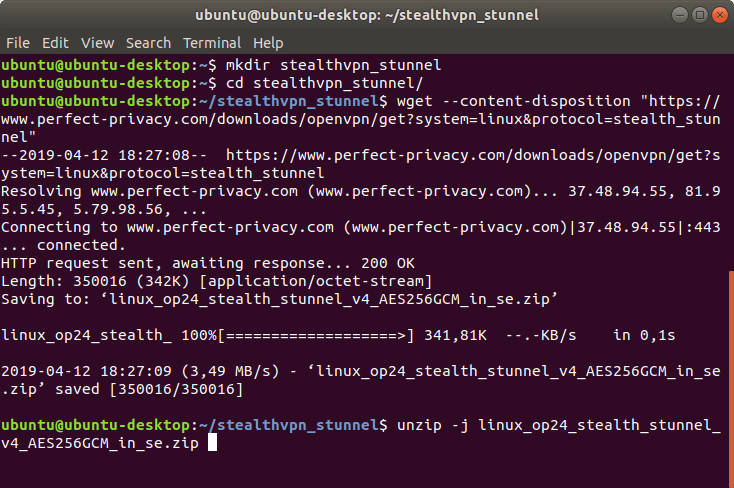
mkdir stealthvpn_stunnel
cd stealthvpn_stunnel
wget --content-disposition "https://www.perfect-privacy.com/downloads/openvpn/get?system=linux&protocol=stealth_stunnel"
unzip -j linux_op24_stealth_stunnel_v4_AES256GCM_AU_in_se.zip
If you have special demands, you can download OpenVPN configurations with further options in the download area (login required).
Set up OpenVPN and stunnel
Select a server location to which you want to establish the VPN connection.
Our tip: Choose a location that is geographically as close as possible to achieve the best speed.
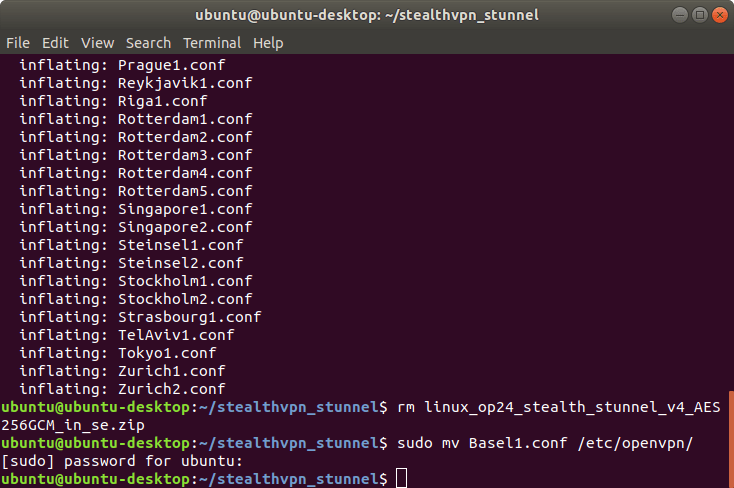
Copy the desired configuration file into the OpenVPN directory. In this example, we have decided to use Basel1.
sudo cp Basel1.conf /etc/openvpn/
To set up stunnel, create a new configuration file.
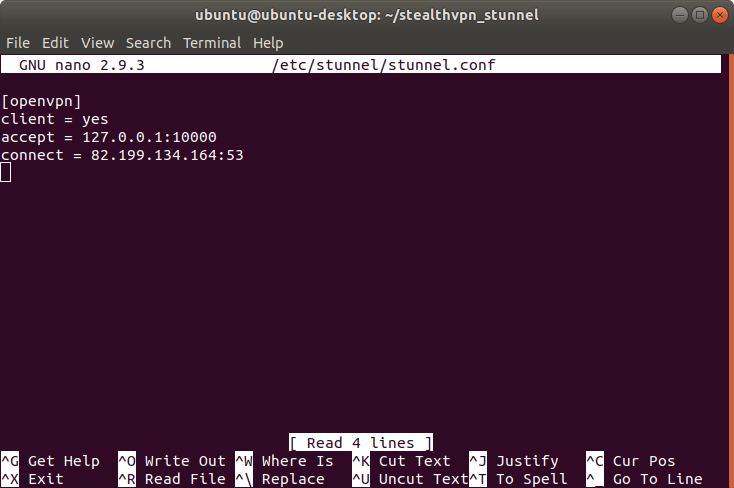
sudo nano /etc/stunnel/stunnel.conf
Insert the following content there:
 [openvpn]
 client = yes
 accept = 127.0.0.1:10000
 connect = SERVER_IP:TUNNEL_PORT
Replace the SERVER_IP with the stunnel-specific IP address of the respective server. You can look it up in the overview of stunnel ports and IPs.
For the STUNNEL_PORT you can choose between the following ports: 22, 53, 443, 8085, 9009, 36315. To circumvent blocking, ports 53 and 443 are particularly recommended.
Start stunnel
Now stunnel can be started:
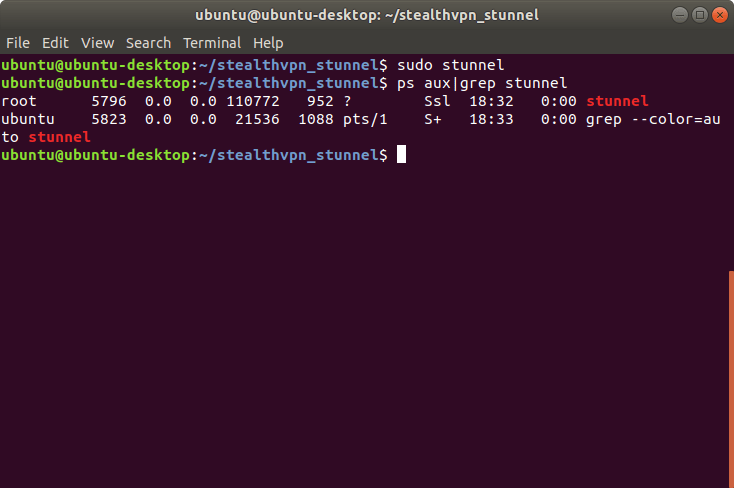
sudo stunnel
The program immediately enters the background. This is how you can check whether stunnel is actually running:
ps aux|grep stunnel
Start OpenVPN
As soon as stunnel is running, you can start OpenVPN:
sudo openvpn /etc/openvpn/Basel1.conf
After a short time you will be asked for your Perfect Privacy username and password.
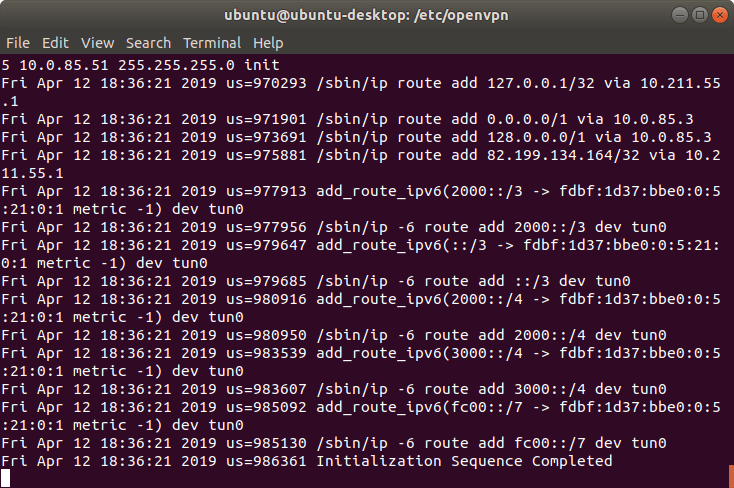
When the connection is established, it says Initialization Sequence Completed in the connection log.
Check the VPN connection
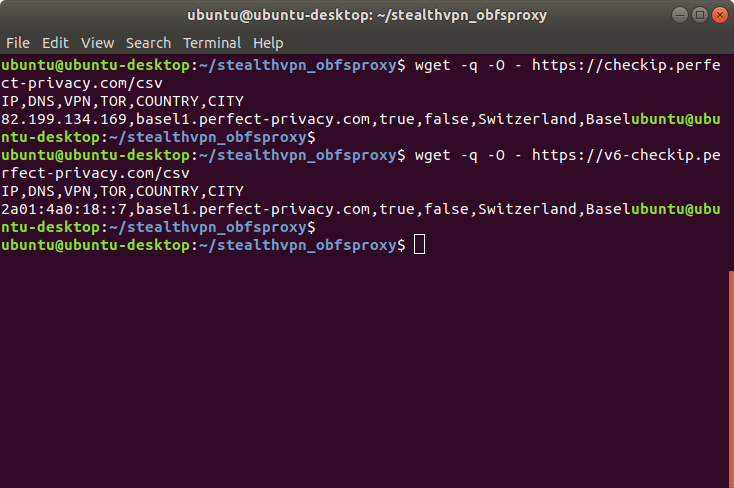
Now test whether your VPN connection is working correctly. Download the CheckIP data e.g. CSV formatted.
For IPv4:
wget -q -O - https://checkip.perfect-privacy.com/csv
And for IPv6:
wget -q -O - https://v6-checkip.perfect-privacy.com/csv
Start the connection on boot
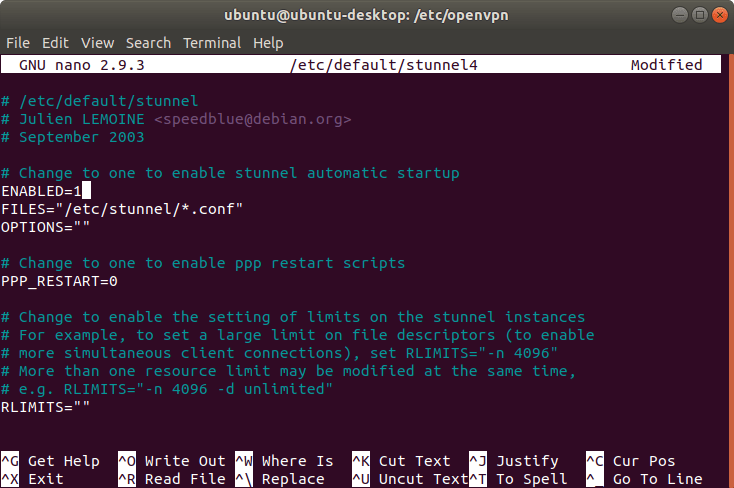
If you want to establish the VPN connection automatically at system startup, you must first start stunnel at boot time. To do this, edit the configuration file:
sudo nano /etc/default/stunnel4
In this file, change the line ENABLED=0 to ENABLED=1.

In order for OpenVPN to start automatically, the login credentials must be made available.
Therefore, write your Perfect Privacy login data (user name and password) in a text file:
sudo nano /etc/openvpn/perfect-privacy-password

Now you have to specify this password file in the OpenVPN configuration file.
Write the name of the file after the line auth-user-pass:
sudo nano /etc/openvpn/Basel1.conf
That way, the line becomes:
auth-user-pass perfect-privacy-password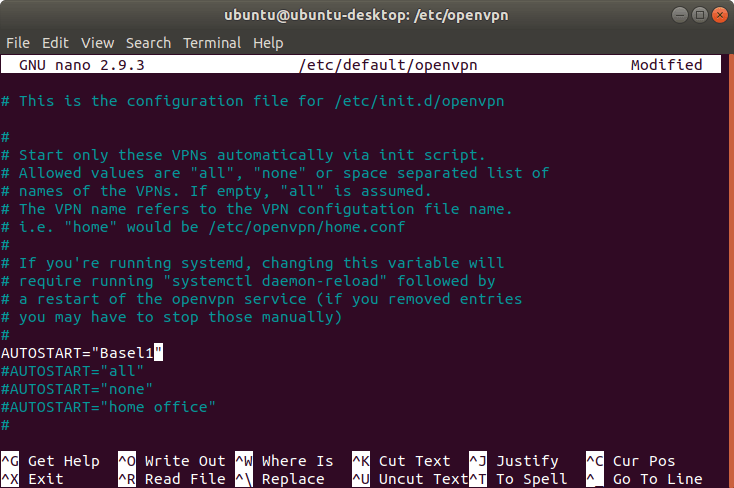
Now you only have to tell OpenVPN the configuration that should be started automatically at system startup.
Open the OpenVPN configuration file:
sudo nano /etc/default/openvpn
Insert the following line:
AUTOSTART="Basel1"Make sure that all other AUTOSTART lines are commented out (# at the beginning of the line).
To test the autostart, restart your computer and go to the CheckIP page to test the connection.


Questions?
If you have any questions, comments or other feedback regarding this tutorial, please use the corresponding thread in our community forums.